NFT AeIndexer
Description: This application demonstrates how to maintain account balances and transfer records by indexing aelf's NFT issued data.
Purpose: Shows you how to create, develop, and deploy your own AeIndexer on AeFinder.
Difficulty Level: Easy
Step 1 - Setting up your development environment
- Install dotnet 8.0 SDK
- Install IDE: Install your favorite IDE, such as: VS Code, Visual Studio, Rider, etc.
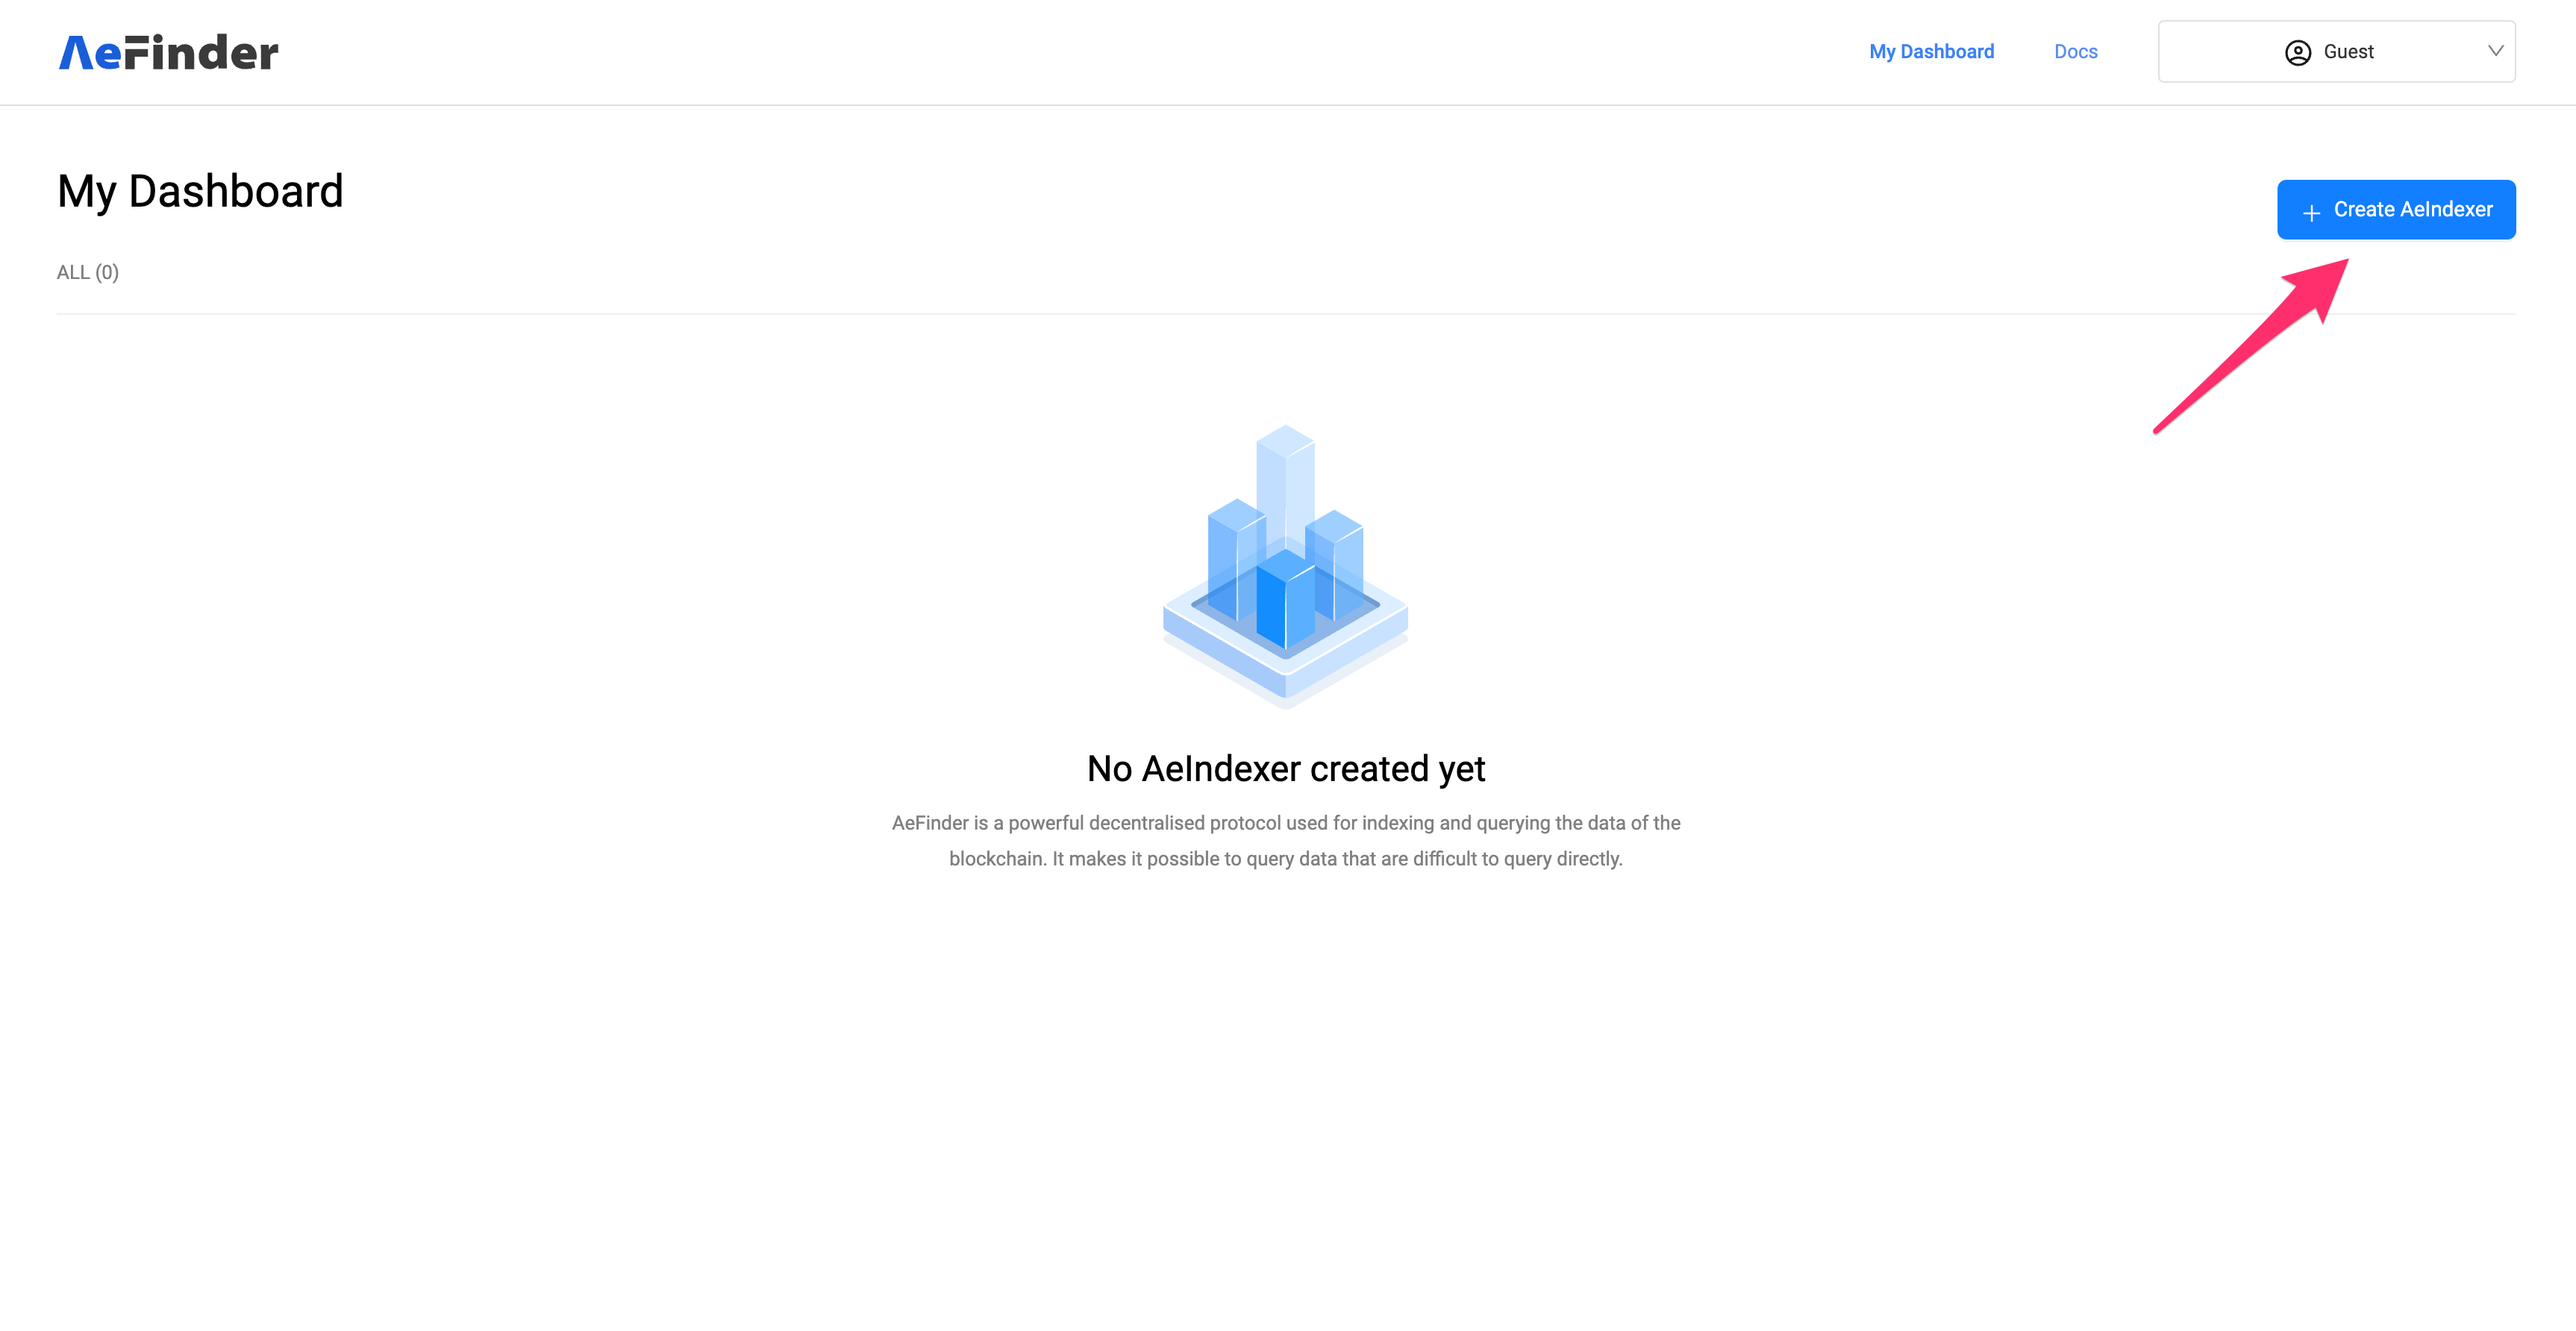
Step 2 - Create AeIndexer in AeFinder
-
Log in to the AeFinder website. TestNet: https://test.aefinder.io/login
-
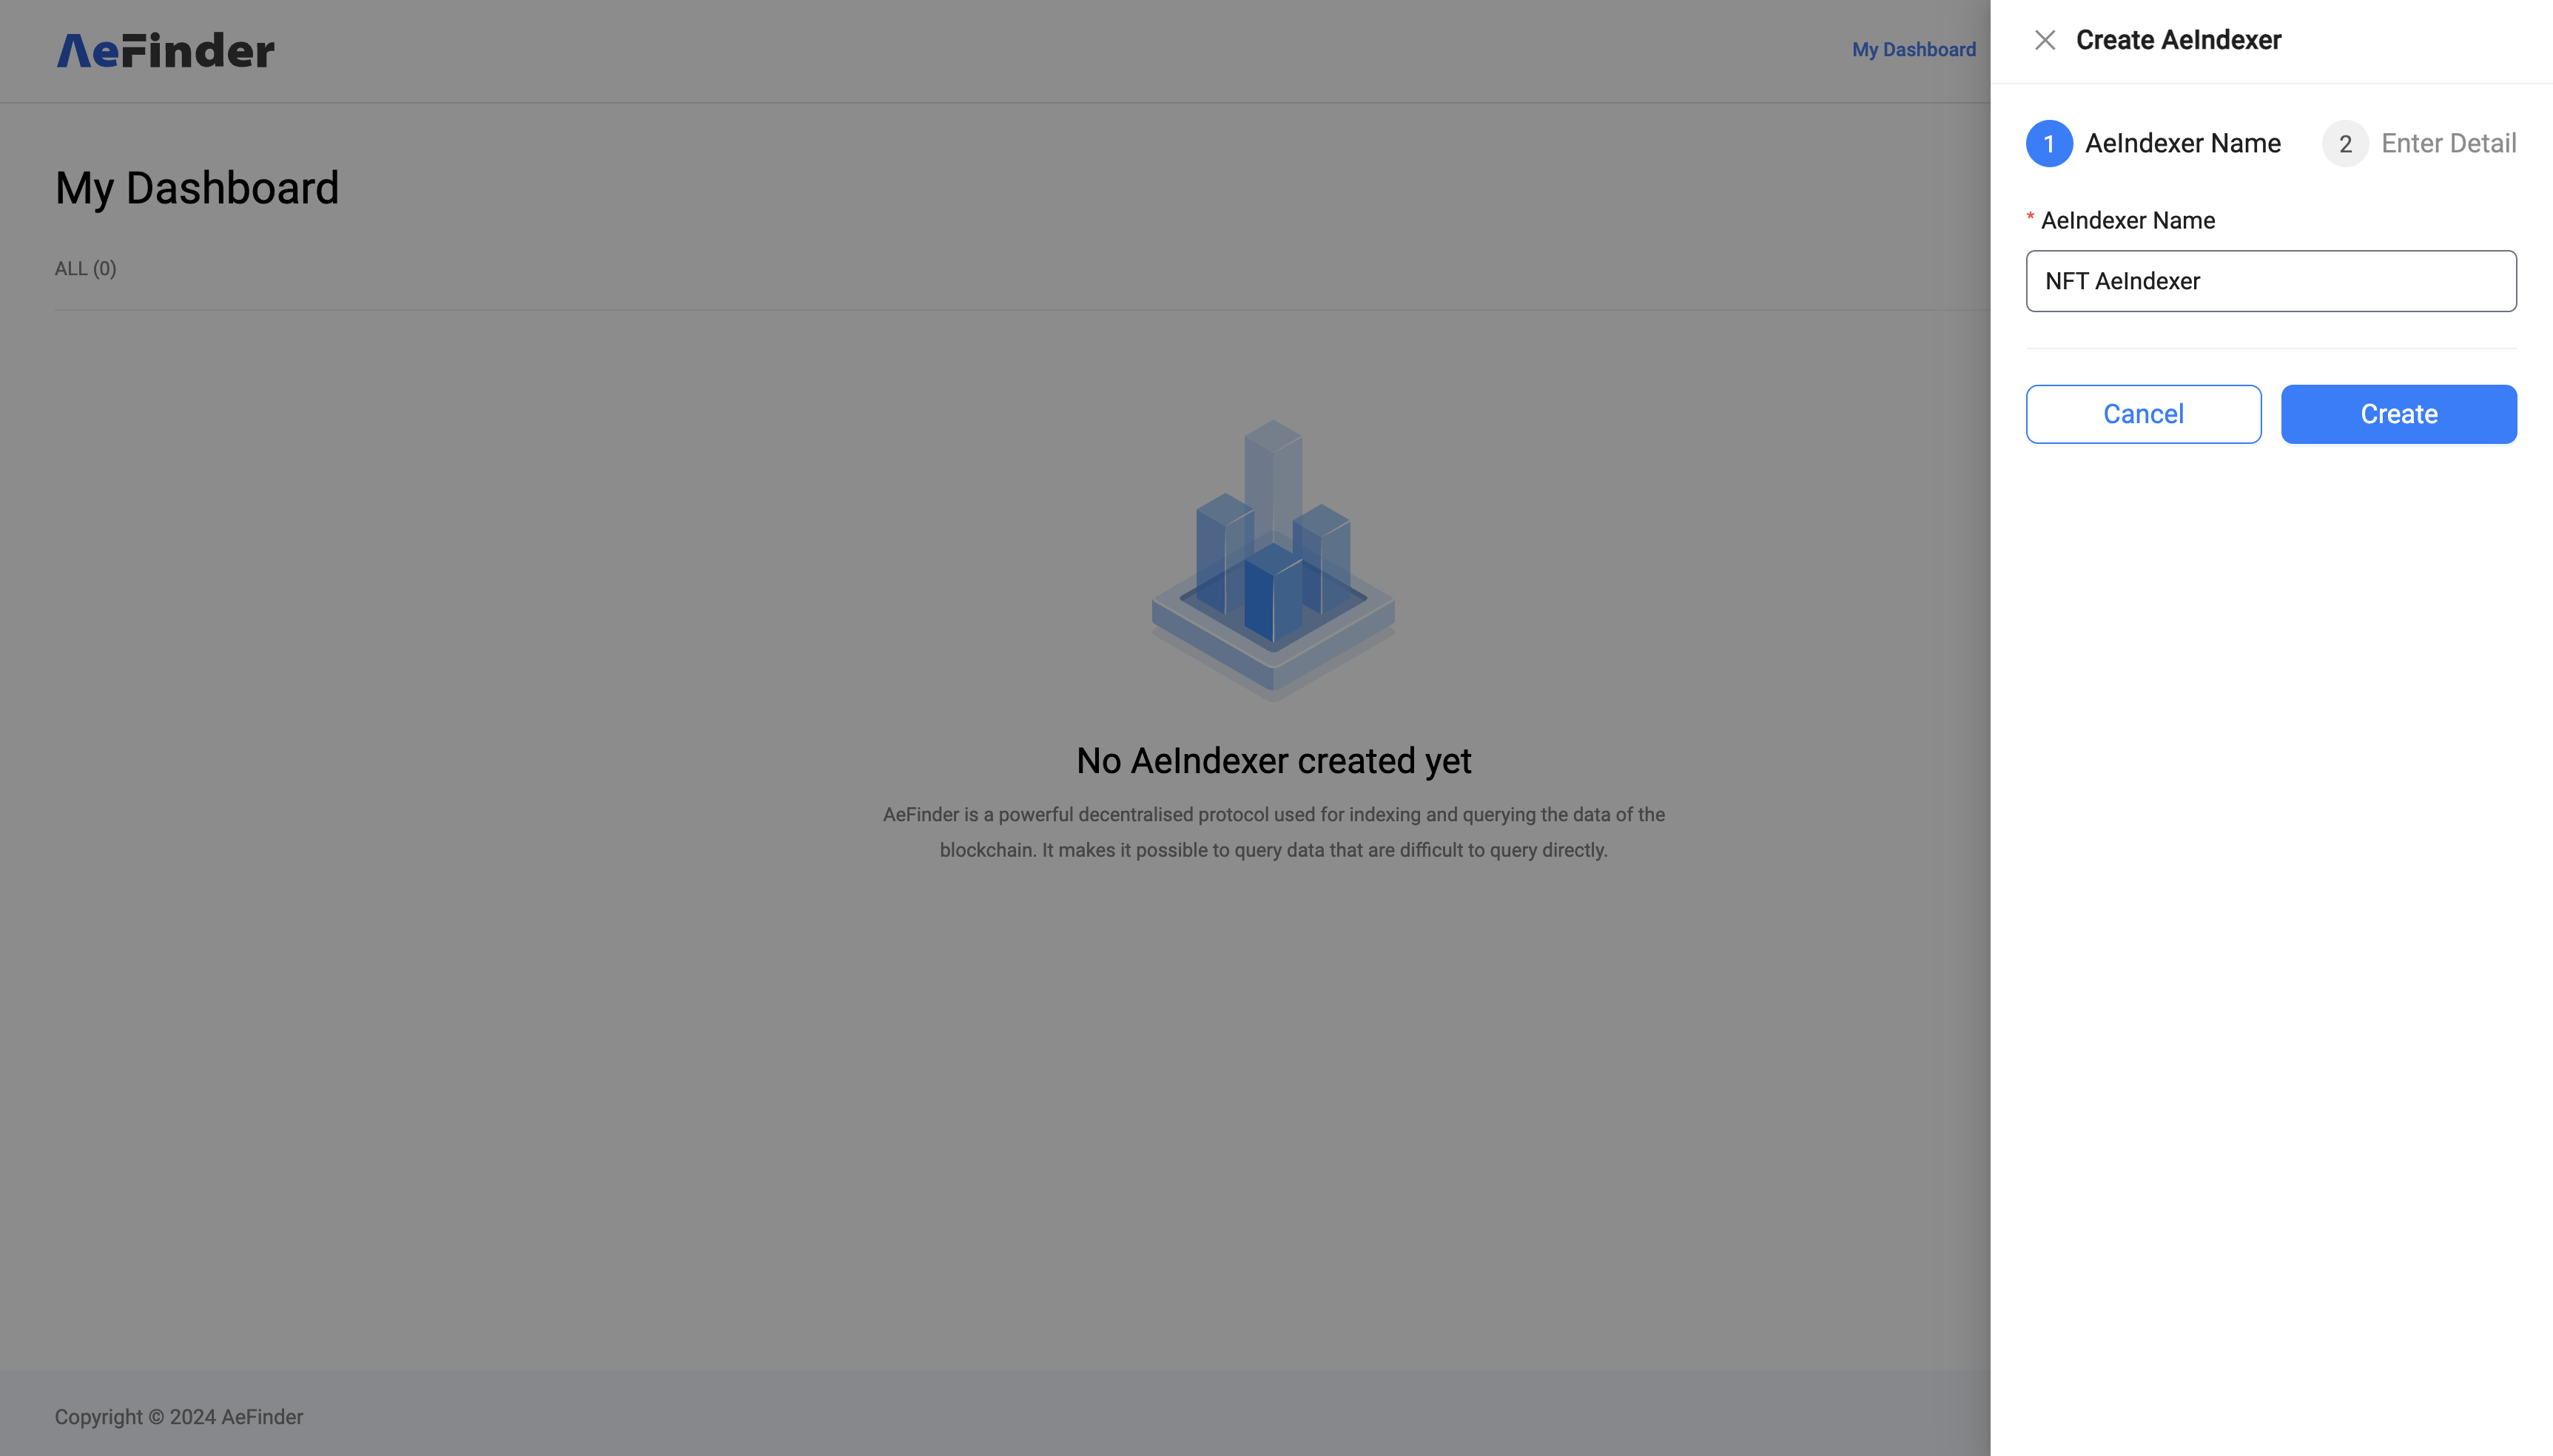
Enter the AeIndexer Name and other information to create a NFT AeIndexer.
Step 3 - Develop NFT AeIndexer
Download the Development Template
- Go to the AeIndexer details page for your created project.
- Download the development template by entering your project name.
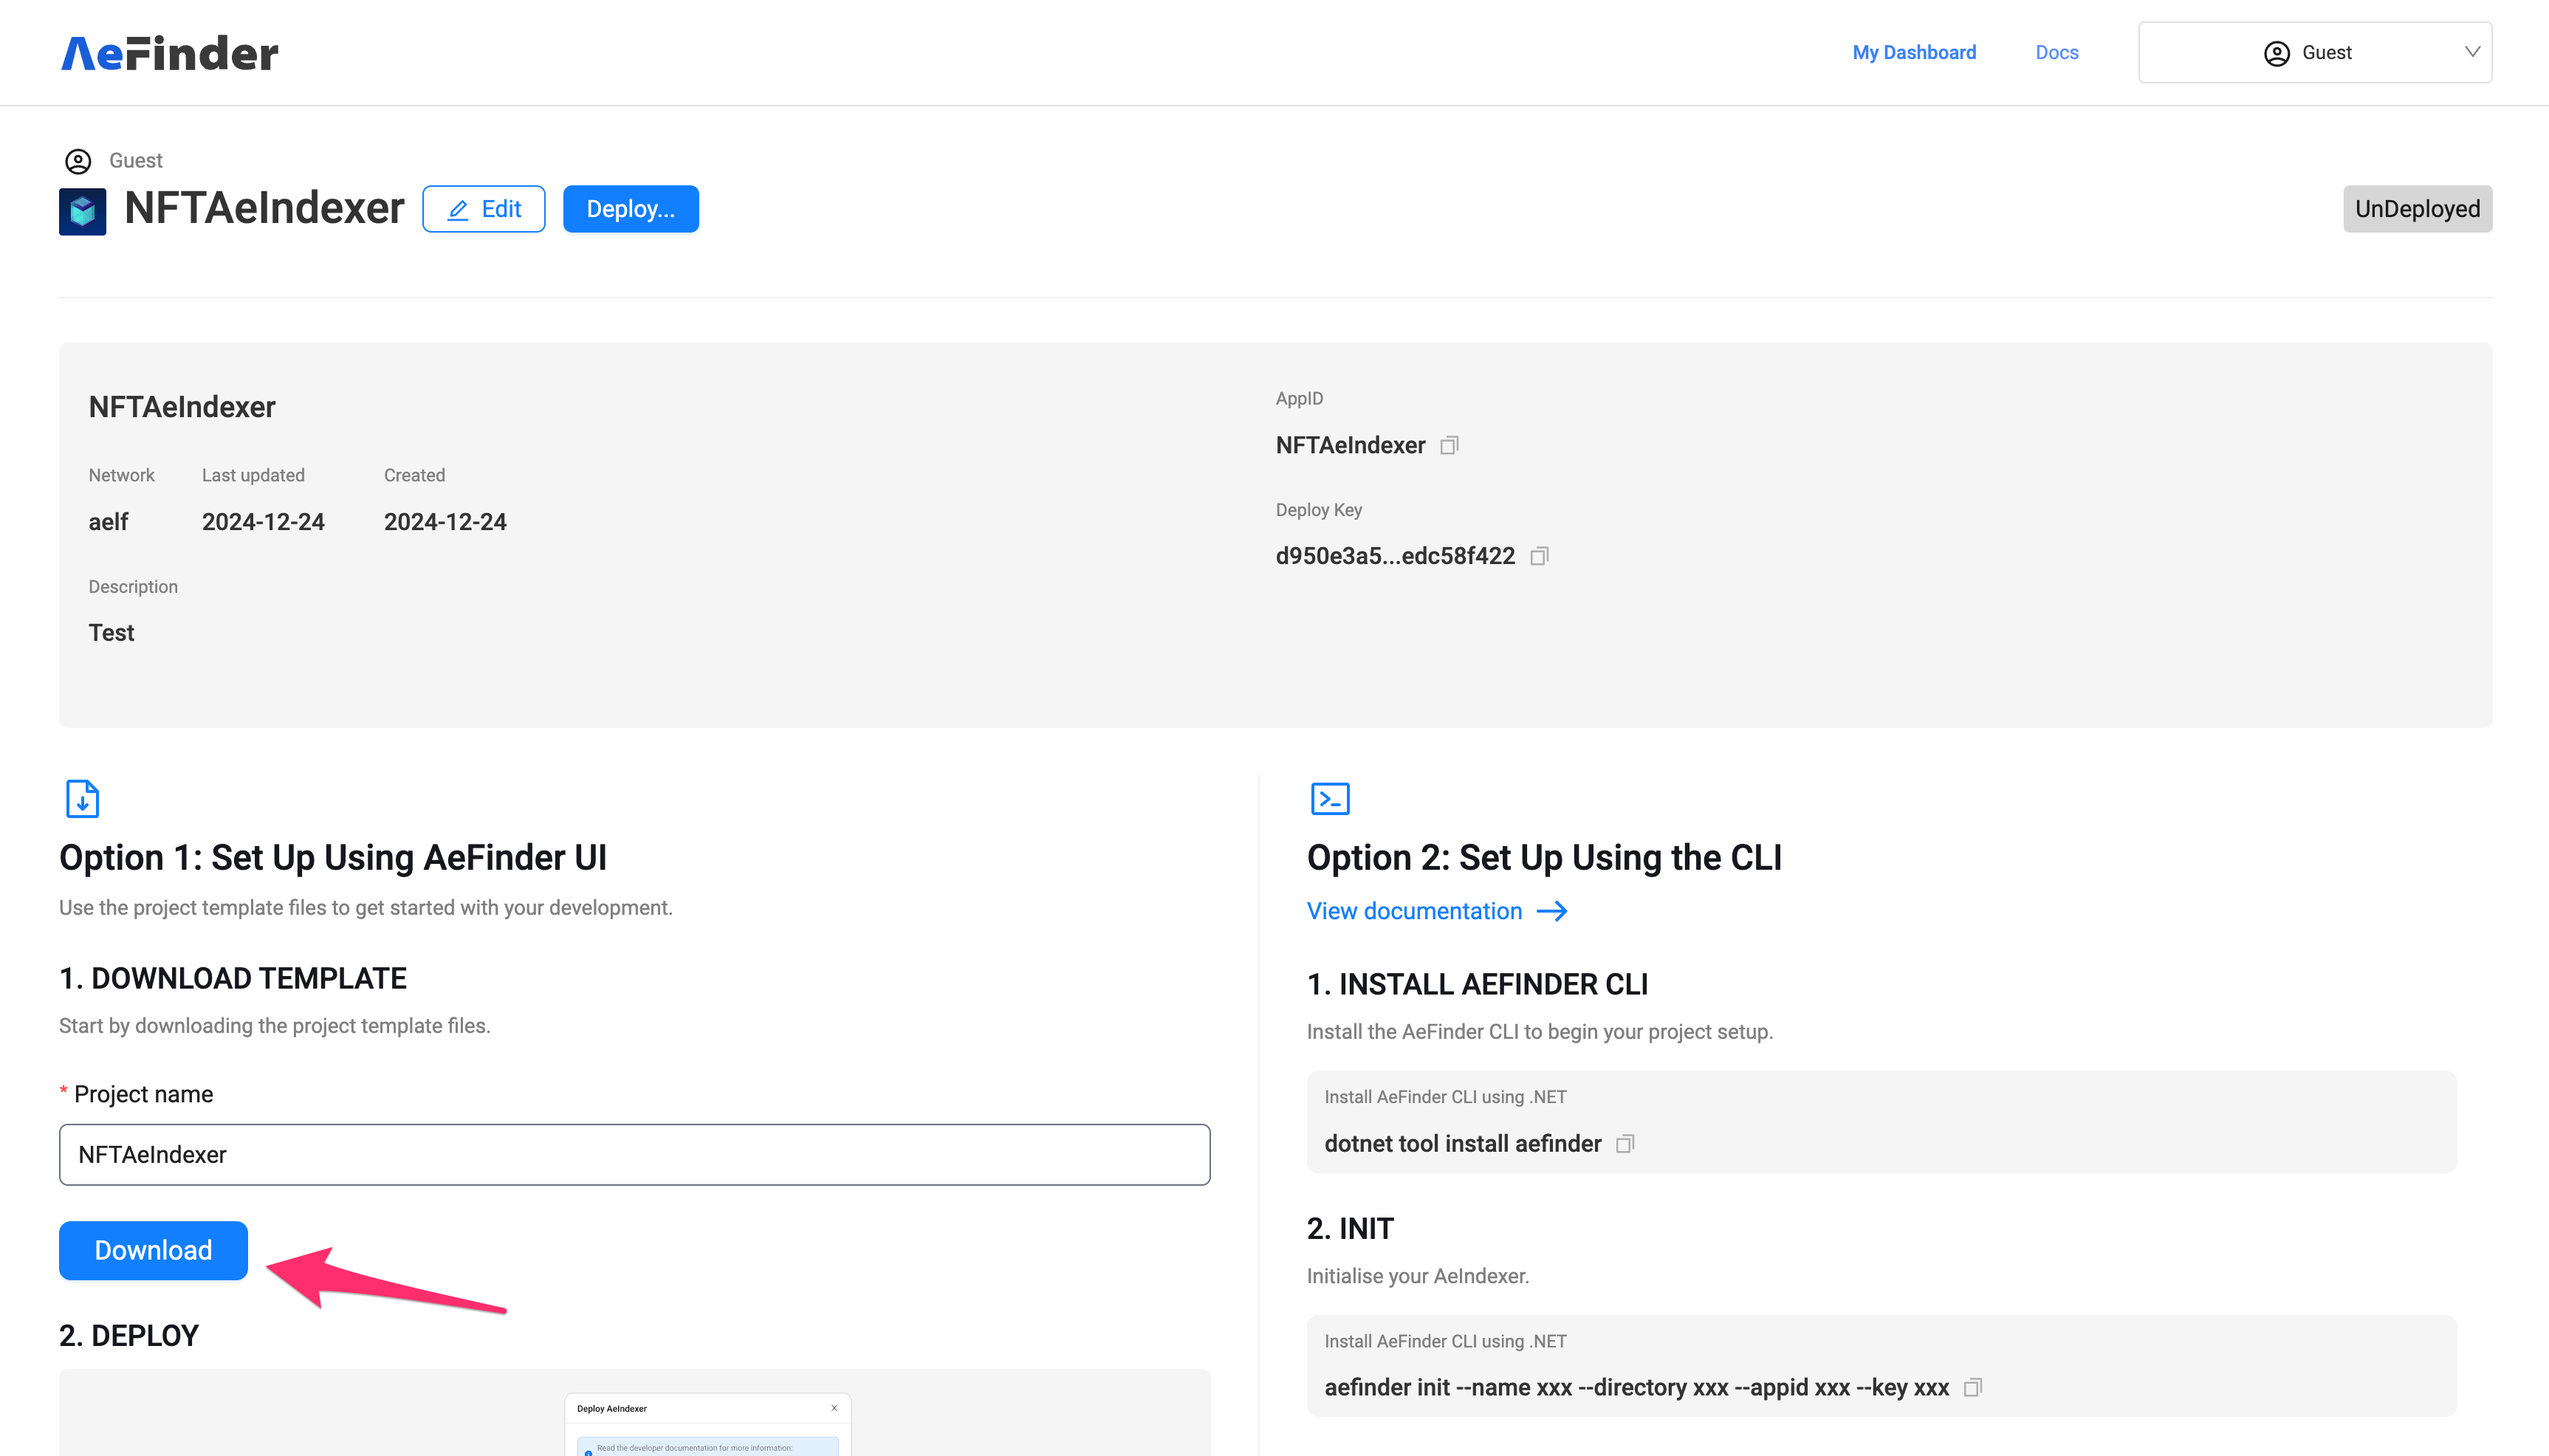
- Unzip the downloaded file to extract the project files.
- After unzipping the files, you are ready to start development
Project Structure
The initial version of the NFT AeIndexer project has the following structure:
To ensure the project is set up correctly, follow these steps:
Setting Up the Files for NFT AeIndexer
-
Rename Files in the
Contracts/Folder:- Navigate to the
Contracts/folder inside your project. - Rename
MyContract.c.cstoTokenContract.c.cs. - Rename
MyContract.g.cstoTokenContract.g.cs.
- Navigate to the
-
Download Token Contract Files:
- Go to the AeFinder GitHub NFT Indexer sample.
- Locate and download the token contract files.
-
Copy and Replace Code:
- Open the downloaded token contract files.
- Copy the content from
TokenContract.c.csandTokenContract.g.cs. - Paste the copied code into the corresponding files in the
src/NFTAeIndexer/Contractsdirectory of your project:- Paste into
TokenContract.c.cs. - Paste into
TokenContract.g.cs.
- Paste into
-
Rename and add new files in the
Entities/Folder:- Navigate to the
Entities/folder inside your project. - Rename
MyEntity.cstoAccount.cs. - Add new
TransferRecord.csfile insideEntitiesfolder.
- Navigate to the
-
Rename and add new files in the
Processors/Folder:- Navigate to the
Processors/folder inside your project. - Rename
MyLogEventProcessor.cstoNFTTransferredProcessor.cs.
- Navigate to the
Updated Project Structure
After the setup, your NFT AeIndexer project will have the following structure:
ℹ️ Note: If other contract files are needed, they need to be generated by compiling the corresponding contract project!
1. Entity Models
-
Navigate to the
Entities/folder inside your project. -
Account.csfile is as follows:
using AeFinder.Sdk.Entities;
using Nest;

namespace NFTAeIndexer.Entities;

public class Account: AeFinderEntity, IAeFinderEntity
{
    [Keyword] public string Address { get; set; }
    [Keyword] public string Symbol { get; set; }
    public long Amount { get; set; }
    public string TokenName { get; set; }
    public string NftImageUri { get; set; }
    public string NftAttributes { get; set; }
}
TransferRecord.csfile is as follows:
using AeFinder.Sdk.Entities;
using Nest;

namespace NFTAeIndexer.Entities;

public class TransferRecord: AeFinderEntity, IAeFinderEntity
{
    [Keyword] public string Symbol { get; set; }
    [Keyword] public string ToAddress { get; set; }
    public long Amount { get; set; }
    [Text] public string Memo { get; set; }
}
2. NFT Transfer Processor
The NFTTransferredProcessor handles NFT transfer events and updates account balances:
-
Navigate to the
Processors/folder inside your project. -
NFTTransferredProcessor.csfile is as follows:
using Microsoft.Extensions.Logging;
using AElf.Contracts.MultiToken;
using AeFinder.Sdk.Logging;
using AeFinder.Sdk.Processor;
using AeFinder.Sdk;
using NFTAeIndexer.Entities;
using Volo.Abp.DependencyInjection;

namespace NFTAeIndexer.Processors;

public class NFTTransferredProcessor : LogEventProcessorBase<Issued>, ITransientDependency
{
    private readonly IBlockChainService _blockChainService;

    public NFTTransferredProcessor(IBlockChainService blockChainService)
    {
        _blockChainService = blockChainService;
    }

    public override string GetContractAddress(string chainId)
    {
        return chainId switch
        {
            "AELF" => "JRmBduh4nXWi1aXgdUsj5gJrzeZb2LxmrAbf7W99faZSvoAaE",
            "tDVW" => "ASh2Wt7nSEmYqnGxPPzp4pnVDU4uhj1XW9Se5VeZcX2UDdyjx",
            _ => string.Empty
        };
    }

    public override async Task ProcessAsync(Issued logEvent, LogEventContext context)
    {
        if (!IsNftTransfer(logEvent))
        {
            return;
        }

        var tokenInfoParam = new GetTokenInfoInput
        {
            Symbol = logEvent.Symbol
        };

        var nftTransfer = new TransferRecord
        {
            Id = $"{context.ChainId}-{context.Transaction.TransactionId}-{context.LogEvent.Index}",
            ToAddress = logEvent.To.ToBase58(),
            Symbol = logEvent.Symbol,
            Amount = logEvent.Amount,
            Memo = logEvent.Memo
        };
        await SaveEntityAsync(nftTransfer);

        await ChangeNFTBalanceAsync(context.ChainId, logEvent.To.ToBase58(), logEvent.Symbol, logEvent.Amount);
    }

    private async Task ChangeNFTBalanceAsync(string chainId, string address, string symbol, long amount)
    {
        var accountId = $"{chainId}-{address}-{symbol}";
        var account = await GetEntityAsync<Account>(accountId);
        var tokenInfoParam = new GetTokenInfoInput { Symbol = symbol };
        var contractAddress = GetContractAddress(chainId);
        var tokenInfo = await _blockChainService.ViewContractAsync<TokenInfo>(
            chainId, contractAddress,
            "GetTokenInfo", tokenInfoParam);

        Logger.LogDebug("TokenInfo response: {@TokenInfo}", tokenInfo);

        if (account == null)
        {
            account = new Account
            {
                Id = accountId,
                Symbol = symbol,
                Amount = amount,
                Address = address,
                TokenName = tokenInfo.TokenName,
                NftImageUri = tokenInfo.ExternalInfo?.Value["__nft_image_uri"] ?? tokenInfo.ExternalInfo?.Value["__nft_image_url"],
                NftAttributes = tokenInfo.ExternalInfo?.Value["__nft_attributes"]
            };
        }
        else
        {
            account.Amount += amount;
        }

        Logger.LogDebug("NFT Balance changed: {0} {1} {2} {3}", account.Address, account.Symbol, account.Amount, account.TokenName);

        await SaveEntityAsync(account);
    }

    private bool IsNftTransfer(Issued logEvent)
    {
        return !string.IsNullOrEmpty(logEvent.Symbol) && logEvent.Symbol.Contains("-") &&
            logEvent.Amount > 0 &&
            logEvent.To != null && !string.IsNullOrEmpty(logEvent.To.ToBase58());
    }
}
- Add files
AccountDto.cs,TransferRecordDto.cs,GetAccountInput.cs,GetTransferRecordInput.csto the directorysrc/NFTAeIndexer/GraphQL.
using AeFinder.Sdk.Dtos;

namespace NFTAeIndexer.GraphQL;

public class AccountDto : AeFinderEntityDto
{
    public string Address { get; set; }
    public string Symbol { get; set; }
    public long Amount { get; set; }
    public string TokenName { get; set; }
    public string NftImageUri { get; set; }
    public string NftAttributes { get; set; }
}
using AeFinder.Sdk.Dtos;

namespace NFTAeIndexer.GraphQL;

public class TransferRecordDto : AeFinderEntityDto
{
    public string Symbol { get; set; }
    public string FromAddress { get; set; }
    public string ToAddress { get; set; }
    public long Amount { get; set; }
}
namespace NFTAeIndexer.GraphQL;

public class GetAccountInput
{
    public string ChainId { get; set; }
    public string Address { get; set; }
    public string Symbol { get; set; }
}
namespace NFTAeIndexer.GraphQL;

public class GetTransferRecordInput
{
    public string ChainId { get; set; }
    public string Address { get; set; }
    public string Symbol { get; set; }
}
- Modify
src/NFTAeIndexer/GraphQL/Query.csto add query logic.
using AeFinder.Sdk;
using GraphQL;
using NFTAeIndexer.Entities;
using Volo.Abp.ObjectMapping;

namespace NFTAeIndexer.GraphQL;

public class Query
{
    public static async Task<List<AccountDto>> Account(
        [FromServices] IReadOnlyRepository<Account> repository,
        [FromServices] IObjectMapper objectMapper,
        GetAccountInput input)
    {
        var queryable = await repository.GetQueryableAsync();

        queryable = queryable.Where(a => a.Metadata.ChainId == input.ChainId);

        if (!input.Address.IsNullOrWhiteSpace())
        {
            queryable = queryable.Where(a => a.Address == input.Address);
        }

        if (!input.Symbol.IsNullOrWhiteSpace())
        {
            queryable = queryable.Where(a => a.Symbol == input.Symbol && a.Symbol.Contains("-"));
        }

        var accounts = queryable.OrderBy(o => o.Metadata.Block.BlockHeight).ToList();

        return objectMapper.Map<List<Account>, List<AccountDto>>(accounts);
    }

    public static async Task<List<TransferRecordDto>> TransferRecord(
        [FromServices] IReadOnlyRepository<TransferRecord> repository,
        [FromServices] IObjectMapper objectMapper,
        GetTransferRecordInput input)
    {
        var queryable = await repository.GetQueryableAsync();

        queryable = queryable.Where(a => a.Metadata.ChainId == input.ChainId);

        if (!input.Address.IsNullOrWhiteSpace())
        {
            queryable = queryable.Where(a => a.ToAddress == input.Address);
        }

        // Filter by Symbol, ensuring it matches the NFT pattern
        if (!input.Symbol.IsNullOrWhiteSpace())
        {
            queryable = queryable.Where(a => a.Symbol == input.Symbol && a.Symbol.Contains("-"));
        }

        // Ensure NFT-specific conditions
        queryable = queryable.Where(a => a.Symbol.Contains("-") && a.Amount > 0);

        var transferRecords = queryable.OrderBy(o => o.Metadata.Block.BlockHeight).ToList();

        return objectMapper.Map<List<TransferRecord>, List<TransferRecordDto>>(transferRecords);
    }
}
-
Register log event processor
Modify
src/NFTAeIndexer/NFTAeIndexerModule.csto register NFTTransferredProcessor.
using AeFinder.Sdk.Processor;
using NFTAeIndexer.GraphQL;
using NFTAeIndexer.Processors;
using GraphQL.Types;
using Microsoft.Extensions.DependencyInjection;
using Volo.Abp.AutoMapper;
using Volo.Abp.Modularity;

namespace NFTAeIndexer;

public class NFTAeIndexerModule: AbpModule
{
    public override void ConfigureServices(ServiceConfigurationContext context)
    {
        Configure<AbpAutoMapperOptions>(options => { options.AddMaps<NFTAeIndexerModule>(); });
        context.Services.AddSingleton<ISchema, AeIndexerSchema>();

        // Add your LogEventProcessor implementation.
        context.Services.AddSingleton<ILogEventProcessor, NFTTransferredProcessor>();
    }
}
-
Add entity mapping
Modify
src/NFTAeIndexer/NFTAeIndexerAutoMapperProfile.csand add entity mapping code.
using NFTAeIndexer.Entities;
using NFTAeIndexer.GraphQL;
using AutoMapper;

namespace NFTAeIndexer;

public class NFTAeIndexerAutoMapperProfile : Profile
{
    public NFTAeIndexerAutoMapperProfile()
    {
        CreateMap<Account, AccountDto>();
        CreateMap<TransferRecord, TransferRecordDto>();
    }
}
Building code
Use the following command in the code directory to compile the code.
dotnet build -c Release
Step 4 - Deploy AeIndexer
- Open the AeIndexer details page and click Deploy.

- Fill out the subscription manifest and upload the DLL file.
- Subscription manifest:
{
  "subscriptionItems": [
    {
      "chainId": "tDVW",
      "startBlockNumber": 151018963,
      "onlyConfirmed": false,
      "transactions": [],
      "logEvents": [
        {
          "contractAddress": "ASh2Wt7nSEmYqnGxPPzp4pnVDU4uhj1XW9Se5VeZcX2UDdyjx",
          "eventNames": [
            "Issued",
            "Issue"
          ]
        }
      ]
    }
  ]
}
- DLL file location: src/NFTAeIndexer/bin/Release/net8.0/NFTAeIndexer.dll

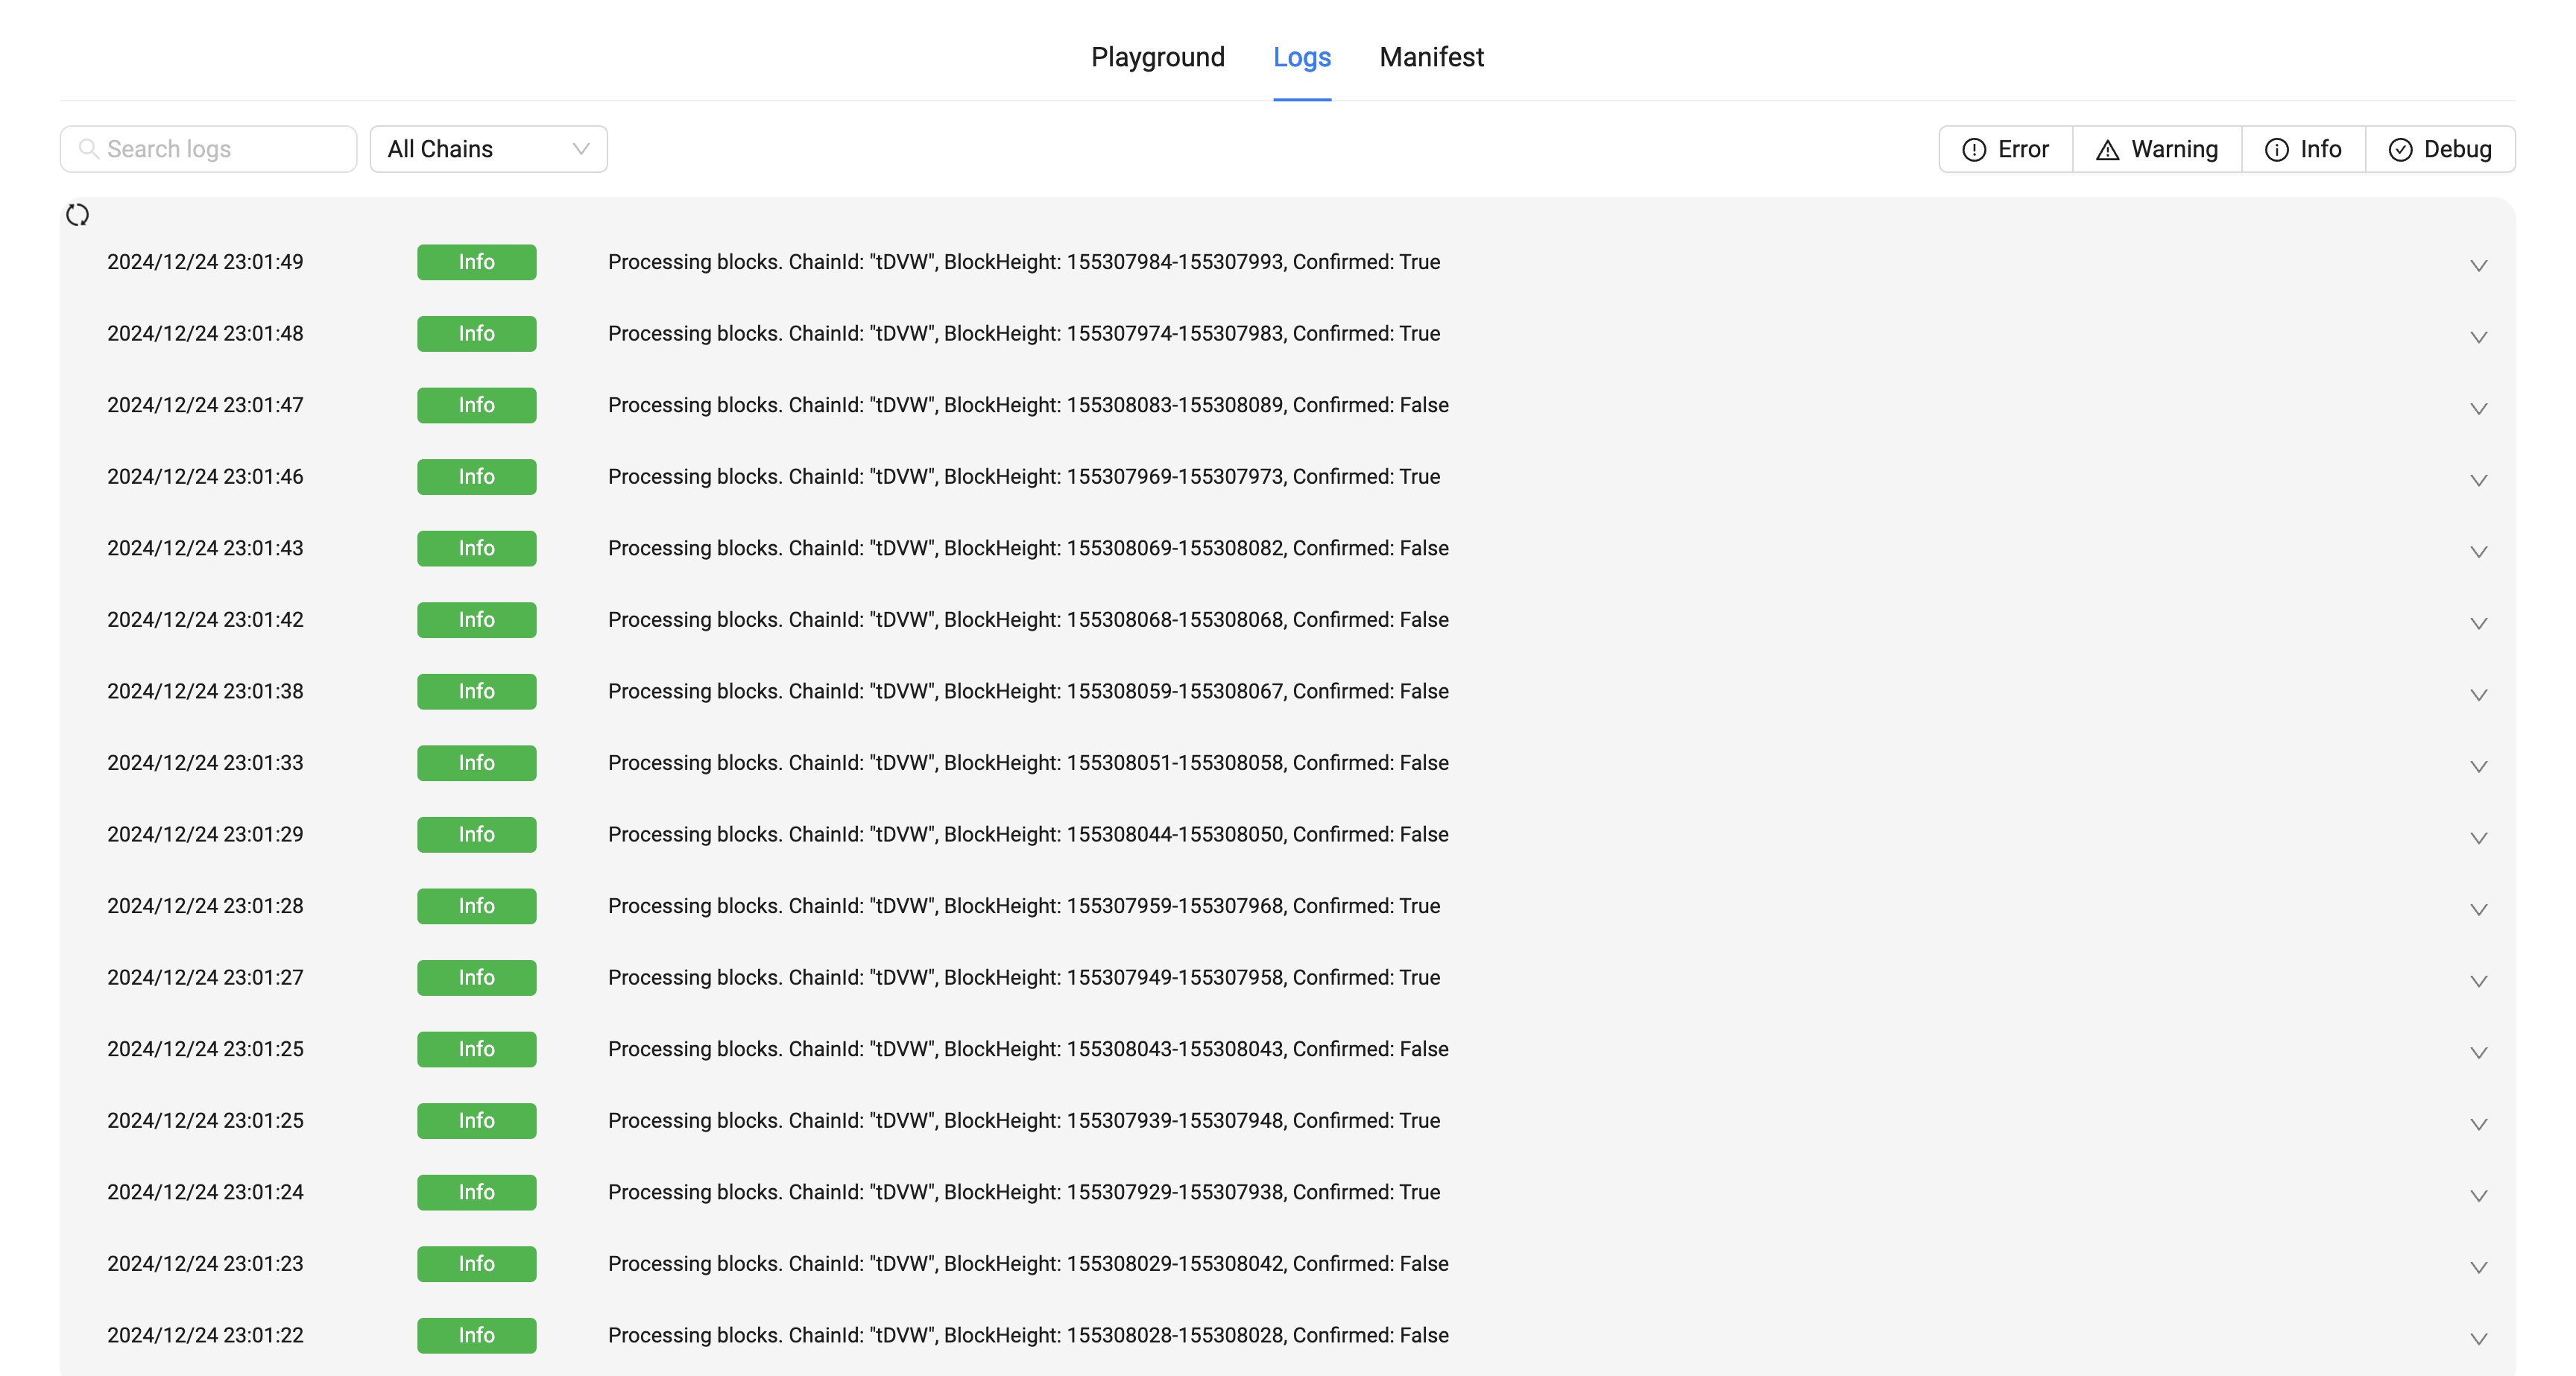
- Click the deploy button to submit deployment information. When the normal processing block information appears on the Logs page at the bottom of the details page, it means that the deployment has been successful and data indexing has started.
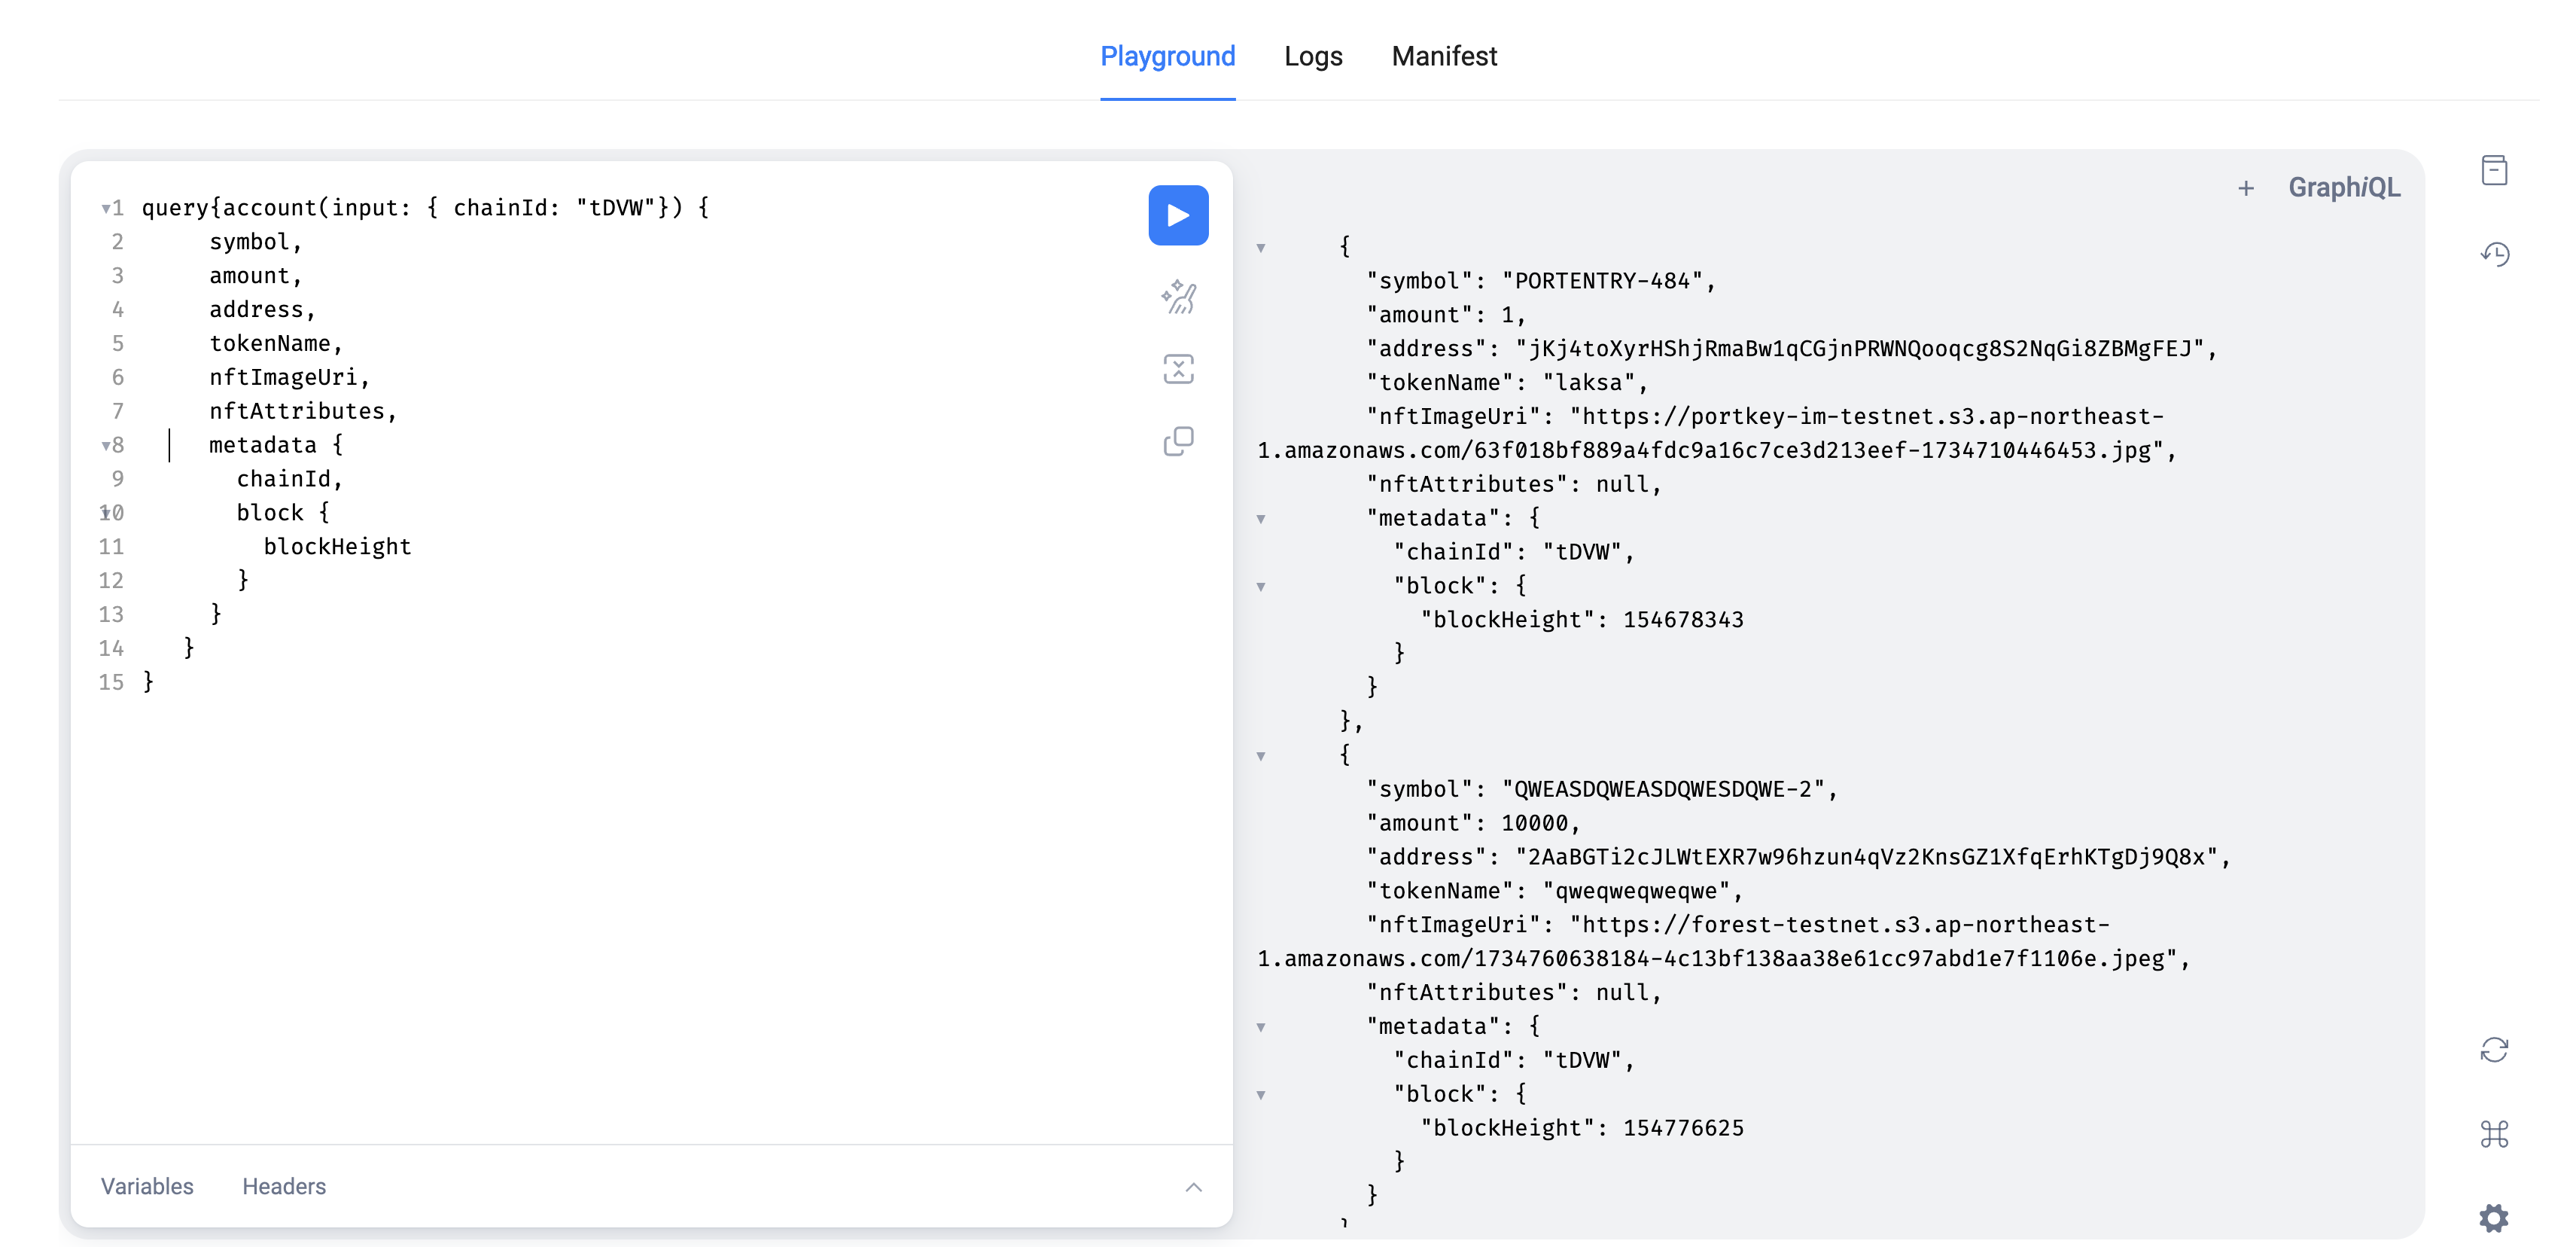
Step 5 - Query indexed data
Through the Playground page below the details page, you can use GraphQL syntax to query the indexed data information. Enter the query statement on the left, and the query results will be displayed on the right.
query{
    account(input: { chainId: "tDVW", address: "2AaBGTi2cJLWtEXR7w96hzun4qVz2KnsGZ1XfqErhKTgDj9Q8x"}) {
        symbol,
        amount,
        address,
        tokenName,
        nftImageUri,
        nftAttributes,
        metadata {
          chainId,
          block {
            blockHeight
          }
        }
      }
}
ℹ️ Note: For the complete demo code, please visit AeFinder github to download. https://github.com/AeFinderProject/aefinder/tree/master/samples/TokenAeIndexer
Step 6 - Getting NFT Seed
In order to create an NFT collection on the aelf blockchain, the deployer wallet must have an NFT SEED.
- Visit NFT Faucet to get your NFT SEED.
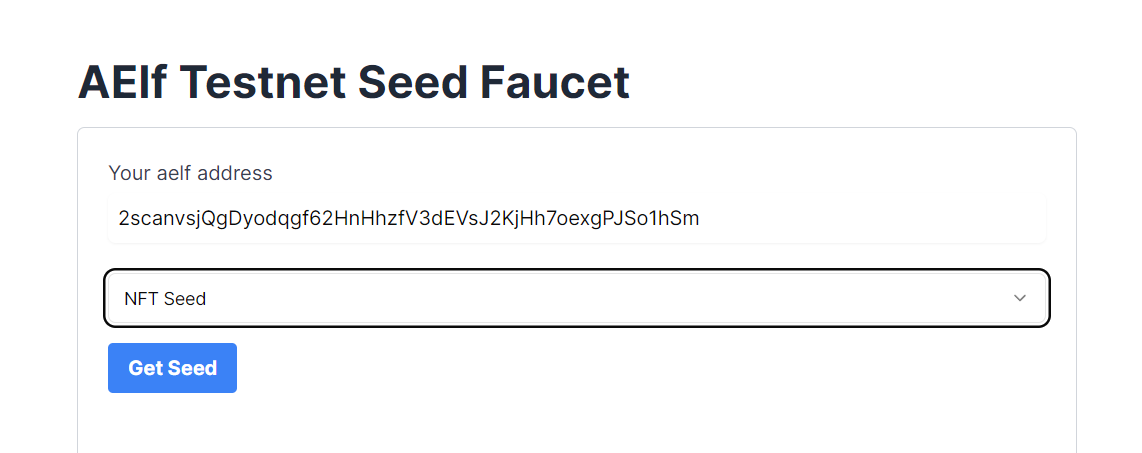
- After the request is successfully processed, the requestor wallet will receive the SEED.
- Please note this SEED symbol value, as it will be needed later while creating the NFT collection and NFT generation. This will become our Token Symbol.
Step 7 - Interact with Smart Contract through frontend dApp
Project Setup
Let's start by cloning the frontend project repository from GitHub.
- Run the following command your Terminal:
git clone https://github.com/AElfProject/aelf-samples.git
- Next, navigate to the frontend project directory with this command:
cd aelf-samples/advance/nft/2-dapp
- Once you're in the
2-dappdirectory, open the project with your preferred IDE (e.g., VSCode). You should see the project structure as shown below.
Install necessary packages and libraries
- Run teh following command in the terminal:
- Linux and macOs
- Windows
sudo npm install
npm install
We are now ready to build the frontend components of our NFT dApp.
Configure Portkey Provider & Write Connect Wallet Function
We'll set up our Portkey provider to allow users to connect their Portkey wallets to our app and interact with the aelf smart contracts. We'll be interacting with the already deployed multi-token contract for this tutorial.
Step 1. Locate the File:
- Go to the
src/hooks/useNFTSmartContract.tsfile.
Step 2. Fetch the Smart Contract:
-
Find the comment
//Step A - Function to fetch a smart contract based on the chain symbol and the contract address. -
Replace the existing
fetchContractfunction with this updated code:
//Step A - Function to fetch a smart contract based on the chain symbol and the contract address
const fetchContract = async (
  symbol: "AELF" | "tDVW",
  contractAddress: string
) => {
  try {
    // If no provider is available, return null
    if (!provider) return null;

    // Fetch the chain information using the provider
    const chain = await provider.getChain(symbol);
    if (!chain) throw new Error("Chain not found");

    // Get the smart contract instance from the chain
    const contract = chain.getContract(contractAddress);

    // Return the smart contract instance
    return contract;
  } catch (error) {
    console.error("Error in fetchContract", { symbol, contractAddress, error });
  }
};
Explanation:
-
fetchContractFunction: This function fetches a smart contract based on the given chain symbol (e.g., "AELF" or "tDVW") and the contract address.- Check Provider : If no provider is available, the function returns null.
- Fetch Chain : The function fetches chain information using the provider.
- Get Contract : It retrieves the smart contract instance from the chain.
- Error Handling : If an error occurs, it logs the error to the console.
Step 3. Initialize and Fetch the Smart Contracts:
-
Find the comment
// Step B - Effect hook to initialize and fetch the smart contracts when the provider changes. -
Replace the existing
useEffecthook with this updated code:
// Step B -  Effect hook to initialize and fetch the smart contracts when the provider changes
  useEffect(() => {
    (async () => {
      // Fetch the MainChain Testnet Contract
      const mainChainContract = await fetchContract(
        "AELF",
        "JRmBduh4nXWi1aXgdUsj5gJrzeZb2LxmrAbf7W99faZSvoAaE"
      );
      setMainChainSmartContract(mainChainContract as IContract);

      // Fetch the dAppChain Testnet Contract
      const sideChainContract = await fetchContract(
        "tDVW",
        "ASh2Wt7nSEmYqnGxPPzp4pnVDU4uhj1XW9Se5VeZcX2UDdyjx"
      );
      setSideChainSmartContract(sideChainContract as IContract);
    })();
  }, [provider]); // Dependency array ensures this runs when the provider changes
Explanation:
-
useEffectHook : This hook initializes and fetches the smart contracts when the provider changes.- Check Provider : If no provider is available, the function returns null.
- Fetch Contracts : It fetches and sets the smart contracts for the main chain, side chain, and cross chain.
- MainChain Contract : Fetches the MainChain Testnet Contract and sets it in the state.
- dAppChain Contract : Fetches the dAppChain Testnet Contract and sets it in the state.
By following these steps, we'll configure the Portkey provider to connect users' wallets to your app and interact with the multi-token smart contract including NFT related functionalities. This setup will enable our frontend components to perform actions like create NFTs, validate NFTs, and transfer NFTs.
Configure Connect Wallet Function
Step 1: Locate the File
- Go to the
src/components/layout/header/index.tsxfile.
Step 2: Write the Connect Wallet Function
-
The
header/index.tsxfile is the header of our NFT dApp. It allows users to connect their Portkey wallet with the NFT dApp. -
Before users can interact with the smart contract, we need to write the
Connect Walletfunction. -
Find the comment
// Step C - Connect Portkey Wallet. -
Replace the existing connect function with this code snippet:
const connect = async (walletProvider?: IPortkeyProvider) => {
  // Step C - Connect Portkey Wallet
  const accounts = await (walletProvider ? walletProvider : provider)?.request({
    method: MethodsBase.REQUEST_ACCOUNTS,
  });
  const account = accounts?.AELF && accounts?.AELF[0];
  if (account) {
    setCurrentWalletAddress(account.replace(/^ELF_/, "").replace(/_AELF$/, ""));
    setIsConnected(true);
  }
  !walletProvider && toast.success("Successfully connected");
};
Explanation:
connectFunction : This function connects the user's Portkey wallet with the dApp.- Fetch Accounts : It fetches the wallet accounts using the provider.
- Log Accounts : Logs the accounts to the console for debugging.
- Set Wallet Address : Sets the current wallet address state variable with the fetched account.
- Update Connection Status : Updates the state to indicate that the wallet is connected.
- User Notification : Displays an alert to notify the user that their wallet is successfully connected. In this code, we fetch the Portkey wallet account using the provider and update the wallet address state variable. An alert notifies the user that their wallet is successfully connected. With the Connect Wallet function defined, we're ready to write the remaining functions in the next steps.
Configure Create NFT Form Code
Step 1: Locate the File
-
Go to the
src/pages/create-nft/index.tsxfile. This file is the Create NFTs page where users can enter details like thetokenName,symbol,totalSupplyanddecimals. Step 2: Prepare Form to Create NFTs -
Find the comment
// Step D - Configure NFT Form. -
Replace the form variable with this code snippet:
// Step D - Configure NFT Form
const form = useForm<z.infer<typeof formSchema>>({
  resolver: zodResolver(formSchema),
  defaultValues: {
    tokenName: "",
    symbol: "",
    totalSupply: "",
    decimals: "",
  },
});
Here's what the function does:
- Initializes a new form variable with default values needed to create an NFT.
- Fields include:
tokenName,symbol,totalSupply, anddecimals. Now the form is ready for users to fill in the necessary details for their NFT function interaction.
Create NFT Collection
Let's write the functions to Create New NFT Collection on the aelf mainchain and the dAppChain.
Step 1: Write the function to Create New NFT Collection on the MainChain
-
The
create-nft/index.tsxfile includes the code to create NFTs. It allows users to create new NFTs. -
Find the comment
// step 1 - Create New NFT Collection on the mainchain. -
Replace the existing
createNftCollectionOnMainChainfunction with this code snippet:
// step - 1 Create New NFT Collection on the mainchain
const createNftCollectionOnMainChain = async (
  values: z.infer<typeof formSchema>
): Promise<INftInput | "error"> => {
  let createLoadingId;
  try {
    createLoadingId = toast.loading("Creating NFT Collection..");

    // Create an object with the necessary information for the new NFT collection.
    const createNftInput: INftInput = {
      tokenName: values.tokenName, // Name of the nft Collection
      symbol: values.symbol, // Symbol of the token (You have to get it from your PortKey wallet on NFT seed from NFT section)
      totalSupply: values.totalSupply, // Total supply of the token
      decimals: values.decimals, // Decimals of the token
      issuer: currentWalletAddress, // Address of the token issuer
      isBurnable: true, // Indicates if the token can be burned
      issueChainId: sidechain_from_chain_id, // ID of the issuing chain
      owner: currentWalletAddress, // Owner's wallet address
    };

    // Call the smart contract method to create the new NFT collection on the main chain.
    const result = await mainChainSmartContract?.callSendMethod(
      "Create",
      currentWalletAddress,
      createNftInput
    );

    // Log the result of the creation for debugging purposes.
    console.log("========= result of createNewNft =========", result);

    toast.update(createLoadingId, {
      render: "NFT Collection Created Successfully On MainChain",
      type: "success",
      isLoading: false,
    });
    removeNotification(createLoadingId);

    // Return the input data for further use.
    return createNftInput;
  } catch (error) {
    handleError(createLoadingId as number, error);
    return "error";
  }
};
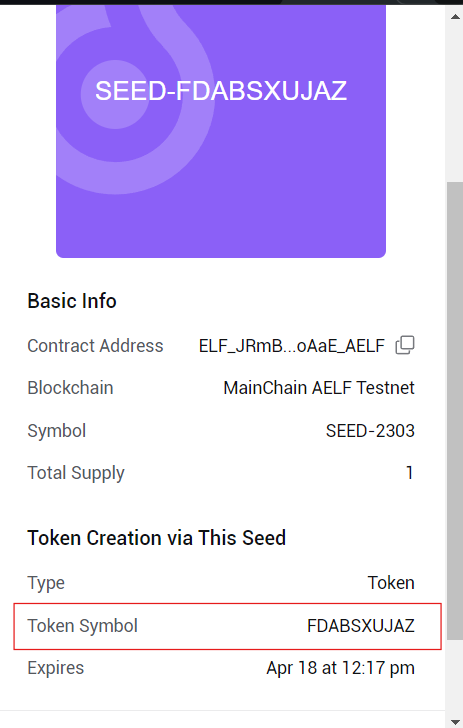
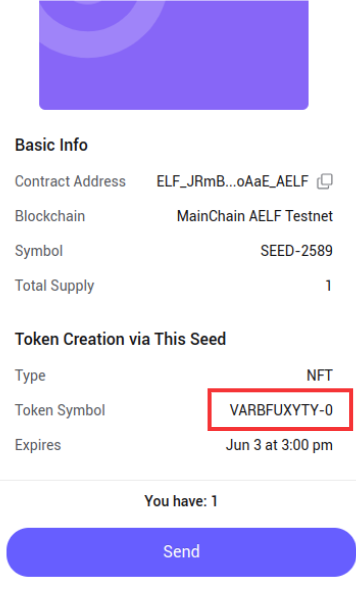
ℹ️ Note: You need to get symbol from the Portkey wallet.
- Follow Steps to get NFT symbol from Portkey Wallet:
- Open Portkey Wallet.
- Go to the NFTs tab.
- You will find the SEED that you already got from the above seed generation step.
- Click on the SEED to see details.
- You will find the Token Symbol inside the Token Creation via This Seed section.
- Copy and use that value of the token symbol.
What This Function Does:
- Creates an Object with NFT Details : It prepares the data needed to create a new NFT collection.
- Calls Smart Contract Method : It interacts with the blockchain smart contract to create the new NFT collection using the prepared data.
- Logs Information : It logs the result for debugging purposes.
- Return Values of Object : It returns necessary values as a object. Next, we'll write the Validate Collection Info Exist function. Step 2: Write the validates collection info exist function
-
Scroll up to find the comment
// step 2 - Validate Collection information exist. -
Replace the existing
validateNftCollectionInfofunction with this code snippet:
// step 2 - Validate Collection information exist
// This function validates if the token collection information already exists on the main blockchain.
const validateNftCollectionInfo = async (
  values: INftInput
): Promise<ValidationResult | "error"> => {
  let validateLoadingId;
  try {
    // Start loading before initiating the transaction
    validateLoadingId = toast.loading(
      <CustomToast
        title="Transaction is getting validated on aelf blockchain. Please wait!"
        message="Validation means transaction runs through a consensus algorithm to be selected or rejected. Once the status changes, the process will complete. It usually takes some time in distributed systems."
      />
    );

    // Create an object with the necessary information for token validation.
    const validateInput: INftInput = {
      symbol: values.symbol, // Symbol of the token
      tokenName: values.tokenName, // Name of the token
      totalSupply: values.totalSupply, // Total supply of the token
      decimals: values.decimals, // Decimals of the token
      issuer: currentWalletAddress, // Address of the token issuer
      isBurnable: true, // Indicates if the token can be burned
      issueChainId: sidechain_from_chain_id, // ID of the issuing chain
      owner: currentWalletAddress, // Owner's wallet address
    };

    // Get mainnet contract
    const aelfTokenContract = await getTokenContract(aelf, wallet);

    // Prepare to sign the transaction using the contract method
    const signedTx =
      aelfTokenContract.ValidateTokenInfoExists.getSignedTx(validateInput);

    // Send the transaction using the signed transaction
    const { TransactionId: VALIDATE_TXID } = await aelf.chain.sendTransaction(
      signedTx
    );

    // Get the validation result
    let VALIDATE_TXRESULT = await aelf.chain.getTxResult(VALIDATE_TXID);

    // Wait until the latest index height is greater than or equal to the transaction block number
    let heightDone = false;

    while (!heightDone) {
      await delay(5000); // Wait 5 seconds before checking again
      // Get the latest index height
      const sideIndexMainHeight = await GetParentChainHeight();
      if (Number(sideIndexMainHeight) >= VALIDATE_TXRESULT.Transaction.RefBlockNumber) {
        VALIDATE_TXRESULT = await aelf.chain.getTxResult(VALIDATE_TXID);
        heightDone = true;
      }
    }

    console.log("VALIDATE_TXRESULT", VALIDATE_TXRESULT);

    // Update the loading message
    toast.update(validateLoadingId, {
      render: "Validating Token Successfully Executed",
      type: "success",
      isLoading: false,
    });

    // Remove the loading message
    removeNotification(validateLoadingId);

    // Return necessary details
    return {
      transactionId: VALIDATE_TXID,
      signedTx: signedTx,
      BlockNumber: VALIDATE_TXRESULT.BlockNumber,
    };
  } catch (error) {
    handleError(validateLoadingId as number, error);
    return "error";
  }
};
What This Function Does:
- Creates an Object with Validate Collection Details : It prepares the data needed to validate the token information.
- Calls Smart Contract Method : It interacts with the multi-token smart contract method to check if the token information already exists using the prepared data.
- Return Values : It returns necessary values as an object. Next, we'll write the Get the parent chain height function. Step 3: Write the get the parent chain height function
-
Scroll up to find the comment
// Step 3: Get the parent chain height. -
Replace the existing
GetParentChainHeightfunction with the following code snippet:
// Step 3: Get the parent chain height
// This function fetches the current height of the parent blockchain.
const GetParentChainHeight = async () => {
  try {
    const tdvwCrossChainContract = await getCrossChainContract(tdvw, wallet);
    // Call the smart contract method to get the parent chain height.
    const result = await tdvwCrossChainContract.GetParentChainHeight.call()
    // Return the parent chain height if it exists, otherwise return an empty string.
    return result ? (result.value as string) : "";
  } catch (error) {
    // If there's an error, log it and return an error status.
    console.error(error, "=====error in GetParentChainHeight");
    return "error";
  }
};
What This Function Does:
- Calls Smart Contract Method : It interacts with the side chain smart contract method to fetch the current height of the parent blockchain.
- Returns Parent Chain's Height : It returns the parent chain's height if it exists. Next, we'll write the Fetch the Merkle path function. Step 4: Write the fetch the merkle path function
-
Scroll up to find the comment
// step 4 - Fetch the merkle path by transaction Id. -
Replace the existing
getMerklePathByTxIdfunction with this code snippet:
// step 4 - Fetch the merkle path by transaction Id
const getMerklePathByTxId = async (aelf: AElf, txId: string) => {
  try {
    const { MerklePathNodes } = await aelf.chain.getMerklePathByTxId(txId);

    const formattedMerklePathNodes = MerklePathNodes.map(
      ({
        Hash,
        IsLeftChildNode,
      }: {
        Hash: string,
        IsLeftChildNode: boolean,
      }) => ({
        hash: Hash,
        isLeftChildNode: IsLeftChildNode,
      })
    );

    return { merklePathNodes: formattedMerklePathNodes };
  } catch (error) {
    console.error("Error fetching Merkle path:", error);
    throw new Error("Failed to get Merkle path by transaction ID.");
  }
};
What This Function Does:
- Fetches Merkle Path : It sends a request to fetch the merkle path using the transaction ID.
- Parses Response : It parses the response from the server as JSON.
- Returns Merkle Path Nodes : It extracts and returns the merkle path of the nodes from the JSON response.
- Handles Errors : If an error occurs, it clears the transaction status and logs the error. Next, we'll write the Create a Collection on the cross-chain function. Step 5: Write a function to create a collection on the side chain
-
Scroll up to find the comment
// step 5 - Create a collection on the dAppChain. -
Replace the existing
createCollectionOnSideChainfunction with this code snippet:
// step 5 - Create a collection on the dAppChain
const createCollectionOnSideChain = async (
  transactionId: string,
  signedTx: string,
  BlockNumber: number
) => {
  let crossChainLoadingId;
  try {
    crossChainLoadingId = toast.loading(
      "Creating Collection on dAppChain..."
    );

    const merklePath = await getMerklePathByTxId(aelf, transactionId);

    const tdvwTokenContract = await getTokenContract(tdvw, wallet);

    const CROSS_CHAIN_CREATE_TOKEN_PARAMS = {
      fromChainId: mainchain_from_chain_id,
      parentChainHeight: "" + BlockNumber,
      transactionBytes: Buffer.from(signedTx, "hex").toString("base64"),
      merklePath,
    };
    const signedTx2 =
      await tdvwTokenContract.CrossChainCreateToken.getSignedTx(
        CROSS_CHAIN_CREATE_TOKEN_PARAMS
      );

    let done = false;

    while (!done) {
      try {
        await delay(10000);
        const { TransactionId } = await tdvw.chain.sendTransaction(signedTx2);
        const txResult = await tdvw.chain.getTxResult(TransactionId);

        if (txResult.Status === "SUCCESS" || txResult.Status === "MINED") {
          done = true;
          setIsNftCollectionCreated(true);
          toast.update(crossChainLoadingId, {
            render: "Collection was Created Successfully On dAppChain",
            type: "success",
            isLoading: false,
          });
          removeNotification(crossChainLoadingId);
          toast.info("You Can Create NFT now");
          setTransactionStatus(false);
        }
      } catch (err) {
        if ((err as { Error: string }).Error.includes("Cross chain verification failed.")) {
          console.log("Exit.");
          done = true;
          toast.update(crossChainLoadingId, {
            render: "Please try again to create NFT using new NFT seed",
            type: "error",
            isLoading: false,
          });
          removeNotification(crossChainLoadingId);
        } else {
          console.error("An unexpected error occurred:", err);
        }
      }
    }
    return "success";
  } catch (error) {
    handleError(crossChainLoadingId as number, error);
    return "error";
  }
};
What This Function Does:
- Displays Loading Toast: Shows a notification indicating the creation process of the collection on the dAppChain.
- Fetches Merkle Path: Retrieves the merkle path using the provided transactionId.
- Prepares and Signs Transaction: Constructs parameters for the cross-chain transaction and signs it.
- Sends Transaction and Checks Status: Sends the signed transaction and polls for its status every 10 seconds. Updates the notification and state, if successful.
- Handles Errors: Logs errors and returns "error" if something goes wrong.
- Final Return: Returns "success" upon successful completion.
Create NFT Token
Step 1: Write a Function to create NFTs on the mainchain
Now, let's write the create NFTs on MainChain function.
-
Scroll down to find the comment
// step 6 - Create an NFT on the mainchain. -
Replace the existing
createNFTOnMainChainfunction with this code snippet:
// step 6 - Create an NFT on the mainchain
const createNFTOnMainChain = async (values: INftParams) => {
  let createMainChainNFTLoadingId;

  try {
    createMainChainNFTLoadingId = toast.loading(
      "Creating NFT on MainChain..."
    );

    // Preparing Parameter for Create Function
    const createNftMainChainInput = {
      tokenName: values.tokenName,
      symbol: values.symbol,
      totalSupply: values.totalSupply,
      issuer: currentWalletAddress,
      isBurnable: true,
      issueChainId: sidechain_from_chain_id,
      owner: currentWalletAddress,
      externalInfo: {},
    };

    const resultMainchain = await mainChainSmartContract?.callSendMethod(
      "Create",
      currentWalletAddress,
      createNftMainChainInput
    );

    console.log(
      "========= result of createNewNft =========",
      resultMainchain
    );

    toast.update(createMainChainNFTLoadingId, {
      render: "NFT Created Successfully on MainChain",
      type: "success",
      isLoading: false,
    });
    removeNotification(createMainChainNFTLoadingId);

    return "success";
  } catch (error) {
    handleError(createMainChainNFTLoadingId as number, error);
    return "error";
  }
};
What this function does:
- Displays Loading Toast: Shows a notification indicating the creation process of the NFT on the mainchain.
- Prepares Parameters: Constructs input parameters for creating the NFT, including token details and the issuer's information.
- Calls Smart Contract: Sends a request to the mainchain smart contract to create the NFT using the prepared parameters.
- Handles Success: Updates the notification to show successful NFT creation.
- Handles Errors: Displays an error message if the operation fails and logs the error.
- Final Return: Returns
"success"if the NFT is created successfully; otherwise, returns"error".
Step 2: Write the Function for Validate NFT Info Exist
Now, let's write the Validate NFT Info Exist function.
-
Scroll down to find the comment
// step 7 - Validate an NFT token on the mainchain. -
Replace the existing
validateNftTokenfunction with this code snippet:
// step 7 - Validate an NFT token on the maincgit stashhain
const validateNftToken = async (values: INftParams) => {
  let validateNFTLoadingId;
  try {
    // Start Loading before initiate the transaction
    validateNFTLoadingId = toast.loading(
      <CustomToast
        title="Transaction is getting validated on aelf blockchain. Please wait!"
        message="Validation means transaction runs through a consensus algorithm to be selected or rejected. Once the status changes process will complete. It usually takes some time in distributed systems."
      />
    );

    // Create an object with the necessary information for token validation.
    const validateInput = {
      symbol: values.symbol,
      tokenName: values.tokenName,
      totalSupply: values.totalSupply,
      issuer: currentWalletAddress,
      isBurnable: true,
      issueChainId: sidechain_from_chain_id,
      owner: currentWalletAddress,
      externalInfo: {},
    };

    // get mainnet contract
    const aelfTokenContract = await getTokenContract(aelf, wallet);

    // prepare Sign the transaction using contract method (ValidateTokenInfoExists Function)
    const signedTx =
      aelfTokenContract.ValidateTokenInfoExists.getSignedTx(validateInput);

    // send the transaction using signed Transaction
    const { TransactionId: VALIDATE_TXID } = await aelf.chain.sendTransaction(
      signedTx
    );

    await delay(3000);

    // get Validate Result
    let VALIDATE_TXRESULT = await aelf.chain.getTxResult(VALIDATE_TXID);

    await delay(3000);

    // if dAppChain index has a MainChain height greater than validateTokenInfoExist's
    let heightDone = false;

    while (!heightDone) {
      await delay(5000); // Wait 5 seconds before checking again
      // get latest index Hight
      const sideIndexMainHeight = await GetParentChainHeight();
      if (
        // check the latest index Hight is grater than or equal
        Number(sideIndexMainHeight) >= VALIDATE_TXRESULT.Transaction.RefBlockNumber
      ) {
        VALIDATE_TXRESULT = await aelf.chain.getTxResult(VALIDATE_TXID);
        heightDone = true;
      }
    }

    console.log(VALIDATE_TXRESULT, "VALIDATE_TXRESULT=====2");

    const merklePath = await getMerklePathByTxId(aelf, VALIDATE_TXID);

    toast.update(validateNFTLoadingId, {
      render: "Validating NFT Successfully Executed",
      type: "success",
      isLoading: false,
    });
    removeNotification(validateNFTLoadingId);

    // return necessary values
    return {
      parentChainHeight: VALIDATE_TXRESULT.BlockNumber,
      signedTx: signedTx,
      merklePath: merklePath,
    };
  } catch (error) {
    handleError(validateNFTLoadingId as number, error);
    return "error";
  }
};
Here's what the function does:
- Displays Loading Toast: Shows a notification indicating that the NFT validation is in progress on the blockchain.
- Prepares Validation Input: Constructs the input parameters needed for validating the NFT token.
- Gets Token Contract: Retrieves the token contract instance from the MainChain.
- Signs and Sends Transaction: Signs the transaction to validate the token info and sends it to the blockchain.
- Polls for Transaction Result: Waits for the transaction result and ensures the transaction has reached the required block height.
- Fetches Merkle Path: Retrieves the Merkle path for the validated transaction.
- Handles Success: Updates the notification to show successful validation and returns necessary values.
- Handles Errors: Logs errors and returns
"error"if something goes wrong.
Step 3: Write a Function for Create NFT on dAppChain
Now, let's write the Create NFT on dAppChain function.
-
Scroll down to find the comment
// step 8 - Create a NFT on dAppChain. -
Replace the existing
createNftTokenOnSideChainfunction with this code snippet:
// step 8 - Create a NFT on dAppChain.
const createNftTokenOnSideChain = async (values: INftValidateResult) => {
  let createSideChainNFTLoadingId;
  try {
    createSideChainNFTLoadingId = toast.loading("Creating NFT on SideChain...");

    const CROSS_CHAIN_CREATE_TOKEN_PARAMS = {
      fromChainId: mainchain_from_chain_id,
      parentChainHeight: values.parentChainHeight,
      transactionBytes: Buffer.from(values.signedTx, "hex").toString("base64"),
      merklePath: values.merklePath,
    };

    await sideChainSmartContract?.callSendMethod(
      "CrossChainCreateToken",
      currentWalletAddress,
      CROSS_CHAIN_CREATE_TOKEN_PARAMS
    );

    toast.update(createSideChainNFTLoadingId, {
      render: "NFT Created Successfully On SideChain",
      type: "success",
      isLoading: false,
    });
    removeNotification(createSideChainNFTLoadingId);
    return "success";
  } catch (error) {
    handleError(createSideChainNFTLoadingId as number, error);
    return "error";
  }
};
Here's what the function does:
- Displays Loading Toast: Shows a notification indicating that the NFT is being created on the dAppChain.
- Prepares Cross-Chain Transaction Parameters: Constructs the parameters needed for creating the NFT on the dAppChain, including chain IDs, block height, transaction data, and Merkle path.
- Calls Smart Contract Method: Sends the transaction to the dAppChain smart contract to create the NFT.
- Handles Success: Updates the notification to show successful NFT creation on the dAppChain.
- Handles Errors: Logs errors and returns
"error"if something goes wrong.
Step 4: Write a Function for Issue NFT Token which has been Created on dAppChain.
Now, let's write the Issue NFT Function.
-
Scroll down to find the comment
// step 9 - Issue a NFT Function which has been Created on dAppChain. -
Replace the existing
issueNftOnSideChainfunction with this code snippet:
// step 9 - Issue a NFT Function which has been Created on dAppChain
const issueNftOnSideChain = async (values: {
  symbol: string;
  amount: string;
  memo: string;
}) => {
  let issuingNFTLoadingId
  try {
    issuingNFTLoadingId = toast.loading(
      "Issuing NFT on SideChain..."
    );
    const issueNftInput = {
      symbol: values.symbol,
      amount: values.amount,
      memo: values.memo,
      to: currentWalletAddress,
    };
    const result = await sideChainSmartContract?.callSendMethod(
      "Issue",
      currentWalletAddress,
      issueNftInput
    );
    console.log("========= result of createNewNft =========", result);

    toast.update(issuingNFTLoadingId, {
      render: "NFT Issue Successfully Executed",
      type: "success",
      isLoading: false,
    });
    removeNotification(issuingNFTLoadingId);
    toast.success("You will get NFT on your Wallet! It can take sometimes to get into your wallet");
    handleReturnClick();
    return "success";
  } catch (error) {
    handleError(issuingNFTLoadingId as number, error);
    setTransactionStatus(false);
    return "error";
  }
};
Here's what the function does:
- Displays Loading Toast: Shows a notification indicating that the NFT is being issued on the dAppChain.
- Prepares Issuance Input: Constructs the input parameters for issuing the NFT, including symbol, amount, memo, and recipient address.
- Calls Smart Contract Method: Sends the transaction to the dAppChain smart contract to issue the NFT.
- Handles Success: Updates the notification to show successful issuance and notifies the user that the NFT will appear in their wallet.
- Handles Errors: Logs and displays any error messages, updates the transaction status, and returns
"error".
Step 5: Create a Function to Call Necessary Functions for NFT Creation
Now, let's write the createNftToken Function.
-
Scroll down to find the comment
// step 10 - Call Necessary Function for Create NFT. -
Replace the existing
createNftTokenfunction with this code snippet:
// step 10 - Call Necessary Function for Create NFT
const createNftToken = async (values: INftParams) => {
  try {
    const mainChainResult = await createNFTOnMainChain(values);

    if (mainChainResult === "error") {
      setTransactionStatus(false);
      return;
    }
    await delay(3000);

    const validateNFTData: INftValidateResult | "error" = await validateNftToken(values);

    if (validateNFTData === "error") {
      setTransactionStatus(false);
      return;
    }

    const sideChainResult = await createNftTokenOnSideChain(validateNFTData);

    if (sideChainResult === "error") {
      setTransactionStatus(false);
      return;
    }

    await issueNftOnSideChain({
      symbol: values.symbol,
      amount: values.totalSupply,
      memo: "We are issuing nftToken",
    });
    setTransactionStatus(false);
  } catch (error) {
    setTransactionStatus(false);
    if (error instanceof Error) {
      toast.error( error.message);
    } else {
      toast.error( "An unexpected error occurred.");
    }
    return "error";
  }
};
Here's what the function does:
- Creates NFT on MainChain: Calls
createNFTOnMainChainto create the NFT on the MainChain. If it fails, it updates the transaction status and exits. - Validates NFT Token: Waits for 3 seconds, then calls
validateNftTokento validate the NFT. If validation fails, it updates the transaction status and exits. - Creates NFT on dAppChain: Calls
createNftTokenOnSideChainto create the NFT on the dAppChain using the validated data. If it fails, it updates the transaction status and exits. - Issues NFT on dAppChain: Calls
issueNftOnSideChainto issue the NFT. Updates the transaction status to false after completion. - Handles Errors: Catches and logs any errors, updates the transaction status, and displays an error notification.
Configure Submit Form
Now, let's write a function to call necessary functions for NFT creation.
-
Scroll down to find the comment
//Step 11 - Handle Submit Form. -
Replace the existing
onSubmitfunction with this code snippet:
//Step 11 - Handle Submit Form
const onSubmit = async (values: z.infer<typeof formSchema>) => {
  setTransactionStatus(true);

  if (isNftCollectionCreated) {
    // Already Collection Created
    // create NFT Token
    await createNftToken(values);
  } else {
    // create NFT Collection on MainChain
    const createResult = await createNftCollectionOnMainChain(values);

    if (createResult === "error") {
      setTransactionStatus(false);
      return;
    }
    // Validate NFT Collection
    const validateCollectionResult = await validateNftCollectionInfo(
      createResult
    );

    if (validateCollectionResult === "error") {
      setTransactionStatus(false);
      return;
    }

    // create NFT Collection on dAppChain
    await createCollectionOnSideChain(
      validateCollectionResult.transactionId,
      validateCollectionResult.signedTx,
      validateCollectionResult.BlockNumber
    );
  }
};
Here's what the function does:
- Starts Transaction: Sets the transaction status to true.
- Checks NFT Collection Status: If the NFT collection is already created, calls
createNftTokento create the NFT token. - Creates and Validates NFT Collection: If the collection isn’t created, calls
createNftCollectionOnMainChainto create it. If successful, validates the NFT collection withvalidateNftCollectionInfo. - Creates Collection on dAppChain: If validation is successful, calls
createCollectionOnSideChainto create the collection on the dAppChain. - Handles Errors: Updates the transaction status to false and exits if any step fails.
Fetch NFT Data
Let's write the Function for the fetch NFT data from user's Wallet using API.
Step 1: Locate the File
- go to the
src/lib/commonFunctions.tsfile.
Step 2: Write the Helper Functions for fetch the NFT data
-
The
commonFunctions.tsfile is contains the helpers function for fetch NFT and etc. -
Find the comment
// fetch NFT Data from Indexer API. -
Replace the existing
fetchUserNftDatafunction with this code snippet:
// fetch NFT Data from Indexer API
export const fetchUserNftData = async (address:string) => {

  const url = 'add_your_aeindexer_api';
  const headers = { 'Content-Type': 'application/json'};

  const body = JSON.stringify({
    query: `
      query {
        account(input: { chainId: "tDVW", address: "${address}" }) {
          symbol
          amount
          address
          tokenName
          metadata {
            chainId
            block {
              blockHeight
            }
          }
        }
      }
    `,
    variables: {},
  });

  try {
    const response = await fetch(url, {
      method: 'POST',
      headers: headers,
      body: body,
    });

    if (!response.ok) {
      throw new Error(`HTTP error! status: ${response.status}`);
    }

    const result = await response.json();
    return result.data.account;
  } catch (error) {
    console.error('Error fetching data:', error);
    return "error";
  }
};
ℹ️ Note: Ensure that you are updating your aeindexer api with "add_your_aeindexer_api" value in url variable.
Here's what the function does:
- Retrieves NFT Data: The function
fetchUserNftDatafetches the NFT data for a given owner using AeIndexer API. We have Prepared all necessary function for fetch NFT Data from User's Wallet. Now, Let's callfetchUserNftDataon necessary page.
Step 3: Call fetchUserNftData Functions on Home Page
-
go to the
src/pages/home/index.tsxfile. -
The
home/index.tsxfile contains the Home Page of NFT dApp -
Find the comment
// get NFT Data from User's wallet. -
Replace the existing
getNFTDatafunction with this code snippet:
// get NFT Data from User's wallet
const getNFTData = async () => {
  const result = await fetchUserNftData(currentWalletAddress as string);
  if (result !== "error") {
    setUserNfts(result);
  }
  setLoading(false);
};
Here's what the function does:
- Fetches NFT Data: The function
getNFTDataretrieves NFT data from the user's wallet. - Calls Fetch Function: It calls the
fetchUserNftDatafunction with thecurrentWalletAddressparameters. - Handles Result: It checks the result:
- If the result is not "error", it updates the state with the fetched NFT data by calling
setUserNfts(result).
- If the result is not "error", it updates the state with the fetched NFT data by calling
- Updates Loading State: Regardless of the result, it sets the loading state to false by calling
setLoading(false).
Step 4: Call fetchUserNftData Functions on Profile Page
-
go to the
src/pages/profile/index.tsxfile. -
The
profile/index.tsxfile contains the Home Page of NFT dApp -
Find the comment
// get NFT Data from User's wallet. -
Replace the existing
getNFTDatafunction with this code snippet:
// get NFT Data from User's wallet
const getNFTData = async () => {
  const result = await fetchUserNftData(currentWalletAddress as string);
  if (result !== "error") {
    setUserNfts(result);
  }
  setLoading(false);
};
Here's what the function does:
- Fetches NFT Data: The function
getNFTDataretrieves NFT data from the user's wallet. - Calls Fetch Function: It calls the
fetchUserNftDatafunction with thecurrentWalletAddressparameters. - Handles Result: It checks the result:
- If the result is not "error", it updates the state with the fetched NFT data by calling
setUserNfts(result).
- If the result is not "error", it updates the state with the fetched NFT data by calling
- Updates Loading State: Regardless of the result, it sets the loading state to false by calling
setLoading(false).
Transfer NFT Token
As we have completed Create and Fetch NFT so now it's time to Transfer NFT.
So now let's Transfer NFT to other wallet now.
Step 1: Locate the File
- go to the
src/pages/transfer-nft/index.tsxfile. This file is the Transfer NFT page where users can enter details like theaddress,amountandmemo.
Step 2: Prepare Form for Transfer NFT
-
Find the comment
// Configure NFT Transfer Form. -
Replace the form variable with this code snippet:
// Configure NFT Transfer Form
const form = useForm<z.infer<typeof formSchema>>({
  resolver: zodResolver(formSchema),
  defaultValues: {
    address: "",
    amount: "0",
    memo: "",
  },
});
Here's what the function does:
- Initializes a new form variable with default values needed to transfer a nft.
- Fields include:
address,amount, andmemo. Now your form is ready for users to fill in the necessary details for their NFTs Transfer function Interaction.
Step 3: Create NFT Transfer Function
- Find the comment
// Transfer NFT to Other Wallet. - Replace the form variable with this code snippet:
// Transfer NFT to Other Wallet
const transferNftToOtherAccount = async (values: {
  address: string;
  amount: string;
  memo: string;
}) => {
  if (Number(values.amount) > Number(nftBalance)) {
    toast.error("Amount must be Less than or Equal to Supply Balance");
    return;
  }
  const transferNFTLoadingId = toast.loading("Transfer Transaction Executing");
  try {
    const transferNtfInput = {
      to: values.address,
      symbol: nftSymbol,
      amount: +values.amount,
      memo: values.memo,
    };
    await sideChainSmartContract?.callSendMethod(
      "Transfer",
      currentWalletAddress,
      transferNtfInput
    );
    toast.update(transferNFTLoadingId, {
      render: "NFT Transferred Successfully!",
      type: "success",
      isLoading: false,
    });
    removeNotification(transferNFTLoadingId);
    await delay(3000);
    handleReturnClick();
  } catch (error) {
    if (error instanceof Error) {
      toast.error(error.message);
    } else {
      toast.error("An unexpected error occurred.");
    }
  };
};
Here's what the function does:
- Transfers NFT to Another Wallet: The function
transferNftToOtherAccounttransfers a specified amount of an NFT to another wallet. - Parameters: It takes a
valuesobject containing:address: The destination wallet address.amount: The amount of NFT to transfer.memo: An optional memo for the transfer.
- Checks Balance: It checks if the transfer amount is greater than the available
nftBalance. If it is, it shows an error message and exits the function. - Displays Loading Toast: It displays a loading toast notification indicating that the transfer transaction is executing.
- Prepares Transfer Data: It prepares the transfer data in the
transferNtfInputobject, which includes the destination address, NFT symbol, transfer amount, and memo. - Executes Transfer: It calls the
Transfermethod on the side chain smart contract to execute the transfer. - Success Handling: If the transfer is successful:
- It updates the toast notification to indicate success.
- It removes the loading notification.
- It waits for 3 seconds using
await delay(3000). - It calls
handleReturnClickto handle any post-transfer actions.
- Error Handling: If an error occurs during the transfer:
- It logs the error message to the console.
- It displays an error toast notification with the error message.
Step 4: Configure on handle Submit Form
-
Find the comment
// Handle Transfer Submit Form. -
Replace the form variable with this code snippet:
// Handle Transfer Submit Form
function onSubmit(values: z.infer<typeof formSchema>) {
  transferNftToOtherAccount(values);
}
Here's what the function does:
- Handles Form Submission: The function
onSubmithandles the submission of a transfer form. - Parameters: It takes
values, which is inferred from theformSchemaand represents the form's data. - Calls Transfer Function: It calls the
transferNftToOtherAccountfunction with the form values to initiate the NFT transfer. Now that we've written all the necessary frontend functions and components, we're ready to run the NFT dApp application in the next step.
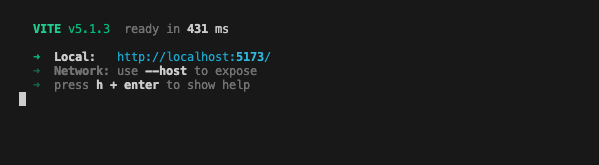
Run Application
In this step, we will run the NFT dApp application.
- To begin, run the following command on your terminal.
npm run dev
ℹ️ Note: Ensure that you are running this command under the nft/2-dapp folder.
-
You should observe the following as shown below.
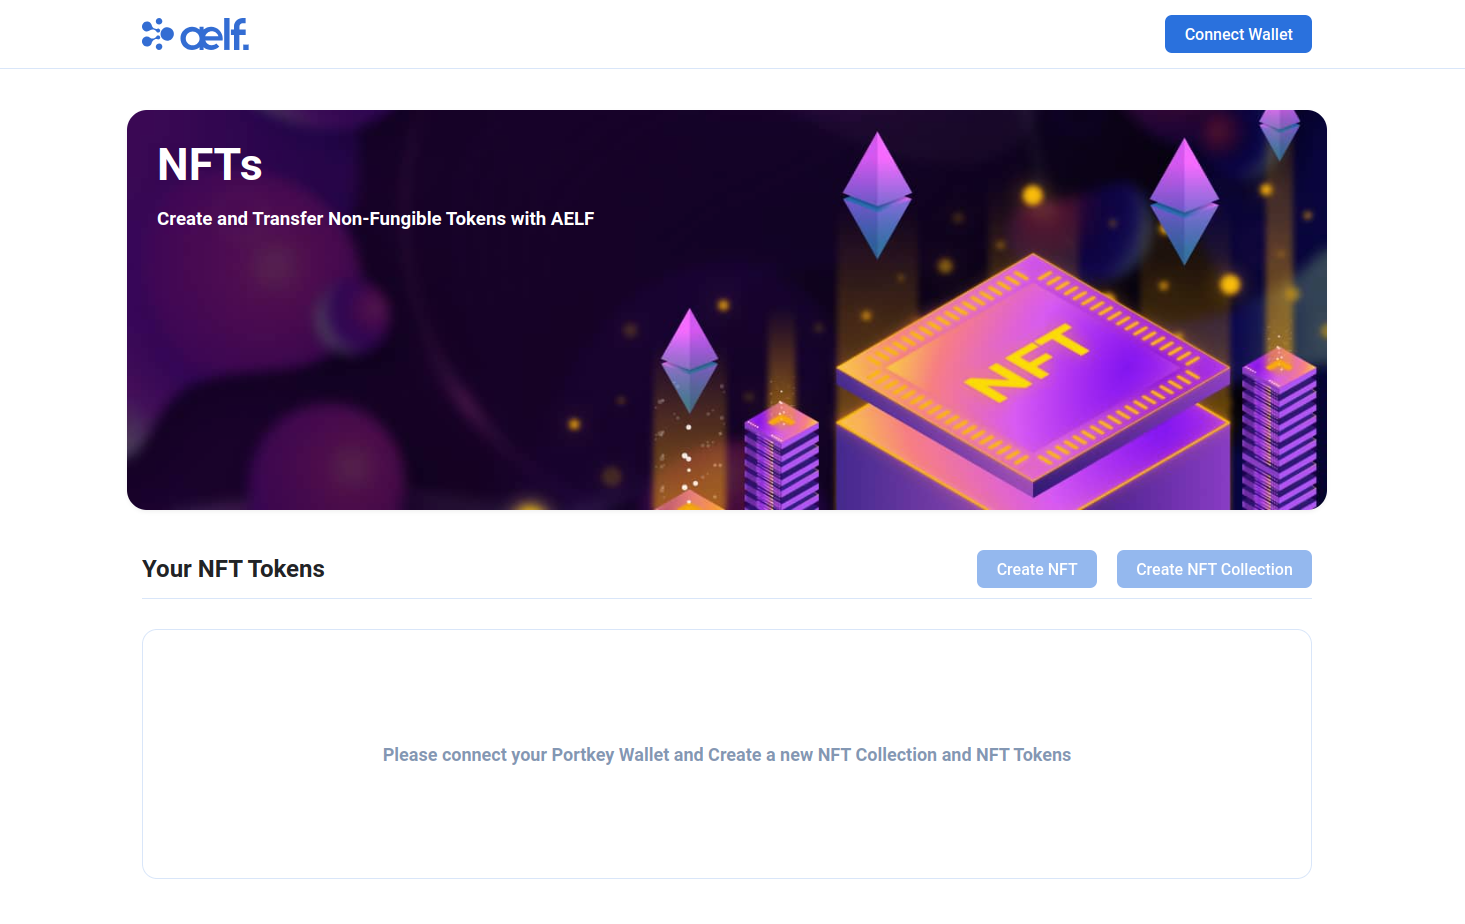
-
Upon clicking on the localhost URL, you should be directed to the NFTs landing page as shown below.
If you are developing and testing this with GitHub codespace, you can use Port Forward to test the web server that is running in codespace, here is the link on how to usePort forward for codespace https://docs.github.com/en/codespaces/developing-in-a-codespace/forwarding-ports-in-your-codespace
-
Usually codespace will automatically forward port, you should see a pop-up message at the bottom right of your codespace browser window as shown in the diagram below:
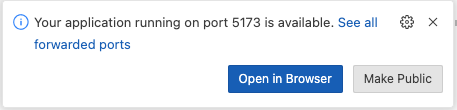
-
Click the link to open the NFT dApp in the browser.
Create Portkey Wallet
Portkey is the first AA wallet from aelf's ecosystem, migrating users, developers and projects from Web2 to Web3 with DID solution. Users can swiftly log into Portkey via their Web2 social info with no private keys or mnemonics required. Underpinned by social recovery and decentralized guardian design, Portkey safeguards users' assets from centralized control and theft. Portkey has a unique payment delegation mechanism which enables interested parties to function as delegatees to pay for user activities on users' behalf. This means that users can create accounts for free and fees for other usages may also be covered in Portkey. Portkey also provides crypto on/off-ramp services, allowing users to exchange fiat with crypto freely. It supports the storage and management of various digital assets such as tokens, NFTs, etc. The compatibility with multi-chains and seamless connection to all kinds of DApps makes Portkey a great way to enter the world of Web3. With DID solution as its core, Portkey provides both Portkey Wallet and Portkey SDKs. For more information, you may visit the official documentation for Portkey at https://doc.portkey.finance/.
-
Download the Chrome extension for Portkey from https://chromewebstore.google.com/detail/portkey-wallet/iglbgmakmggfkoidiagnhknlndljlolb.
infoThe Portkey extension supports Chrome browser only (for now). Please ensure that you are using Chrome browser. You may download Chrome from https://www.google.com/intl/en_sg/chrome/.
-
Once you have downloaded the extension, you should see the following on your browser as shown below.
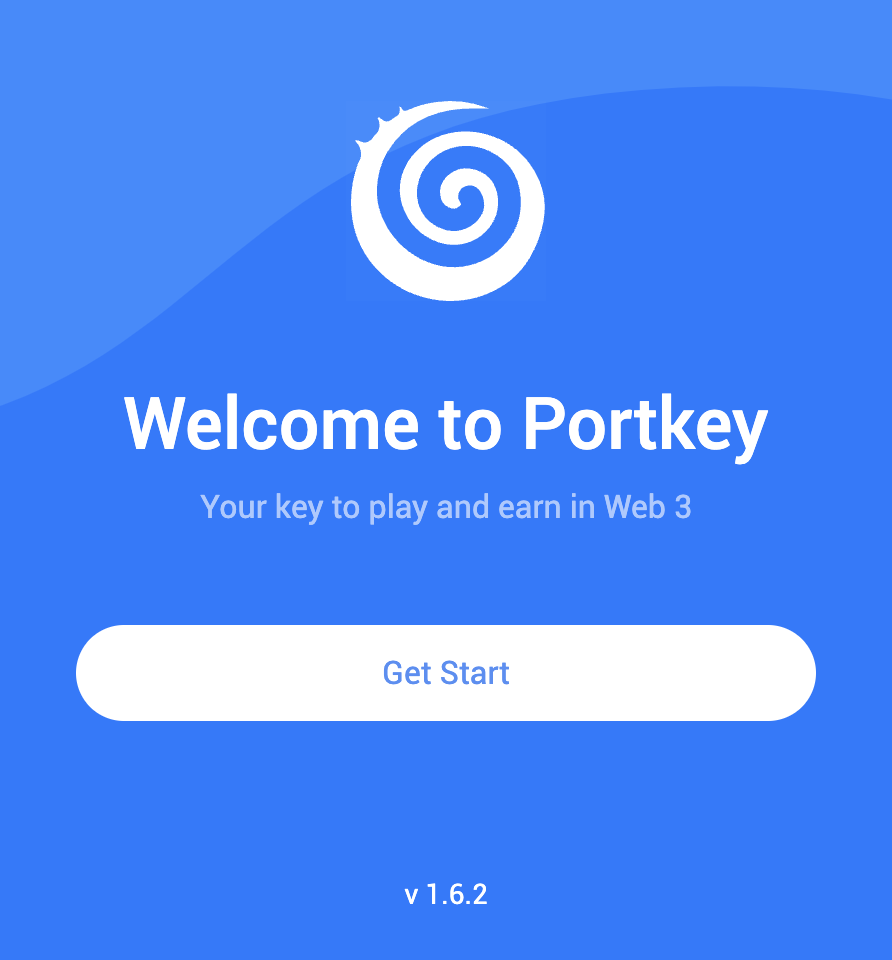
-
Click on
Get Startand you should see the following interface as shown below.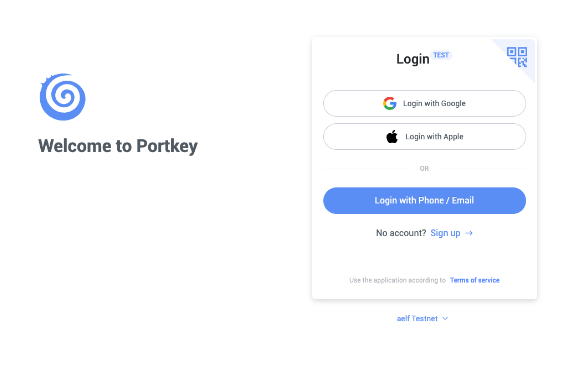
Sign up
-
Switch to aelf Testnet network by selecting it:
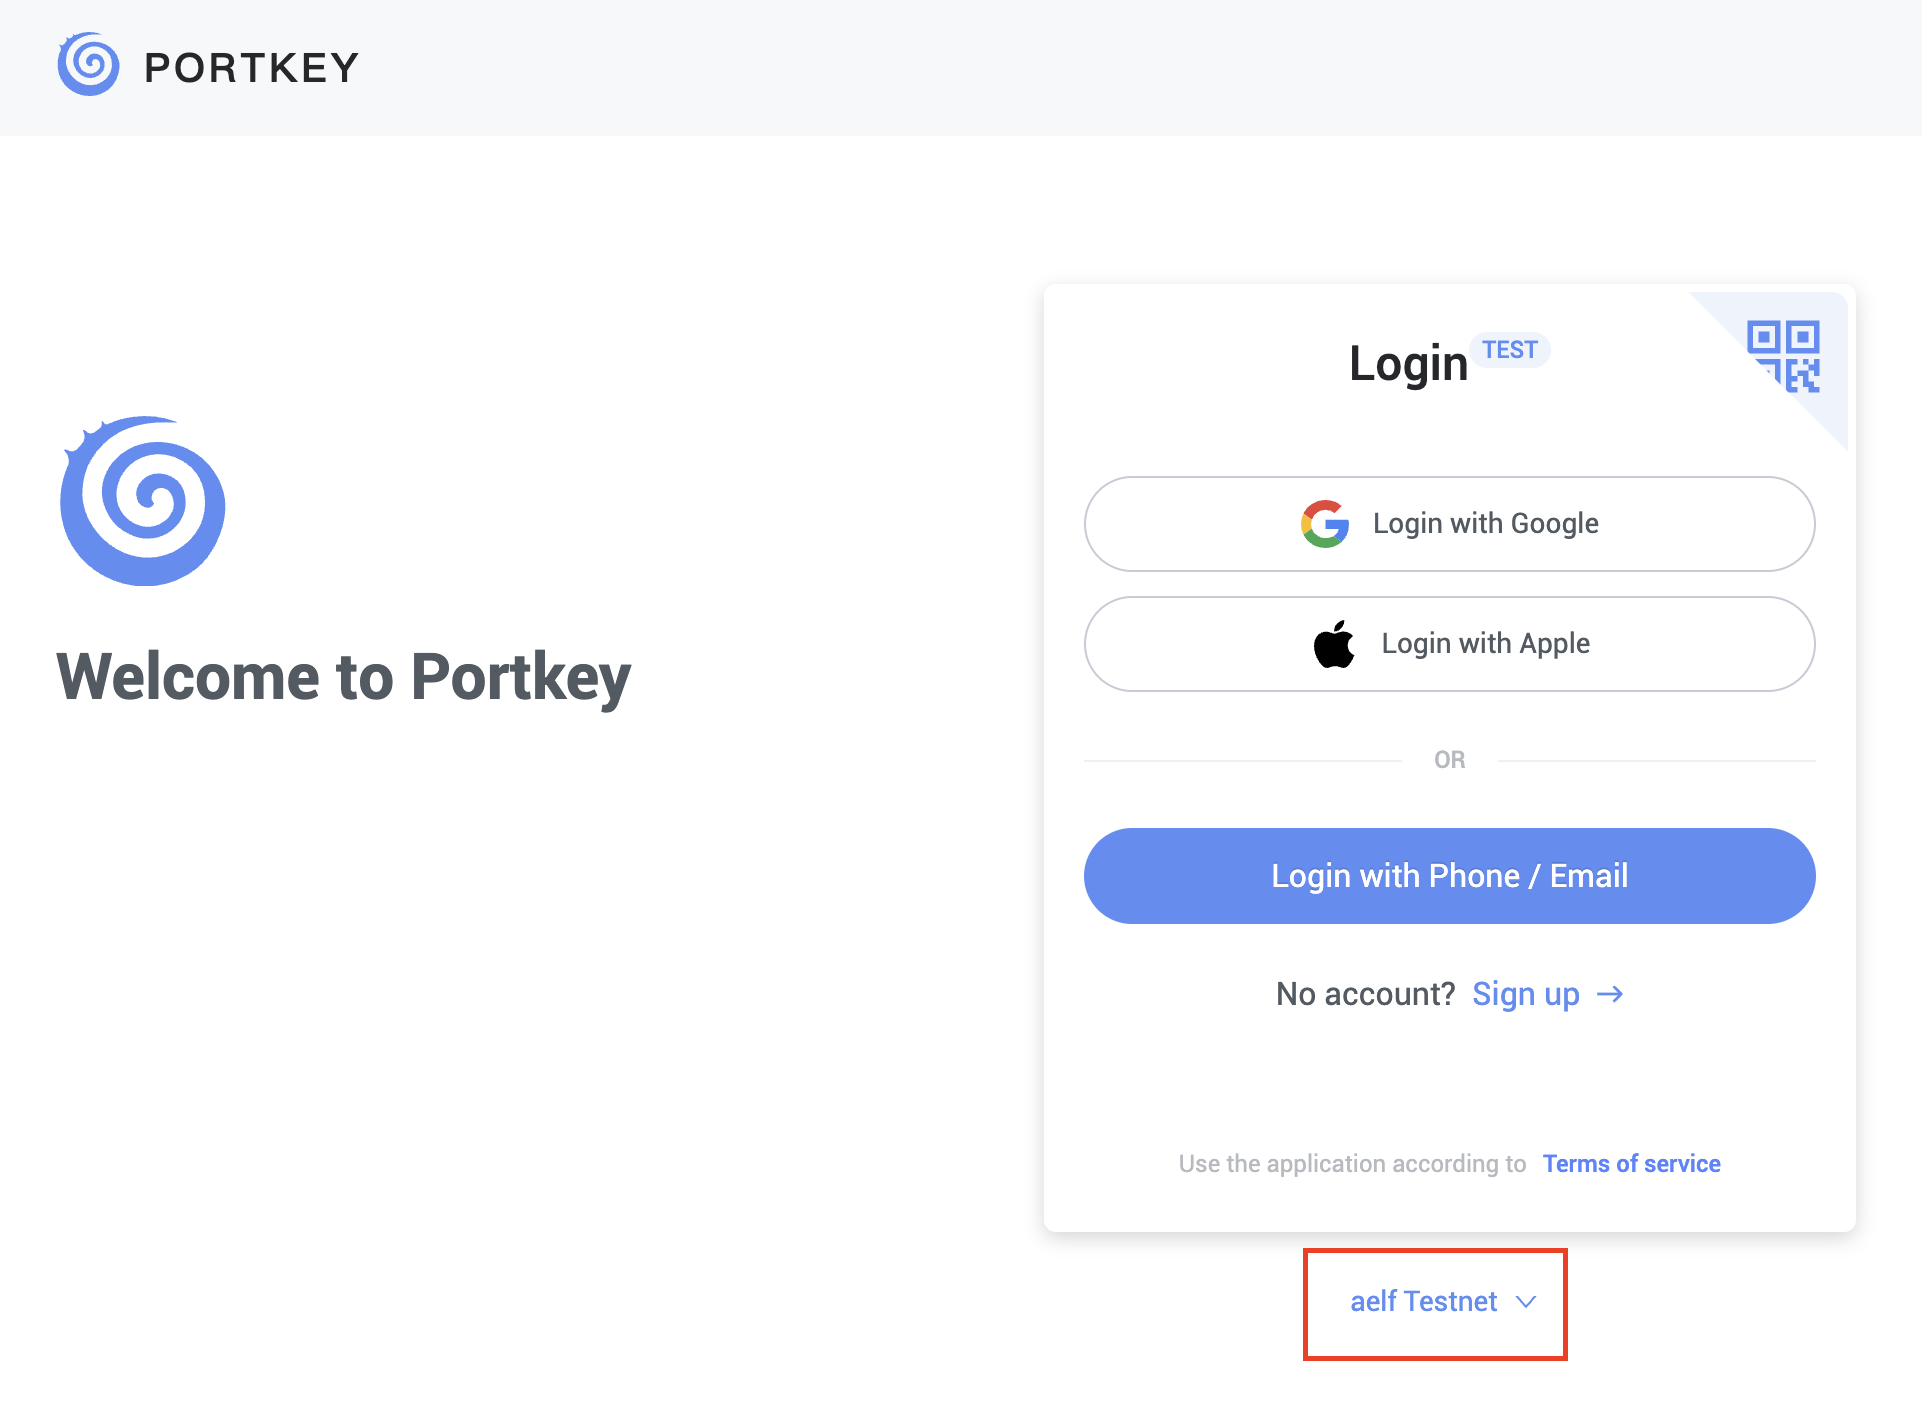
Please make sure you are using aelf Testnet in order to be able to receive your testnet tokens from the Faucet.
-
Proceed to sign up with a Google Account or your preferred login method and complete the necessary accounts creation prompts and you should observe the following interface once you have signed up.
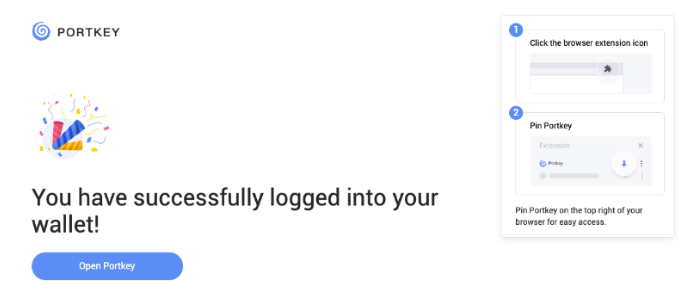
With that, you have successfully created your very first Portkey wallet within seconds. How easy was that?
It is highly recommended to pin the Portkey wallet extension for easier access and navigation to your Portkey wallet!
-
Next, click on ‘Open Portkey’ and you should now observe the following as shown below.
Connect Portkey Wallet
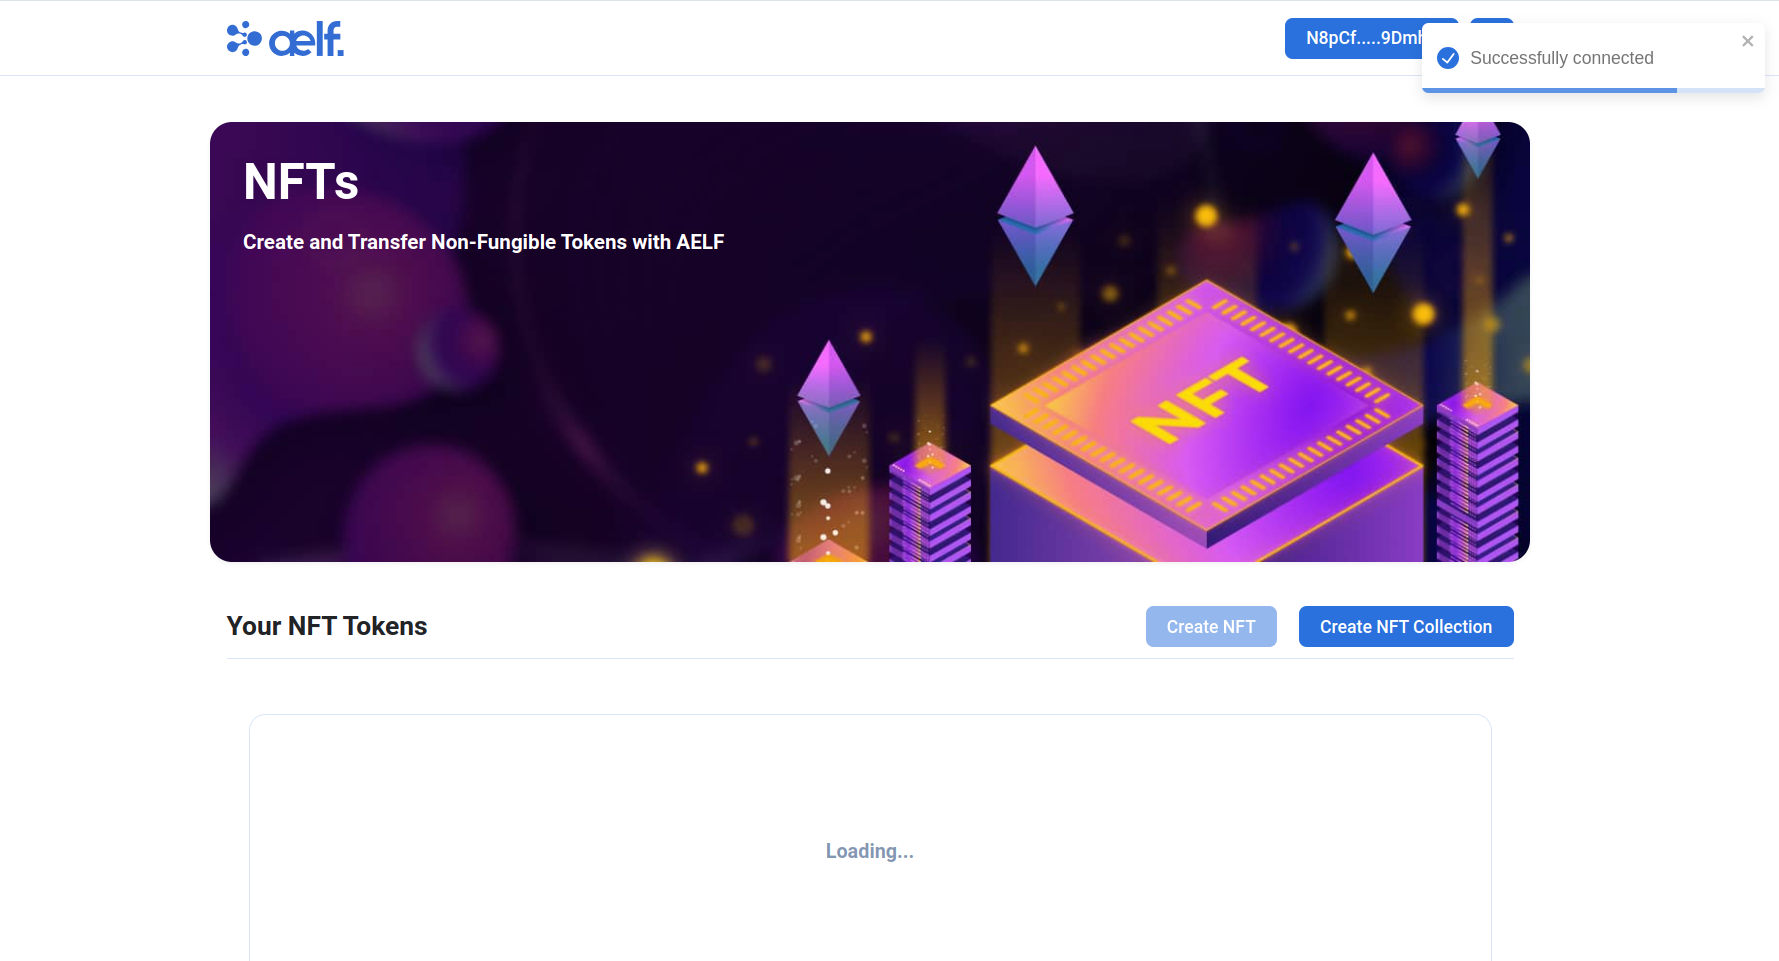
-
Click on "Connect Wallet" to connect your Portkey wallet.

-
The button will change to "Your Wallet Address" when the connection is successful.
Create NFT Collection
-
Click on "Create NFT Collection" button to create new NFT Collection.
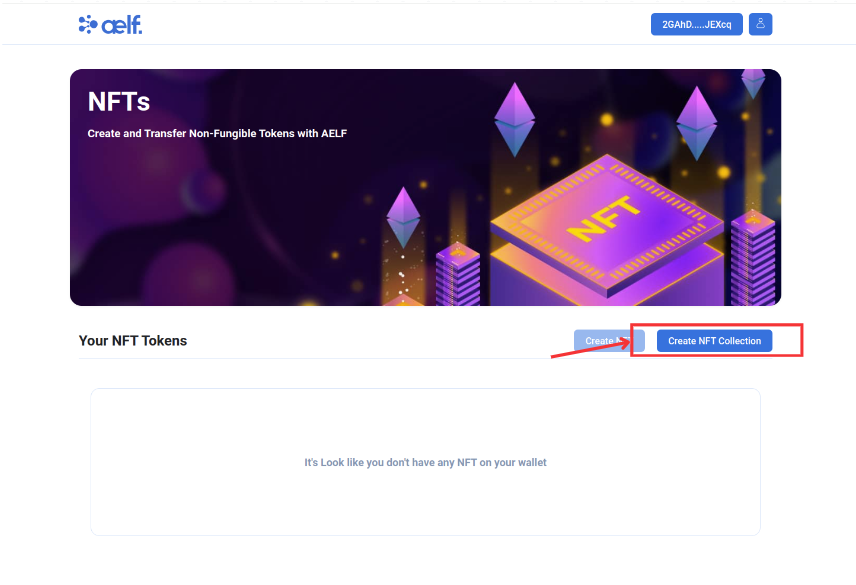
-
You will be redirect this create NFT Collection page
-
Now you need NFT Seed for create the new collection.
-
If you Don't have NFT Seed then please follow this steps to get it.
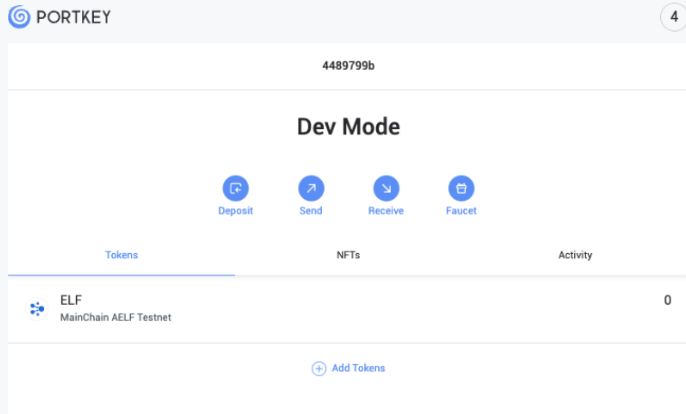
-
Open you Portkey Wallet and you will find the NFT Seed on NFT Tab.
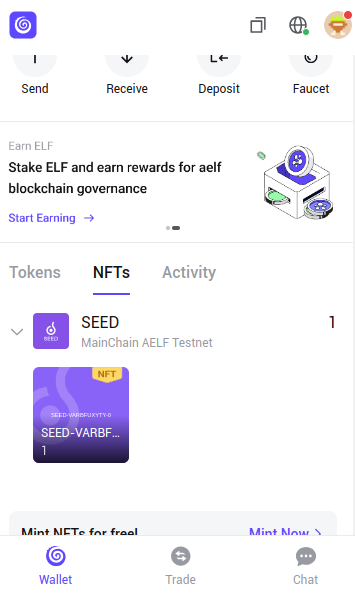
-
Copy the Token Symbol and use it on
Symbolfield of Form Submission of Create Collection. -
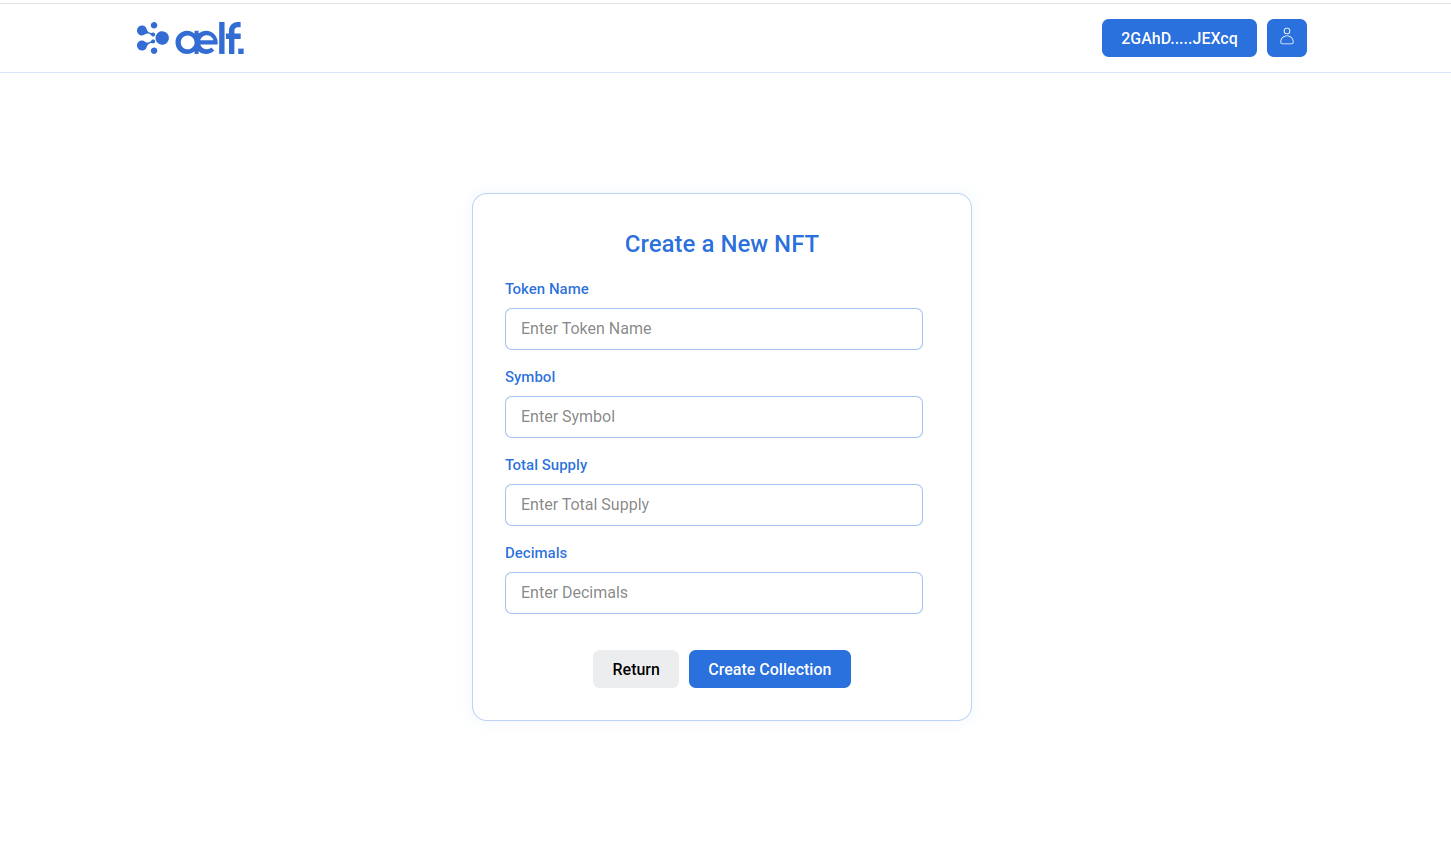
Fill all other Necessary Fields like
Token Namemeans(Collection Name),Total Supply,Decimals.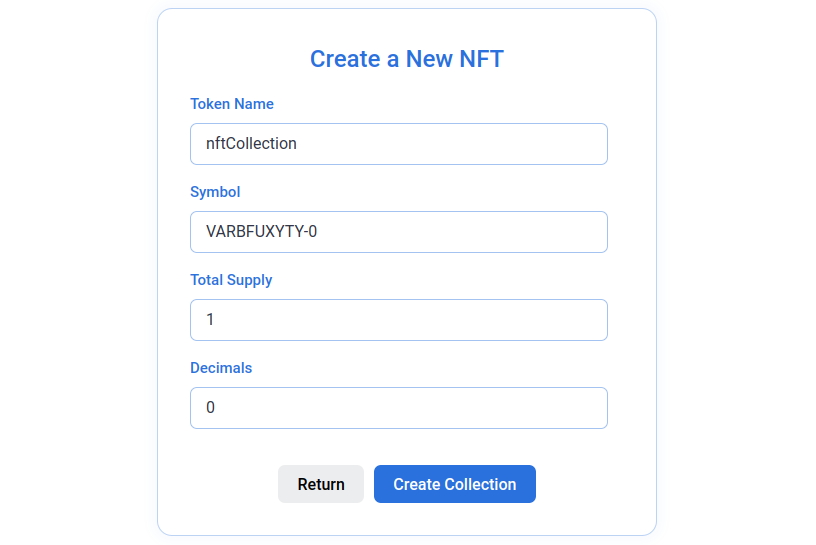
-
Click on Create Collection Button.
-
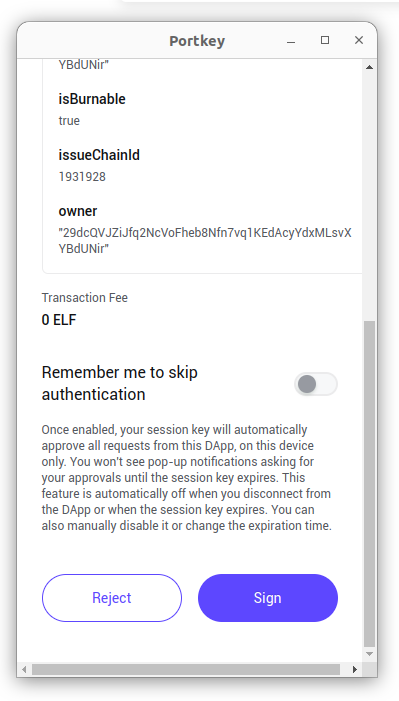
You will get Transaction Request on your Portkey Wallet so Sign In the Transaction.
-
After Sign In the Transaction, Please wait to complete these steps. It will take approx 3-4 minutes.
- NFT Collection Created Successfully On MainChain.
- Validating Token Successfully Executed.
- Collection was Created Successfully On dAppChain.
Create NFT Token
-
Once you done with create collection process the Now, It's time to Create NFT.
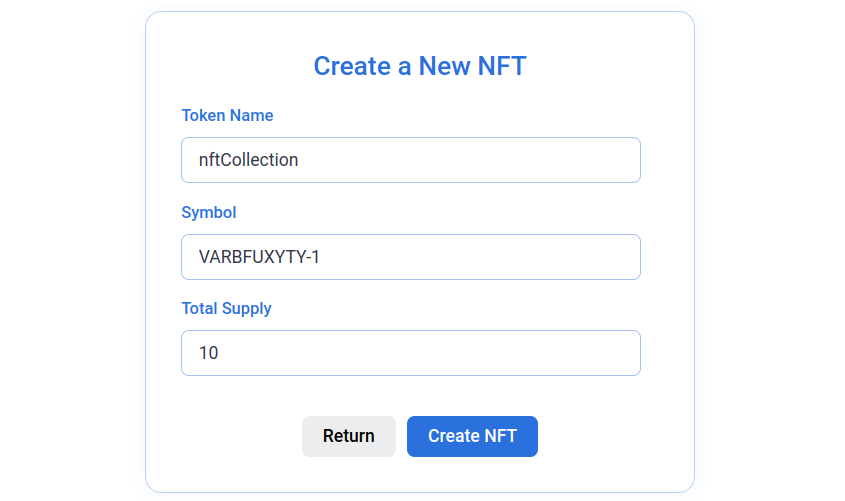
Please make sure the Symbol will be change to [your_symbol]-id. ie VARBFUXYTY-1, VARBFUXYTY-2, VARBFUXYTY-3 etc. It means you can only create Collection with id 0 like VARBFUXYTY-0 and for NFT Token Please use another integer as a id in Symbol.
-
Fill all Necessary Fields in Create NFT Form like
Token Namemeans(Collection Name),Symbolmeans(NFT Symbol), andTotal Supply. -
Click on Create NFT Button.
-
You will get Transaction Request on your Portkey Wallet so Sign In the Transaction for Create NFT as above you got for Create NFT Collection
-
After Sign In the Transaction, Please wait to complete these steps. It will take approx 3-4 minutes.
- NFT Created Successfully on MainChain.
- Validating NFT Successfully Executed.
- NFT Created Successfully On dAppChain.
- You will get NFT on your Wallet! It can take sometimes to get into your wallet.
-
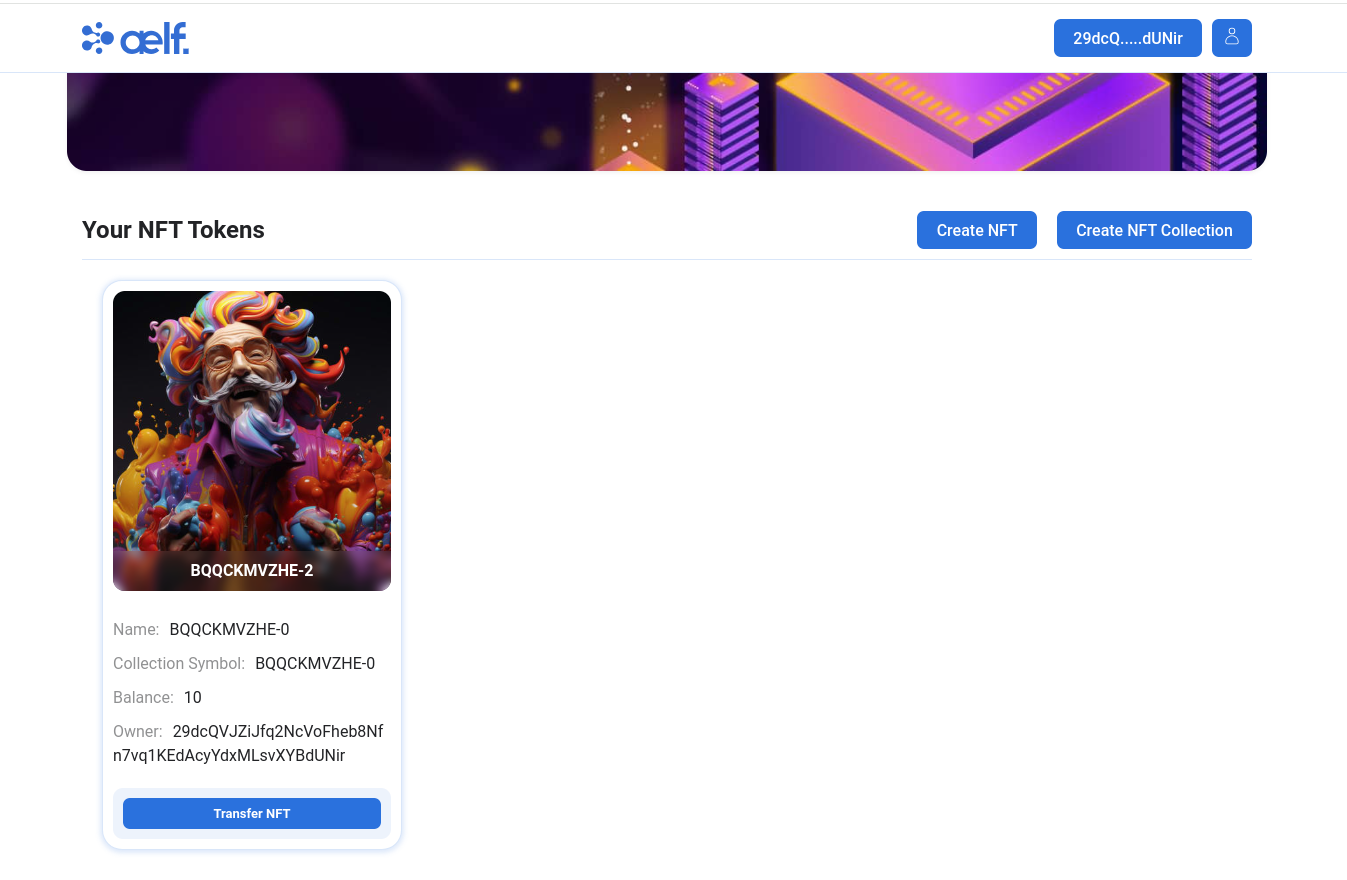
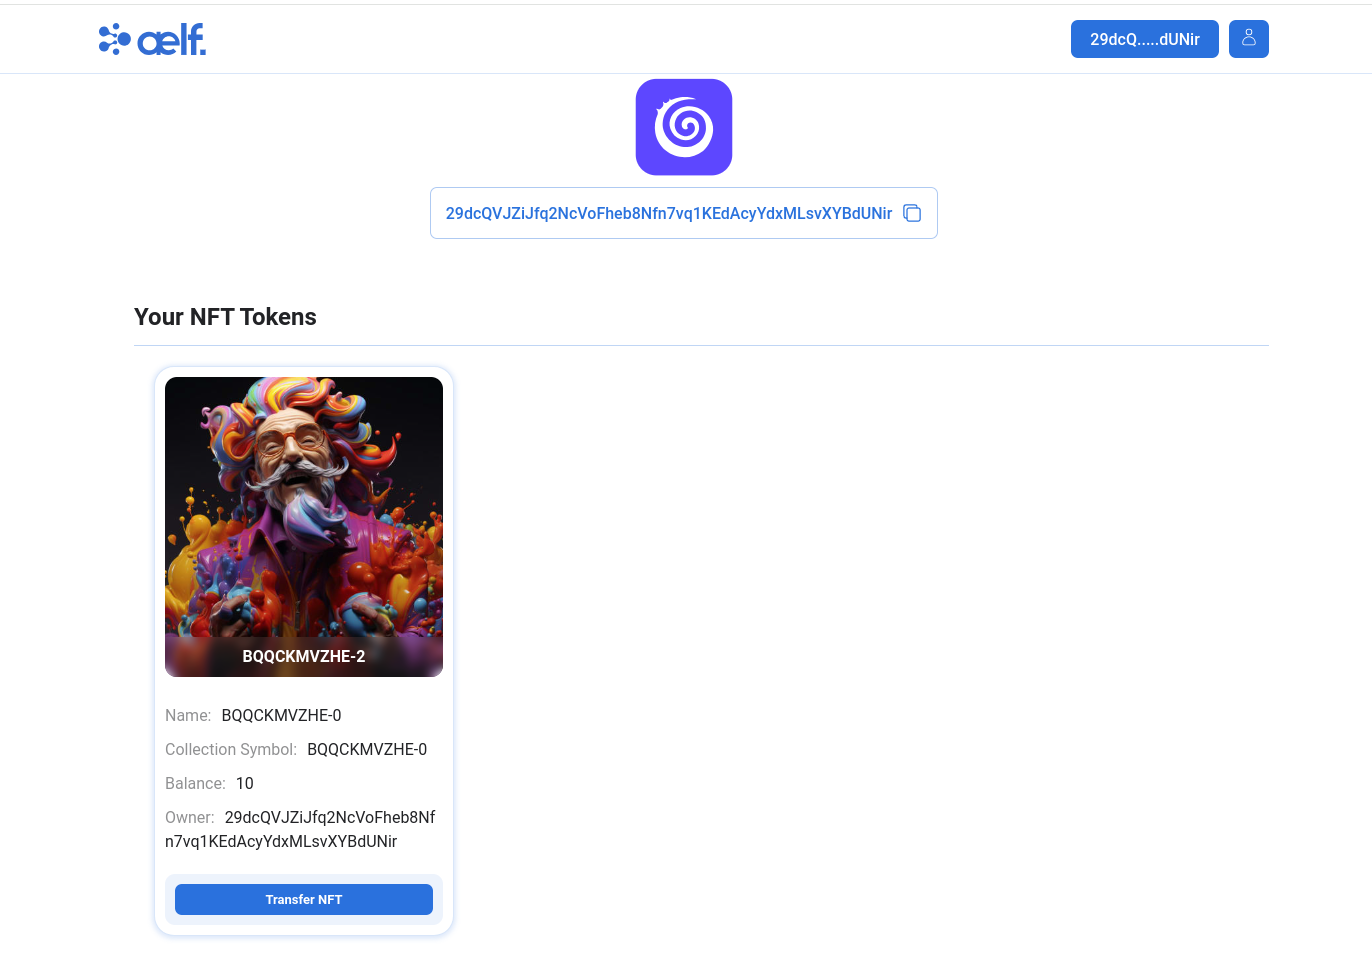
After Successfully Create NFT, Now you redirected to Home page and as you can see you will get the NFT in your account. (It' take some time to store your NFT in your wallet so please reload the page multiple times till you get the NFT).
-
You will also able you access you NFT data on your Profile Page.
Transfer NFT Token
-
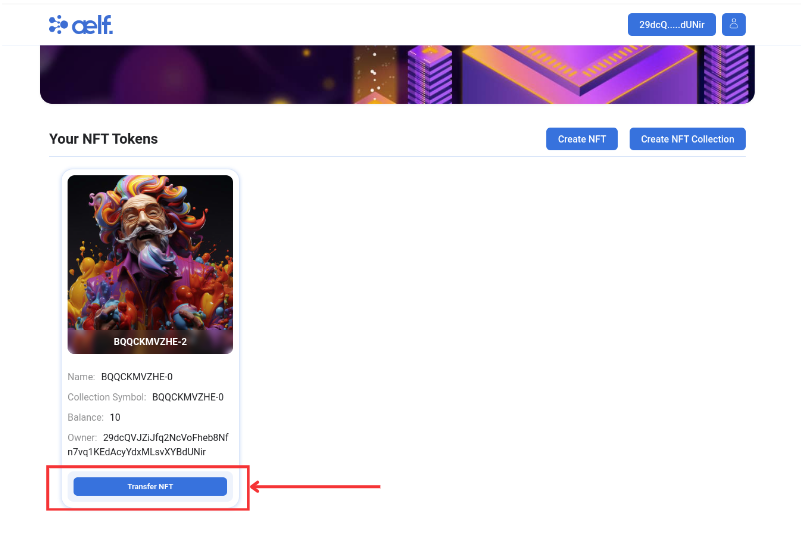
Once you get NFT in your account like above image then it's time to transfer NFT to another account.
-
Please Click on "Transfer NFT" Button.
-
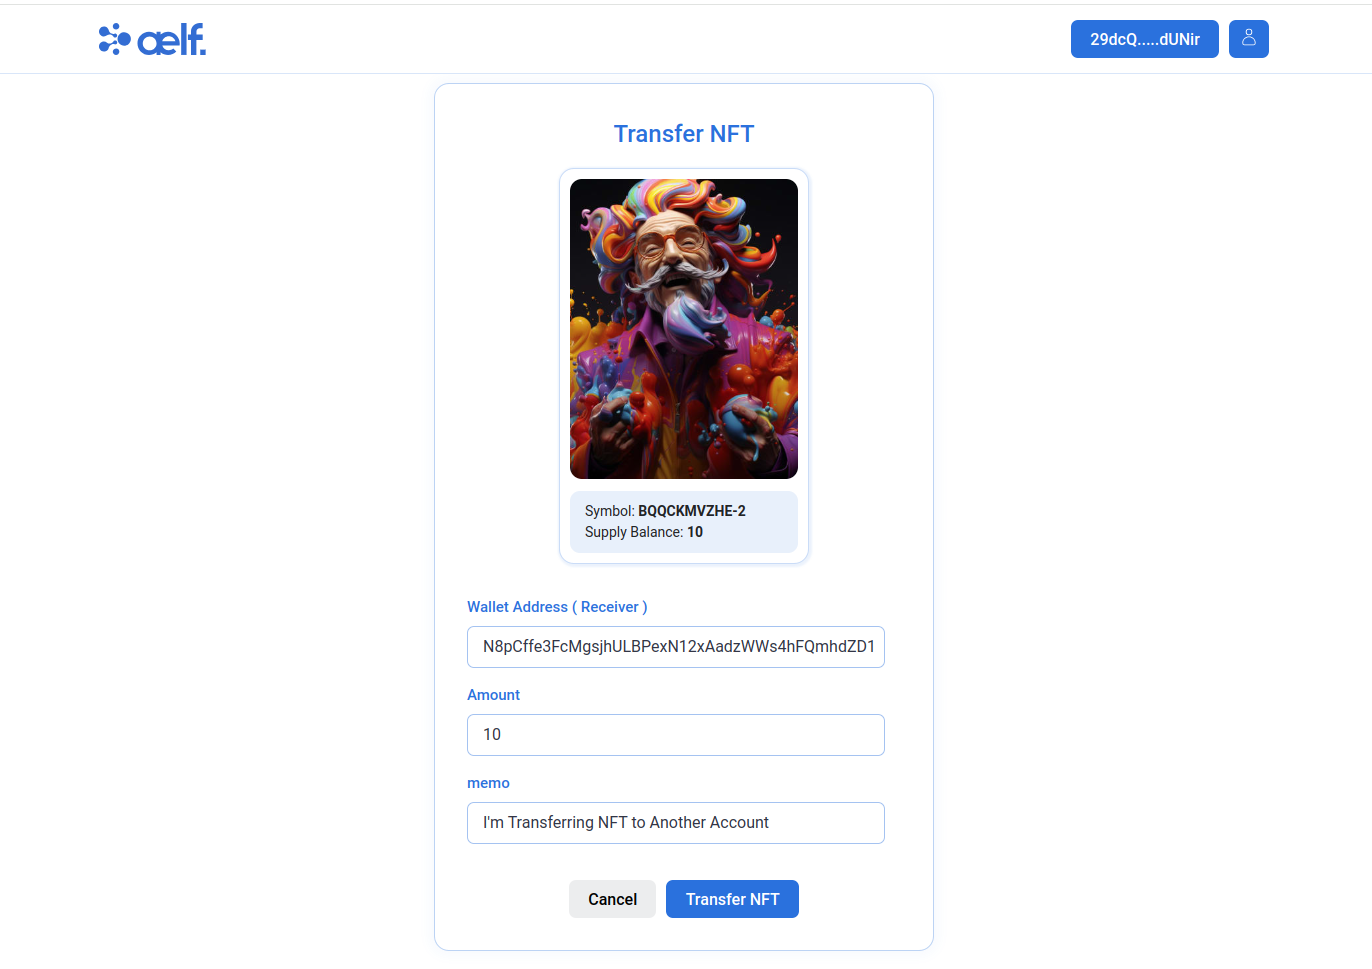
Now you will be redirected to Transfer NFT page.
-
Please Fill all the Necessary Fields for Transfer NFT to another account like below image 👇.
-
Click on Transfer NFT button.
-
Your NFT Transfer Successfully to another account.
🎉 Congratulations Learners! You have successfully built your NFT dApp and this is no mean feat!
🎯 Conclusion
🎉 Congratulations on completing the advanced NFT dApp tutorial with AEIndexer on the aelf blockchain! 🎉 You've successfully mastered not only the fundamentals of NFT development but also the sophisticated techniques of data indexing and multi-layered interactions. 🌟
📚 What You've Learned
Through this advanced tutorial, you’ve gained expertise in:
- 🛠️ Setting Up Your Development Environment: Prepared a robust foundation for smooth development and deployment processes.
- 📂 Creating and Configuring AEIndexer:Learned to set up AeIndexer in AeFinder to manage and index NFT data efficiently.
- 🖋️ Developing NFT AeIndexer: Built a structured, scalable project with customized files for NFT indexing and optimized data organization.
- 🚀 Deploying AeIndexer: Deployed and integrated the AeIndexer to enhance querying capabilities within your dApp.
- 🔍 Querying Indexed Data: Enabled fast and accurate retrieval of NFT-related data using indexed results.
- 🌱 Obtaining NFT Seed: Familiarized yourself with the NFT Faucet for initializing NFT creation.
- 💻 Smart Contract Interaction through Frontend: Configured your dApp for end-to-end functionality, including wallet connection, form-based NFT creation, and token transfers.
🔍 Final Output
By the end of this journey, you’ve accomplished:
- 🌐 Successfully creating and deploying an AEIndexer for seamless NFT data indexing.
- 🎨 Developing and interacting with NFT collections and tokens through a fully configured frontend.
- �⚡ Optimizing dApp performance with efficient querying of indexed blockchain data.
➡️ What's Next?
With a firm grasp of advanced indexing and NFT development, you're ready to push the boundaries of blockchain technology even further. Consider exploring:
- 📊 Advanced Data Indexing Strategies: Scale your AEIndexer to support complex queries and large datasets.
- 🔒 Enhanced Smart Contract Logic: Strengthen your contracts with innovative features and robust security protocols.
- 🌐 Cross-Chain NFT Interoperability: Expand your dApp’s functionality by exploring how aelf connects blockchains seamlessly.
Your journey in blockchain innovation is just beginning. Keep experimenting, building, and shaping the future of decentralized applications with aelf! 🚀 Happy coding and indexing! 😊