Donation dApp
Description: The Donation dApp contract is moderately complex, enabling functionalities such as creating, editing, and deleting donation campaigns, tracking donations, and rewarding contributors. It also supports user-specific data retrieval and ensures secure interactions for managing ELF token-based campaigns.
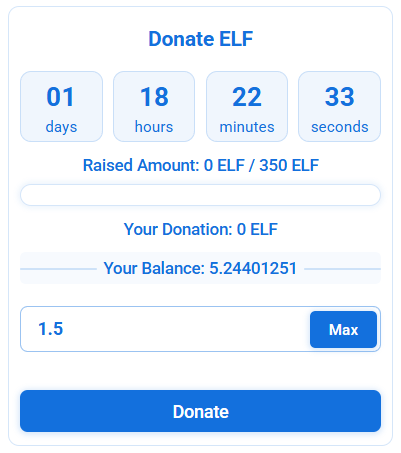
Purpose: To provide a practical understanding of donation management systems using smart contracts, focusing on features like campaign creation, user-specific interactions, secure fund management, and reward distribution to enhance blockchain-based philanthropy. This tutorial also emphasizes unit testing practices for smart contracts to ensure reliability and security.
Difficulty Level: Moderate
Step 1 - Setting up your development environment
- Local
- Codespaces
- Basic knowledge of terminal commands
- IDE - Install VS Code
Note for Apple Silicon users:
Ensure that Rosetta is installed, if it is not, use the following command:
softwareupdate --install-rosetta
Install Required Packages
- Install dotnet 8.0.x SDK
- Install aelf contract templates
- Linux and macOs
- Windows
dotnet new --install AElf.ContractTemplates
dotnet new install AElf.ContractTemplates
AELF.ContractTemplates contains various predefined templates for the ease of developing smart contracts on the aelf blockchain.
- Install aelf deploy tool
dotnet tool install --global aelf.deploy
aelf.deploy is a utility tool for deploying smart contracts on the aelf blockchain. Please remember to export PATH after installing aelf.deploy.
ℹ️ Note: If you have installed aelf.deploy and your terminal says that there is no such command available, please uninstall and install aelf.deploy.
Install Node.js and Yarn
Install aelf-command
- Linux and macOs
- Windows
sudo npm i -g aelf-command
npm i -g aelf-command
aelf-command is a CLI tool for interacting with the aelf blockchain, enabling tasks like creating wallets and managing transactions. Provide required permissions while installing aelf-command globally.
- Visit aelf-devcontainer-template.
- Click the
Use this templatebutton. ChooseCreate a new repository. - Enter a suitable repository name. Click
Create repository. - Within the GitHub interface of your new repository, click on
Code. SelectCodespaces. - Click on the
+sign to create a new Codespace. - After some time, your workspace will load with the contents of the repository. You can now continue your development using GitHub Codespaces.
Step 2 - Develop Smart Contract
Start Your Smart Contract Project
-
Open your
Terminal. -
Enter the following command to generate a new project:
mkdir donation
cd donation
dotnet new aelf -n DonationApp
Adding Your Smart Contract Code
Now that we have a template donation project, we can customize the template to incorporate our own contract logic. Let's start by implementing methods to provide basic functionality for managing donation campaigns and handling donations.
- Enter this command in your
Terminal.
cd src
Defining Methods and Messages
- Rename the file name from
Protobuf/contract/hello_world_contract.prototodonation_contract.proto:
mv Protobuf/contract/hello_world_contract.proto Protobuf/contract/donation_contract.proto
- Open the project with your IDE.
Contract State Definition
Update DonationAppState.cs file in the src directory:
using AElf.Sdk.CSharp.State;
using AElf.Types;
using System.Collections.Generic;

namespace AElf.Contracts.DonationApp
{
    public partial class DonationAppState : ContractState
    {
        // A state to check if contract is initialized
        public BoolState Initialized { get; set; }

        // A state to store the owner address
        public SingletonState<Address> Owner { get; set; }

        // Maps campaign ID to Campaign
        public MappedState<string, Campaign> Campaigns { get; set; }

        // Maps user address to their info (campaigns and donations)
        public MappedState<Address, UserInfo> UserInfos { get; set; }

        // Maps campaign ID to list of rewards sent
        public MappedState<string, DonationList> CampaignRewards { get; set; }

        // Store campaign IDs by index
        public MappedState<long, string> CampaignIdsByIndex { get; set; }

        // Total number of campaigns
        public SingletonState<long> CampaignCount { get; set; }
    }
}
Contract References
Create a new file ContractReferences.cs in the src directory:
using AElf.Contracts.MultiToken;

namespace AElf.Contracts.DonationApp
{
    public partial class DonationAppState
    {
        internal TokenContractContainer.TokenContractReferenceState TokenContract { get; set; }
    }
}
Protocol Definitions
First, let's set up all the necessary protocol files for our donation contract:
- Replace the content of
donation_contract.protowith:
syntax = "proto3";

import "aelf/core.proto";
import "aelf/options.proto";
import "google/protobuf/empty.proto";
import "google/protobuf/wrappers.proto";
import "Protobuf/reference/acs12.proto";

option csharp_namespace = "AElf.Contracts.DonationApp";

service DonationDApp {
    option (aelf.csharp_state) = "AElf.Contracts.DonationApp.DonationAppState";
    option (aelf.base) = "Protobuf/reference/acs12.proto";

    rpc IsContractInitialized (google.protobuf.Empty) returns (google.protobuf.BoolValue) {
        option (aelf.is_view) = true;
    }

    rpc Initialize (google.protobuf.Empty) returns (google.protobuf.StringValue) {
    }

    rpc CreateCampaign (CampaignInput) returns (google.protobuf.StringValue) {
    }

    rpc Donate (DonationInput) returns (google.protobuf.Empty) {
    }

    rpc GetCampaign (google.protobuf.StringValue) returns (Campaign) {
        option (aelf.is_view) = true;
    }

    rpc GetCampaignsData (google.protobuf.Empty) returns (CampaignList) {
        option (aelf.is_view) = true;
    }

    rpc GetUsersCampaigns (aelf.Address) returns (CampaignList) {
        option (aelf.is_view) = true;
    }

    rpc EditCampaign (EditCampaignInput) returns (google.protobuf.Empty) {
    }

    rpc DeleteCampaign (google.protobuf.StringValue) returns (google.protobuf.Empty) {
    }

    rpc WithdrawCampaignAmount (WithdrawCampaignInput) returns (google.protobuf.Empty) {
    }

    rpc GetUserDetails (aelf.Address) returns (UserDetails) {
        option (aelf.is_view) = true;
    }
}

message CampaignInput {
    string title = 1;
    string description = 2;
    string imageUrl = 3;
    string type = 4;
    int64 goalAmount = 5;
    int64 duration = 6;
}

message WithdrawCampaignInput {
    string campaignId = 1;
}

message DonationInput {
    string campaignId = 1;
    int64 amount = 2;
}

message EditCampaignInput {
    string campaignId = 1;
    string newTitle = 2;
    string newDescription = 3;
    string newImageUrl = 4;
    string newType = 5;
    int64 newGoalAmount = 6;
    bool newIsActive = 7;
}

message Donation {
    aelf.Address donor = 1;
    int64 amount = 2;
    int64 timestamp = 3;
}

message Campaign {
    string id = 1;
    string title = 2;
    string description = 3;
    string imageUrl = 4;
    string type = 5;
    int64 goalAmount = 6;
    int64 currentAmount = 7;
    aelf.Address creator = 8;
    int64 startTime = 9;
    int64 endTime = 10;
    repeated Donation donators = 11;
    bool isActive = 12;
    bool isWithdrawn = 13;
}

message CampaignList {
    repeated Campaign value = 1;
}

message UserDetails {
    aelf.Address walletAddress = 1;
    repeated Campaign campaigns = 2;
    repeated Campaign donatedCampaigns = 3;
    int64 totalRaisedAmount = 4;
}

message UserInfo {
    repeated string campaigns = 1;
    repeated string donated_campaigns = 2;
    int64 total_raised_amount = 3;
}

message DonationList {
    repeated Donation value = 1;
}

// Events
message CampaignCreatedEvent {
    option (aelf.is_event) = true;
    string campaignId = 1;
    string title = 2;
    aelf.Address creator = 3;
    int64 goalAmount = 4;
}

message DonationMadeEvent {
    option (aelf.is_event) = true;
    string campaignId = 1;
    aelf.Address donor = 2;
    int64 amount = 3;
}

message CampaignWithdrawnEvent {
    option (aelf.is_event) = true;
    string campaignId = 1;
    int64 amount = 2;
    aelf.Address recipient = 3;
}
- Create
src/Protobuf/reference/token_contract.proto:
syntax = "proto3";

package token;

import "aelf/core.proto";
import "aelf/options.proto";
import "google/protobuf/empty.proto";
import "google/protobuf/wrappers.proto";

option csharp_namespace = "AElf.Contracts.MultiToken";

service TokenContract {
    // Create a new token.
    rpc Create (CreateInput) returns (google.protobuf.Empty) { }

    // Transfer tokens between accounts
    rpc Transfer (TransferInput) returns (google.protobuf.Empty) { }

    // Transfer tokens using allowance
    rpc TransferFrom (TransferFromInput) returns (google.protobuf.Empty) { }

    // Approve token spending
    rpc Approve (ApproveInput) returns (google.protobuf.Empty) { }

    // Query balance
    rpc GetBalance (GetBalanceInput) returns (GetBalanceOutput) {
        option (aelf.is_view) = true;
    }

    // Query allowance
    rpc GetAllowance (GetAllowanceInput) returns (GetAllowanceOutput) {
        option (aelf.is_view) = true;
    }
}

message CreateInput {
    string symbol = 1;
    string token_name = 2;
    int64 total_supply = 3;
    int32 decimals = 4;
    aelf.Address issuer = 5;
    bool is_burnable = 6;
}

message TransferInput {
    aelf.Address to = 1;
    string symbol = 2;
    int64 amount = 3;
    string memo = 4;
}

message TransferFromInput {
    aelf.Address from = 1;
    aelf.Address to = 2;
    string symbol = 3;
    int64 amount = 4;
    string memo = 5;
}

message ApproveInput {
    aelf.Address spender = 1;
    string symbol = 2;
    int64 amount = 3;
}

message GetBalanceInput {
    string symbol = 1;
    aelf.Address owner = 2;
}

message GetBalanceOutput {
    string symbol = 1;
    aelf.Address owner = 2;
    int64 balance = 3;
}

message GetAllowanceInput {
    string symbol = 1;
    aelf.Address owner = 2;
    aelf.Address spender = 3;
}

message GetAllowanceOutput {
    string symbol = 1;
    aelf.Address owner = 2;
    aelf.Address spender = 3;
    int64 allowance = 4;
}
Main Contract Implementation
Replace the content of DonationApp.cs with:
using AElf.Sdk.CSharp;
using AElf.Types;
using Google.Protobuf.WellKnownTypes;
using System.Linq;
using System.Collections.Generic;
using AElf.Contracts.MultiToken;

namespace AElf.Contracts.DonationApp
{
    public class DonationApp : DonationDAppContainer.DonationDAppBase
    {
        // Token contract constants
        private const string TokenSymbol = "ELF";
        private const long MaximumAmount = 1000_00000000; // 1000 ELF

        public override BoolValue IsContractInitialized(Empty input)
        {
            return new BoolValue { Value = State.Initialized.Value };
        }

        public override StringValue Initialize(Empty input)
        {
            if (State.Initialized.Value)
            {
                return new StringValue { Value = "failed" };
            }

            State.TokenContract.Value = Context.GetContractAddressByName(SmartContractConstants.TokenContractSystemName);
            Assert(State.TokenContract.Value != null, "Failed to get token contract address");

            State.Initialized.Value = true;
            State.Owner.Value = Context.Sender;
            State.CampaignCount.Value = 0;

            return new StringValue { Value = "success" };
        }

        public override StringValue CreateCampaign(CampaignInput input)
        {
            Assert(State.Initialized.Value, "Contract not initialized.");
            Assert(input.GoalAmount <= MaximumAmount,
                "Goal amount should be less than equal to 1000 ELF");

            var campaignId = HashHelper.ComputeFrom(input.Title + Context.Sender.ToBase58() + Context.CurrentBlockTime.Seconds).ToHex();
            var currentTime = Context.CurrentBlockTime.Seconds;
            var campaign = new Campaign
            {
                Id = campaignId,
                Title = input.Title,
                Description = input.Description,
                ImageUrl = input.ImageUrl,
                Type = input.Type,
                GoalAmount = input.GoalAmount,
                CurrentAmount = 0,
                Creator = Context.Sender,
                StartTime = currentTime,
                EndTime = currentTime + input.Duration,
                IsActive = true,
                IsWithdrawn = false
            };

            State.Campaigns[campaignId] = campaign;

            // Update user's campaign list
            var userInfo = State.UserInfos[Context.Sender] ?? new UserInfo
            {
                Campaigns = { campaignId },
                DonatedCampaigns = { },
                TotalRaisedAmount = 0
            };
            if (!userInfo.Campaigns.Contains(campaignId))
            {
                userInfo.Campaigns.Add(campaignId);
            }
            State.UserInfos[Context.Sender] = userInfo;

            // Add to campaign index
            var currentIndex = State.CampaignCount.Value;
            State.CampaignIdsByIndex[currentIndex] = campaignId;
            State.CampaignCount.Value = currentIndex + 1;

            // Fire campaign created event
            Context.Fire(new CampaignCreatedEvent
            {
                CampaignId = campaignId,
                Title = input.Title,
                Creator = Context.Sender,
                GoalAmount = input.GoalAmount
            });

            return new StringValue { Value = campaignId };
        }

        public override Empty Donate(DonationInput input)
        {
            Assert(State.Initialized.Value, "Contract not initialized.");
            var campaign = State.Campaigns[input.CampaignId];
            Assert(campaign != null, "Campaign does not exist.");
            Assert(IsCampaignActive(campaign), "Campaign is not active or has ended.");

            // Check if donor has enough tokens
            var balance = State.TokenContract.GetBalance.Call(new GetBalanceInput
            {
                Owner = Context.Sender,
                Symbol = TokenSymbol
            }).Balance;
            Assert(balance >= input.Amount, "Insufficient balance for donation.");

            // Transfer donation amount
            State.TokenContract.TransferFrom.Send(new TransferFromInput
            {
                From = Context.Sender,
                To = Context.Self,
                Symbol = TokenSymbol,
                Amount = input.Amount
            });

            // Record donation
            var donation = new Donation
            {
                Donor = Context.Sender,
                Amount = input.Amount,
                Timestamp = Context.CurrentBlockTime.Seconds
            };
            campaign.Donators.Add(donation);
            campaign.CurrentAmount += input.Amount;

            // Update campaign
            State.Campaigns[input.CampaignId] = campaign;

            // Update user's donation history
            var userInfo = State.UserInfos[Context.Sender] ?? new UserInfo
            {
                Campaigns = { },
                DonatedCampaigns = { input.CampaignId },
                TotalRaisedAmount = input.Amount
            };
            if (!userInfo.DonatedCampaigns.Contains(input.CampaignId))
            {
                userInfo.DonatedCampaigns.Add(input.CampaignId);
                userInfo.TotalRaisedAmount += input.Amount;
            }
            State.UserInfos[Context.Sender] = userInfo;

            // Fire donation made event
            Context.Fire(new DonationMadeEvent
            {
                CampaignId = input.CampaignId,
                Donor = Context.Sender,
                Amount = input.Amount
            });

            return new Empty();
        }

        public override CampaignList GetCampaignsData(Empty input)
        {
            var campaigns = new List<Campaign>();
            var totalCampaigns = State.CampaignCount.Value;

            for (var i = 0L; i < totalCampaigns; i++)
            {
                var campaignId = State.CampaignIdsByIndex[i];
                var campaign = State.Campaigns[campaignId];
                if (campaign != null)
                {
                    campaign.IsActive = IsCampaignActive(campaign);
                    campaigns.Add(campaign);
                }
            }

            return new CampaignList { Value = { campaigns } };
        }

        private bool IsCampaignActive(Campaign campaign)
        {
            return campaign.IsActive &&
                   Context.CurrentBlockTime.Seconds <= campaign.EndTime;
        }

        public override Campaign GetCampaign(StringValue campaignId)
        {
            var campaign = State.Campaigns[campaignId.Value];
            campaign.IsActive = IsCampaignActive(campaign);
            return campaign;
        }

        public override CampaignList GetUsersCampaigns(Address input)
        {
            var userInfo = State.UserInfos[input];
            if (userInfo == null || userInfo.Campaigns.Count == 0)
            {
                return new CampaignList();
            }

            var campaigns = new List<Campaign>();
            foreach (var id in userInfo.Campaigns)
            {
                var campaign = State.Campaigns[id];
                if (campaign != null)
                {
                    campaign.IsActive = IsCampaignActive(campaign);
                    campaigns.Add(campaign);
                }
            }

            return new CampaignList { Value = { campaigns } };
        }

        public override Empty EditCampaign(EditCampaignInput input)
        {
            var campaign = State.Campaigns[input.CampaignId];
            Assert(campaign != null, "Campaign does not exist.");
            Assert(campaign.Id == input.CampaignId, "Campaign ID mismatch");
            Assert(campaign.Creator == Context.Sender, "Only the creator can edit the campaign.");

            if (!string.IsNullOrEmpty(input.NewTitle))
                campaign.Title = input.NewTitle;
            if (!string.IsNullOrEmpty(input.NewDescription))
                campaign.Description = input.NewDescription;
            if (!string.IsNullOrEmpty(input.NewImageUrl))
                campaign.ImageUrl = input.NewImageUrl;
            if (!string.IsNullOrEmpty(input.NewType))
                campaign.Type = input.NewType;
            if (input.NewGoalAmount != 0)
                campaign.GoalAmount = input.NewGoalAmount;

            campaign.IsActive = input.NewIsActive;

            State.Campaigns[input.CampaignId] = campaign;
            return new Empty();
        }

        public override Empty DeleteCampaign(StringValue input)
        {
            var campaign = State.Campaigns[input.Value];
            Assert(campaign != null, "Campaign does not exist.");
            Assert(campaign.Creator == Context.Sender, "Only the creator can delete the campaign.");

            // Remove campaign
            State.Campaigns.Remove(input.Value);

            // Update user info
            var userInfo = State.UserInfos[Context.Sender];
            if (userInfo != null)
            {
                userInfo.Campaigns.Remove(input.Value);
                State.UserInfos[Context.Sender] = userInfo;
            }

            return new Empty();
        }

        public override Empty WithdrawCampaignAmount(WithdrawCampaignInput input)
        {
            var campaign = State.Campaigns[input.CampaignId];
            Assert(campaign != null, "Campaign does not exist.");
            Assert(campaign.Creator == Context.Sender, "Only the campaign creator can withdraw funds.");
            Assert(Context.CurrentBlockTime.Seconds >= campaign.EndTime, "Campaign duration has not ended yet.");
            Assert(!campaign.IsWithdrawn, "Campaign funds have already been withdrawn.");

            // Transfer campaign amount to creator
            State.TokenContract.Transfer.Send(new TransferInput
            {
                To = campaign.Creator,
                Symbol = TokenSymbol,
                Amount = campaign.CurrentAmount
            });

            // Update withdrawal status
            campaign.IsWithdrawn = true;
            State.Campaigns[input.CampaignId] = campaign;

            // Fire withdrawal event
            Context.Fire(new CampaignWithdrawnEvent
            {
                CampaignId = input.CampaignId,
                Amount = campaign.CurrentAmount,
                Recipient = campaign.Creator
            });

            return new Empty();
        }

        public override UserDetails GetUserDetails(Address input)
        {
            var userInfo = State.UserInfos[input] ?? new UserInfo();

            var campaigns = new List<Campaign>();
            foreach (var id in userInfo.Campaigns)
            {
                var campaign = State.Campaigns[id];
                if (campaign != null)
                {
                    campaign.IsActive = IsCampaignActive(campaign);
                    campaigns.Add(campaign);
                }
            }

            var donatedCampaigns = new List<Campaign>();
            foreach (var id in userInfo.DonatedCampaigns)
            {
                var campaign = State.Campaigns[id];
                if (campaign != null)
                {
                    campaign.IsActive = IsCampaignActive(campaign);
                    donatedCampaigns.Add(campaign);
                }
            }

            return new UserDetails
            {
                WalletAddress = input,
                Campaigns = { campaigns },
                DonatedCampaigns = { donatedCampaigns },
                TotalRaisedAmount = userInfo.TotalRaisedAmount
            };
        }
    }
}
Building Smart Contract
- Build the new code with the following commands inside
srcfolder:
dotnet build
You should see DonationApp.dll.patched in the directory donation/src/bin/Debug/net6.0
Unit Testing Smart Contract
Unit testing is crucial for ensuring the reliability and security of smart contracts. Let's look at some test cases for the critical Donate method:
[Fact]
public async Task Donate_Success()
{
    // Arrange
    await DonationContract.Initialize.SendAsync(new InitializeInput());

    var createResult = await DonationContract.CreateCampaign.SendAsync(new CreateCampaignInput
    {
        Title = "Test Campaign",
        Description = "Test Description",
        TargetAmount = 100_00000000,
        StartTime = GetTimestamp(),
        EndTime = GetTimestamp(30)
    });
    var campaignId = createResult.Output.Value;

    // Approve token spending
    await ApproveTokenAsync(DonationContractAddress, DefaultDonationAmount);

    // Act
    var result = await DonationContract.Donate.SendAsync(new DonateInput
    {
        CampaignId = campaignId,
        Amount = DefaultDonationAmount
    });

    // Assert
    result.TransactionResult.Status.ShouldBe(TransactionResultStatus.Mined);

    var campaign = await DonationContract.GetCampaign.CallAsync(new StringValue { Value = campaignId });
    campaign.CurrentAmount.ShouldBe(DefaultDonationAmount);

    var donatorList = await DonationContract.GetDonatorList.CallAsync(new StringValue { Value = campaignId });
    donatorList.Value.Count.ShouldBe(1);
    donatorList.Value[0].Donor.ShouldBe(DefaultAddress);
    donatorList.Value[0].Amount.ShouldBe(DefaultDonationAmount);
}

[Fact]
public async Task Donate_CampaignEnded_ShouldFail()
{
    // Arrange
    await DonationContract.Initialize.SendAsync(new InitializeInput());

    var createResult = await DonationContract.CreateCampaign.SendAsync(new CreateCampaignInput
    {
        Title = "Test Campaign",
        Description = "Test Description",
        TargetAmount = 100_00000000,
        StartTime = GetTimestamp(-30),  // Started 30 days ago
        EndTime = GetTimestamp(-1)      // Ended yesterday
    });
    var campaignId = createResult.Output.Value;

    await ApproveTokenAsync(DonationContractAddress, DefaultDonationAmount);

    // Act & Assert
    var exception = await Assert.ThrowsAsync<Exception>(() =>
        DonationContract.Donate.SendAsync(new DonateInput
        {
            CampaignId = campaignId,
            Amount = DefaultDonationAmount
        }));
    exception.Message.ShouldContain("Campaign has ended");
}

[Fact]
public async Task Donate_ExceedTargetAmount_ShouldFail()
{
    // Arrange
    await DonationContract.Initialize.SendAsync(new InitializeInput());

    var targetAmount = 10_00000000;  // 10 ELF
    var createResult = await DonationContract.CreateCampaign.SendAsync(new CreateCampaignInput
    {
        Title = "Test Campaign",
        Description = "Test Description",
        TargetAmount = targetAmount,
        StartTime = GetTimestamp(),
        EndTime = GetTimestamp(30)
    });
    var campaignId = createResult.Output.Value;

    // First donation equals target amount
    await ApproveTokenAsync(DonationContractAddress, targetAmount);
    await DonationContract.Donate.SendAsync(new DonateInput
    {
        CampaignId = campaignId,
        Amount = targetAmount
    });

    // Try to donate more
    await ApproveTokenAsync(DonationContractAddress, DefaultDonationAmount);

    // Act & Assert
    var exception = await Assert.ThrowsAsync<Exception>(() =>
        DonationContract.Donate.SendAsync(new DonateInput
        {
            CampaignId = campaignId,
            Amount = DefaultDonationAmount
        }));
    exception.Message.ShouldContain("Campaign target amount reached");
}
These test cases demonstrate:
-
Successful Donation: Tests a complete donation flow, including:
- Campaign creation
- Token approval
- Donation execution
- Verification of campaign amount and donor list
-
Campaign End Date Validation: Tests that donations cannot be made to expired campaigns
-
Target Amount Validation: Tests that donations cannot exceed the campaign's target amount
Each test follows the Arrange-Act-Assert pattern and uses the Shouldly assertion library for clear, readable assertions.
For a deeper dive into unit testing smart contracts, check out the complete test suite in our GitHub repository.
Step 3 - Deploy Smart Contract
Create A Wallet
To send transactions on the aelf blockchain, you must have a wallet.
- Run this command to create aelf wallet.
aelf-command create

- You will be prompted to save your account, please do save your account as shown below:
? Save account info into a file? (Y/n) Y
Make sure to choose Y to save your account information.
ℹ️ Note: If you do not save your account information (by selecting n or N), do not export the wallet password. Only proceed to the next step if you have saved your account information.
- Next, enter and confirm your password. Then export your wallet address and password as shown below:
- Linux and macOs
- Windows
export WALLET_ADDRESS="YOUR_WALLET_ADDRESS"
$env:WALLET_ADDRESS = "YOUR_WALLET_ADDRESS"
- Linux and macOs
- Windows
export WALLET_PASSWORD="YOUR_WALLET_PASSWORD"
$env:WALLET_PASSWORD = "YOUR_WALLET_PASSWORD"
Acquire Testnet Tokens (Faucet) for Development
To deploy smart contracts or execute on-chain transactions on aelf, you'll require testnet ELF tokens.
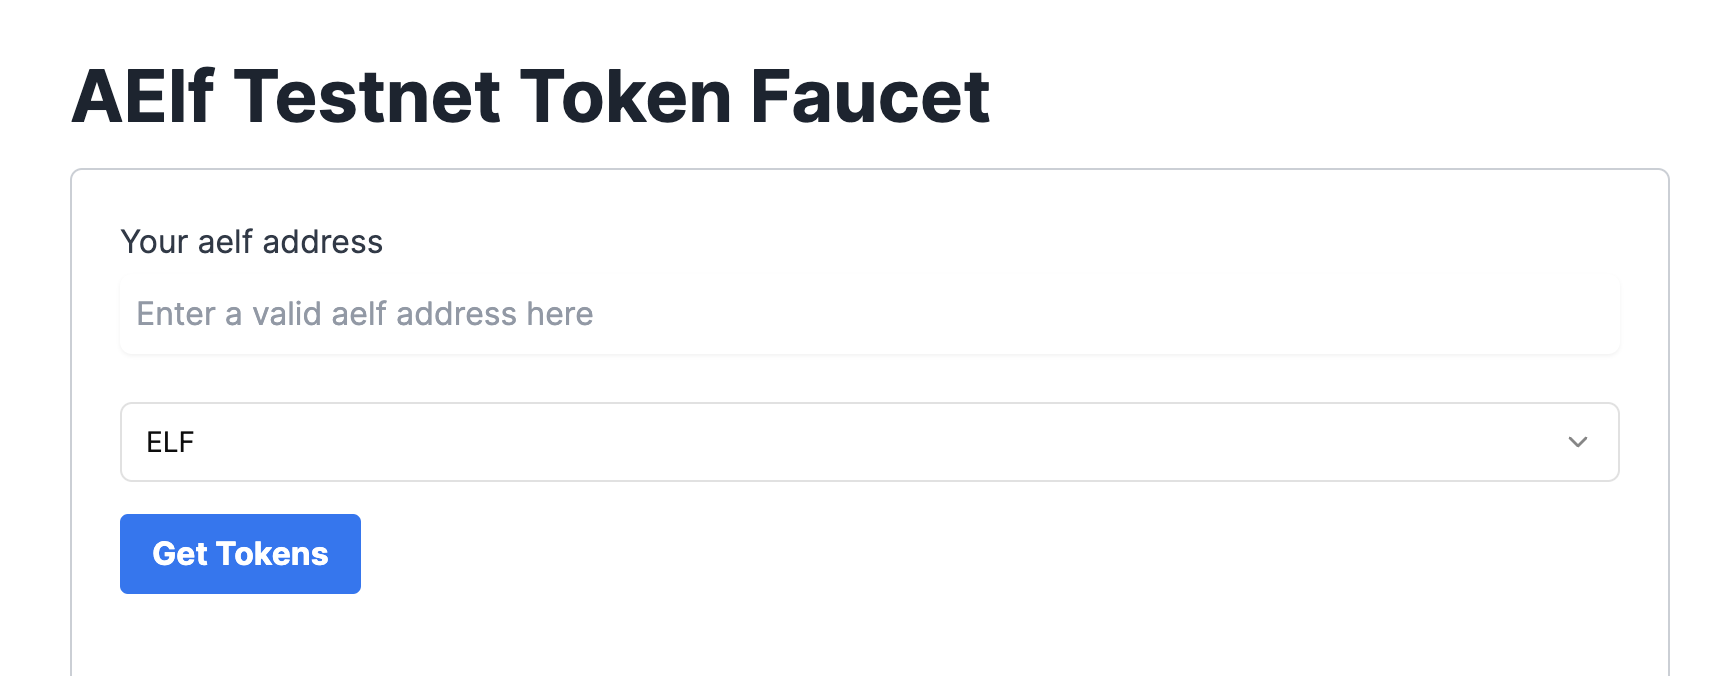
Get ELF Tokens
Go to https://faucet-ui.aelf.dev Enter your address and click Get Tokens.
Deploy Smart Contract:
The smart contract needs to be deployed on the chain before users can interact with it.
Run the following command to deploy a contract. Remember to export the path of DonationApp.dll.patched to CONTRACT_PATH.
- Linux and macOs
- Windows
export CONTRACT_PATH=$(find ~+ . -path "*patched*" | head -n 1)
aelf-deploy -a $WALLET_ADDRESS -p $WALLET_PASSWORD -c $CONTRACT_PATH -e https://tdvw-test-node.aelf.io/
$CONTRACT_PATH = Get-ChildItem -Recurse -Filter "*patched*" | Select-Object -First 1 -ExpandProperty FullName
$env:CONTRACT_PATH = $CONTRACT_PATH
aelf-deploy -a $env:WALLET_ADDRESS -p $env:WALLET_PASSWORD -c $env:CONTRACT_PATH -e https://tdvw-test-node.aelf.io/
-
Please wait for approximately 1 to 2 minutes. If the deployment is successful, it will provide you with the contract address.
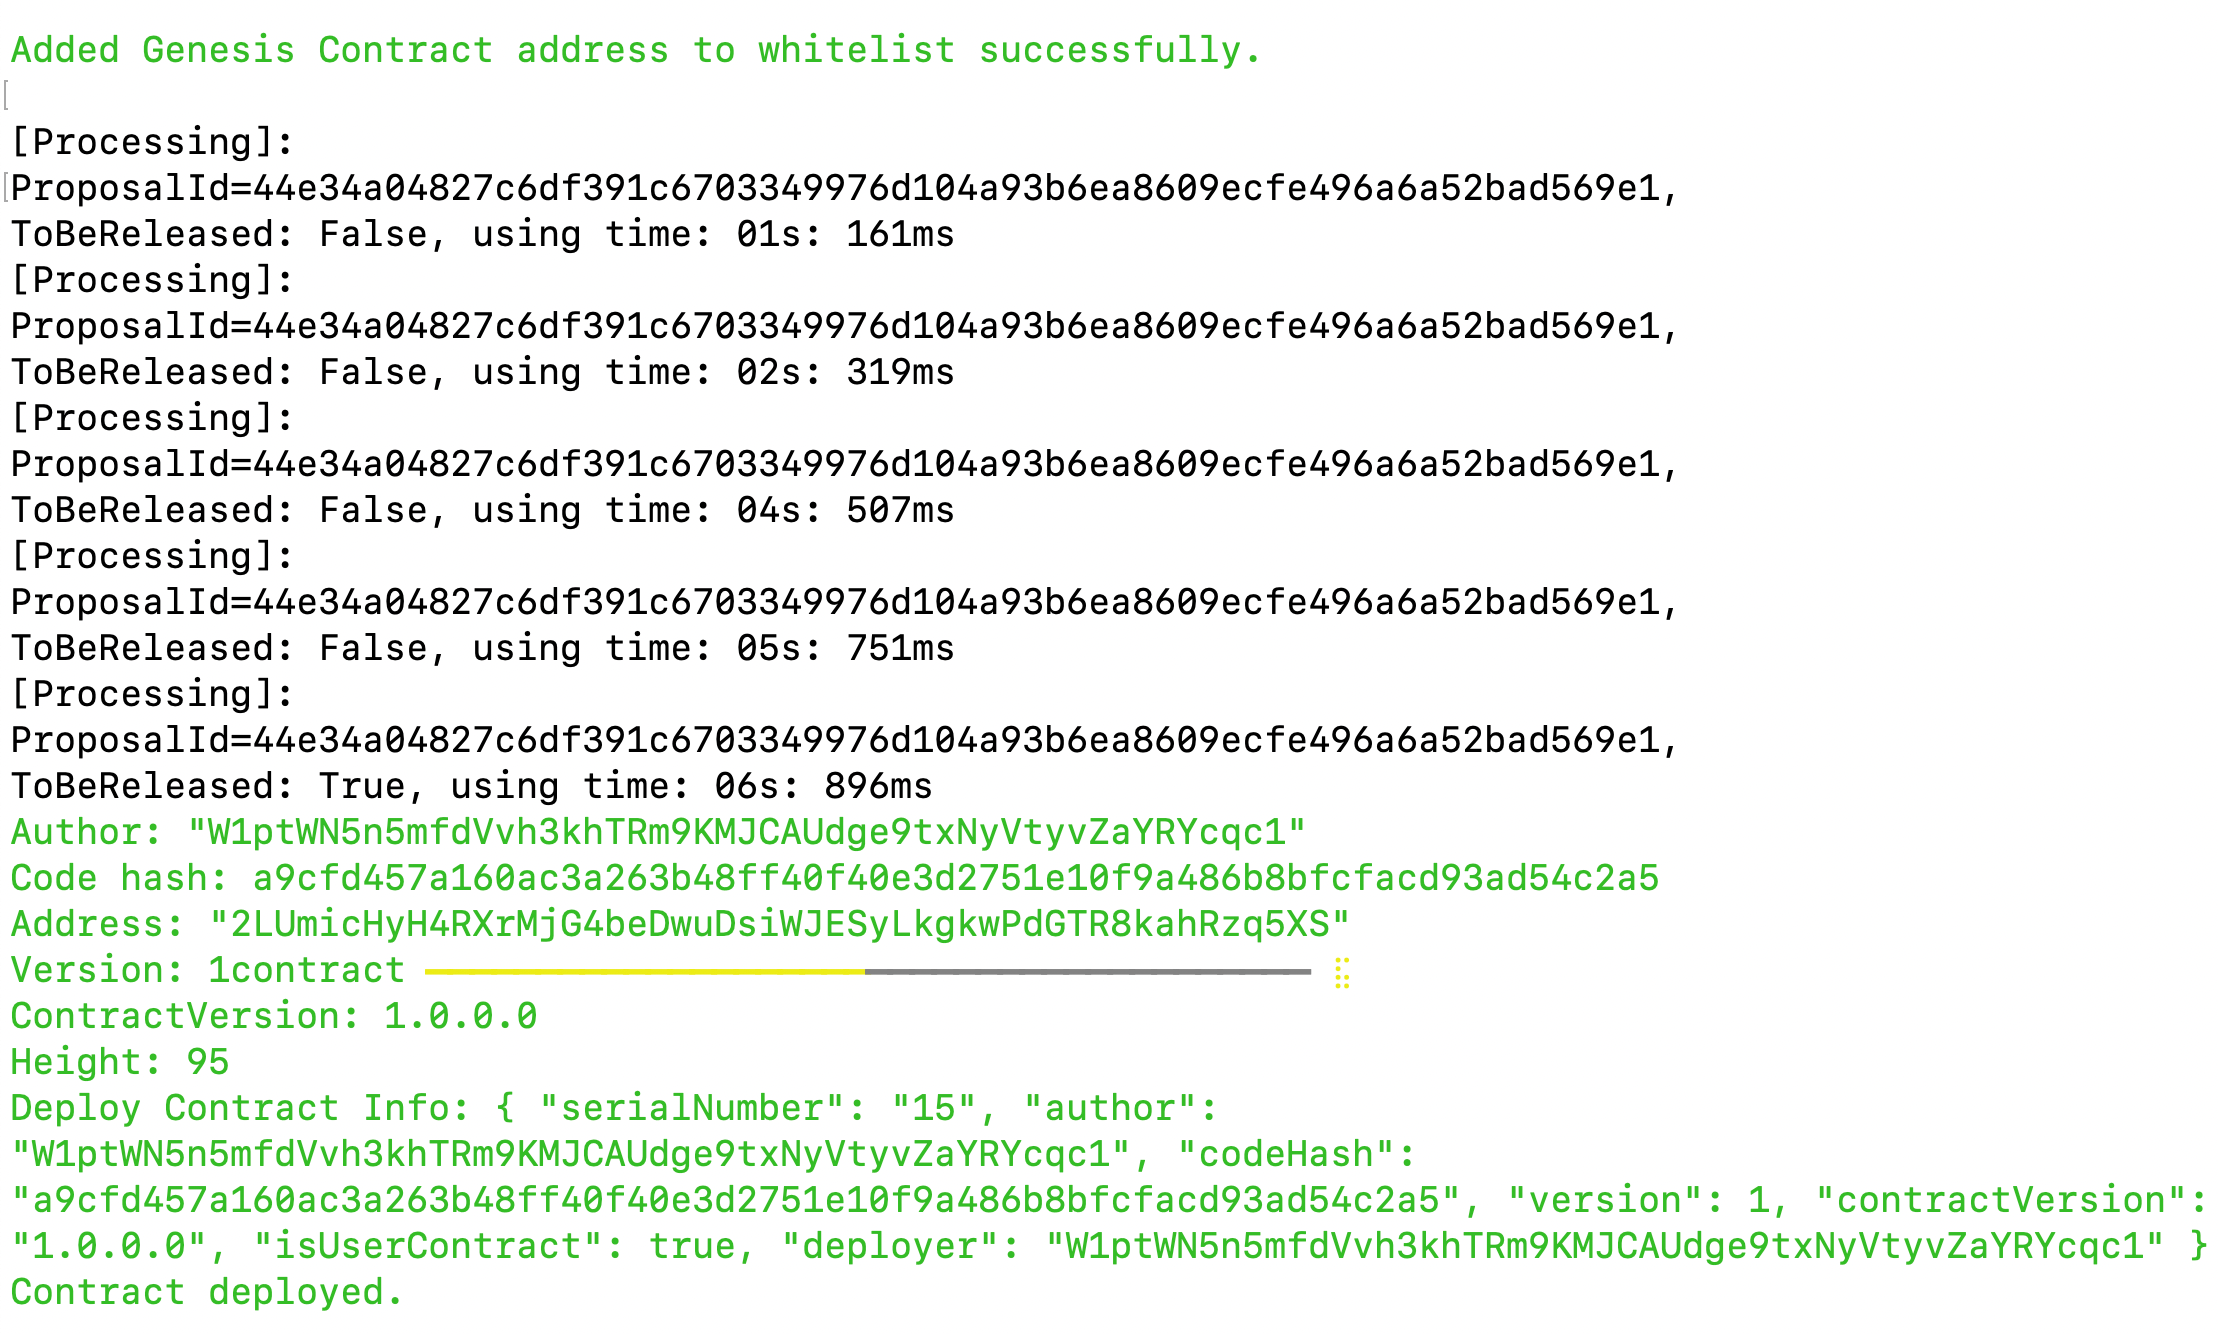
-
Copy the smart contract address from the
addressfield
-
Export your smart contract address:
- Linux and macOs
- Windows
export CONTRACT_ADDRESS="YOUR_SMART_CONTRACT_ADDRESS e.g. 2LUmicHyH4RXrMjG4beDwuDsiWJESyLkgkwPdGTR8kahRzq5XS"
$env:CONTRACT_ADDRESS="YOUR_SMART_CONTRACT_ADDRESS e.g. 2LUmicHyH4RXrMjG4beDwuDsiWJESyLkgkwPdGTR8kahRzq5XS"
ℹ️ Note: You are to copy the smart contract address as we will be referencing it in the next steps!
🎉 You have successfully deployed your Donation dApp smart contract on the aelf testnet! In the next steps, we will be building the frontend components that allow us to interact with our deployed smart contract!
Step 4 - Interact with Your Deployed Smart Contract through dApp
Project Setup
Let's start by cloning the frontend project repository from github.
git clone https://github.com/AElfProject/aelf-samples.git
- Next, navigate to the frontend project directory with this command:
cd aelf-samples/donation/2-dapp
- Once you're inside the
2-dappdirectory, open the project with your preferred IDE (e.g., VSCode). You should see the project structure as shown below.
Install necessary libraries
- Run this command in the terminal to install all necessary packages and libraries:
npm install
We are now ready to build the frontend components of our Donation dApp.
Fetch smart contracts and token balance
Let's create common function for fetch smartcontract using provider and contract address.
Step 1 : Locate the File:
- Go to the
src/lib/contract.tsfile.
Step 2 : Prepare fetch smart contract function:
-
Find the comment
// Step 1 - Function to fetch a smart contract based on address -
Replace the existing
fetchContractfunction with this updated code:
// Step 1 - Function to fetch a smart contract based on address
export const fetchContract = async (
  provider: IPortkeyProvider | null,
  address: string
) => {
  if (!provider) return null;

  try {
    // get the dAppChain tDVW using provider.getChain
    const chain = await provider?.getChain("tDVW");
    if (!chain) throw new Error("No chain");

    // get the smart contract
    const contract = chain?.getContract(address);

    return contract;
  } catch (error) {
    console.log(error, "====error");
    return
  }
};
Explanation
The fetchContract function retrieves a smart contract instance using a blockchain provider and a specific address. Here's a breakdown:
- Provider Check: Ensures a valid provider is available; otherwise, returns null.
- Fetch Chain: Uses provider.getChain("tDVW") to get chain details for the testnet (or other specified chain). Throws an error if the chain is unavailable.
- Get Contract: Retrieves the contract instance using chain.getContract(address) with the given address.
- Error Handling: Logs errors and safely exits if any issue arises.
Next, we’ll fetch the donation smart contract to enable interaction with it from the frontend, as well as the token contract to access details about the user’s ELF tokens.
Step 3 : Fetch Donation contract
-
Go to the
src/hooks/useDonationSmartContract.tsfile. -
Find the comment
// Step 2 - Replace with Address of Deployed Smart Contract -
Replace the your donation contract address with this value :
your_deployed_donation_smart_contract_address -
Find the comment
// Step 3 - Function to fetch a smart contract based on deployed contract address -
Replace the existing fetchDonationContract function with this updated code:
// Step 3 - Function to fetch a smart contract based on deployed contract address
const fetchDonationContract = async () => {
  const contract = await fetchContract(provider, donationContractAddress);
  contract && setSmartContract(contract);
};
-
Find the comment
// Step 4 - Effect hook to initialize and fetch the smart contract when the provider changes -
Replace the existing useEffect hook with this updated code:
// Step 4 - Effect hook to initialize and fetch the smart contract when the provider changes
useEffect(() => {
  fetchDonationContract();
}, [provider]); // Dependency array ensures this runs when the provider changes
Step 4 : Fetch Token contract
-
Go to the
src/hooks/useTokenContract.tsfile. -
Find the comment
// Step 5 - Function to fetch the ELF token contract on dApp chain -
Replace the existing fetchTokenContract function with this updated code:
// Step 5 - Function to fetch the ELF token contract on dApp chain
const fetchTokenContract = async () => {
  // token address of dApp chain
  const contract = await fetchContract(
    provider,
    "ASh2Wt7nSEmYqnGxPPzp4pnVDU4uhj1XW9Se5VeZcX2UDdyjx"
  );
  contract && setTokenContract(contract);
};
-
Find the comment
// Step 6 - Effect hook to initialize and fetch the smart contract when the provider changes -
Replace the existing useEffect hook with this updated code:
// Step 6 -  Effect hook to initialize and fetch the smart contract when the provider changes
useEffect(() => {
 fetchTokenContract();
}, [provider]); // Dependency array ensures this runs when the provider changes
Step 5 : Get Token Balance
-
Go to the
src/hooks/userBalance.tsfile. -
Find the comment
// Step 7 - Function to get ELF token balance -
Replace the existing getTokenBalance function with this updated code:
// Step 7 - Function to get ELF token balance
const getTokenBalance = async () => {
  if (!tokencontract || !currentWalletAddress) return;

  try {
    setLoading(true);
    const { data } = await tokencontract.callViewMethod("GetBalance", {
      symbol: "ELF",
      owner: currentWalletAddress,
    });
    data?.balance && setBalance(convertTokenToAmount(data.balance));
  } catch (error) {
    console.log("==== balance fetch error", error);
  } finally {
    setLoading(false);
  }
};
-
Find the comment
// Step 8 - Effect hook to fetch the token balance when tokencontract and currentWalletAddress change -
Replace the existing useEffect hook with this updated code:
// Step 8 - Effect hook to fetch the token balance when tokencontract and currentWalletAddress change
useEffect(() => {
  getTokenBalance();
}, [tokencontract, currentWalletAddress]);
Now, we have completed step with fetch smart contracts and token balance.
Configure Connect Wallet Function
Step 1 : Locate the File
- Go to the
src/components/layout/header/index.tsxfile.
Step 2 : Write the Connect Wallet Function
-
The
header/index.tsxfile is the header of our Donation dApp. It allows users to connect their Portkey wallet with the Donation dApp. -
Before users can interact with the smart contract, we need to write the
Connect Walletfunction. -
Find the comment
// Step 9 - Connect Portkey Wallet. -
Replace the existing connect function with this code snippet:
// Step 9 - Connect Portkey Wallet
const connect = async (walletProvider?: IPortkeyProvider) => {
  const accounts = await (walletProvider
    ? walletProvider
    : provider
  )?.request({
    method: MethodsBase.REQUEST_ACCOUNTS,
  });
  const account = accounts?.AELF && accounts?.AELF[0];
  if (account) {
    setCurrentWalletAddress(
      account.replace(/^ELF_/, "").replace(/_AELF$/, "")
    );
    setIsConnected(true);
  }
  !walletProvider && toast.success("Successfully connected");
};
Explanation:
connectFunction : This function connects the user's Portkey wallet with the dApp.- Fetch Accounts : It fetches the wallet accounts using the provider.
- Log Accounts : Logs the accounts to the console for debugging.
- Set Wallet Address : Sets the current wallet address state variable with the fetched account.
- Update Connection Status : Updates the state to indicate that the wallet is connected.
- User Notification : Displays an alert to notify the user that their wallet is successfully connected.
In this code, we fetch the Portkey wallet account using the provider and update the wallet address state variable. An alert notifies the user that their wallet is successfully connected.
With the connect wallet function defined, we're ready to write the remaining functions in the next steps.
Configure Create and Edit Campaign Form
Step 1 : Locate the File
- Go to the
src/pages/create-campaign/index.tsxfile.
Step 2 : Prepare Form to Create and Edit Campaign
-
Find the comment
// Step 10 - Configure campaign form. -
Replace the form variable with this code snippet:
// Step 10 - Configure campaign form
const form = useForm<z.infer<typeof formSchema>>({
  resolver: zodResolver(formSchema),
  defaultValues: {
    title: "",
    description: "",
    selectedCategory: undefined,
    goal: 0,
    endDate: "",
  },
});
Here's what the function does:
-
Initializes a new form variable with default values needed to create or edit campaign.
-
Fields include:
title,description,selectedCategory,goalandendDate.
Now the form is ready for users to fill in the necessary details.
Check Contract Initialization
-
Scroll down to find the comment
// step 11 - Check if the smart contract is initialized. -
Replace the existing
checkIsContractInitializedfunction with this code snippet:
// step 11 - Check if the smart contract is initialized
const checkIsContractInitialized = async () => {
  const result = await smartContract?.callViewMethod(
    "IsContractInitialized",
    ""
  );
  IsContractInitialized(result?.data?.value);
};
Initialize Contract
-
Scroll down to find the comment
// step 12 - Initialize the smart contract if not already initialized. -
Replace the existing
initializeContractfunction with this code snippet:
// step 12 - Initialize the smart contract if not already initialized
const initializeContract = async () => {
  return await smartContract?.callSendMethod("Initialize", "");
};
Create a New Campaign
-
Write the function to
Create a New Campaign -
The
create-campaign/index.tsxfile includes the code to create campaigns. It allows users to create new campaign. -
Find the comment
// step 13 - Function to create a new campaign. -
Replace the existing
createCampaignfunction with this code snippet:
// step 13 - Function to create a new campaign
const createCampaign = async (values: z.infer<typeof formSchema>) => {
  let createLoading: Id;
  createLoading = toast.loading("Creating Campaign...");
  setFormLoading(true);

try {
  // Initialize contract if required
  if (!isContractInitialized) {
    await initializeContract();
  }

  // Prepare data for creating the campaign
  const campaignData = {
    title: values.title,
    description: values.description,
    imageUrl: values.imageUrl,
    type: values.selectedCategory.value,
    goalAmount: convertAmountToToken(values.goal),
    duration:
      new Date(values.endDate).getTime() / 1000 -
      Number((new Date().getTime() / 1000).toFixed(0)),
  };

  // Call smart contract method to create the campaign
  await smartContract?.callSendMethod(
    "CreateCampaign",
    currentWalletAddress as string,
    campaignData
  );

    // Show success notification
    toast.update(createLoading, {
      render: "Campaign Created successfully",
      type: "success",
      isLoading: false,
    });
    removeNotification(createLoading);
    navigate("/"); // Redirect to home page
  } catch (error) {
    handleError(createLoading, error); // Handle any errors
  } finally {
    setFormLoading(false);
  }
};
What This Function Does:
-
Creates an Object with Campaign Details : It prepares the data needed to create a new campaign.
-
Calls Smart Contract Method : It interacts with the blockchain smart contract to create the new campaign using the prepared data.
Next, we'll write the Edit an Existing Campaign function.
Edit an Existing Campaign
Write the function for update an existing campaign.
-
Scroll down to find the comment
// step 14 - Function to edit an existing campaign. -
Replace the existing
editCampaignfunction with this code snippet:
// step 14 - Function to edit an existing campaign
const editCampaign = async (values: z.infer<typeof formSchema>) => {
  let createLoading: Id;
  createLoading = toast.loading("Updating Campaign...");
  setFormLoading(true);

  try {
    // Prepare data for editing the campaign
    const campaignData = {
      campaignId: editCampaignId,
      newTitle: values.title,
      newDescription: values.description,
      newImageUrl: values.imageUrl,
      newType: values.selectedCategory.value,
      newGoalAmount: convertAmountToToken(values.goal),
      newIsActive: true,
    };

    // Call smart contract method to edit the campaign
    await smartContract?.callSendMethod(
      "EditCampaign",
      currentWalletAddress as string,
      campaignData
    );

    // Show success notification
    toast.update(createLoading, {
      render: "Campaign Updated successfully",
      type: "success",
      isLoading: false,
    });
    removeNotification(createLoading);
    navigate("/"); // Redirect to home page
  } catch (error) {
    handleError(createLoading, error); // Handle any errors
  } finally {
    setFormLoading(false);
  }
};
What This Function Does:
-
Creates an Object with Updated Capmaign Details : It prepares the data needed for the updated capmaign details
-
Calls Smart Contract Method : It interacts with the blockchain smart contract to update the existing capmaign using the prepared data.
-
Scroll down to find the comment
// step 15 - Handle form submission for creating/editing a campaign. -
Replace the existing
onSubmitfunction with this code snippet:
// step 15 - Handle form submission for creating/editing a campaign
const onSubmit = (values: z.infer<typeof formSchema>) => {
  if (editCampaignId) {
    editCampaign(values);
  } else {
    createCampaign(values);
  }
};
-
Scroll down to find the comment
// step 16 - Set form data for editing an existing campaign. -
Replace the existing
setEditFormDatafunction with this code snippet:
// step 16 - Set form data for editing an existing campaign
const setEditFormData = async () => {
  try {
    const data = await smartContract?.callViewMethod("GetCampaign", {
      value: editCampaignId,
    });

    // Populate form fields with existing data
    const type = CATEGORY_OPTIONS.find(
      ({ value }) => data?.data?.type === value
    );
    form.setValue("title", data?.data?.title);
    form.setValue("description", data?.data?.description);
    type && form.setValue("selectedCategory", type);
    form.setValue("goal", convertTokenToAmount(data?.data?.goalAmount));
    form.setValue("endDate", data?.data?.endTime);
    form.setValue("imageUrl", data?.data?.imageUrl);
  } catch (error) {
    console.log("error in set edit form data", error); // Log any errors
  }
};
Fetch Campaign Data
Step 1 : Locate the File
- Go to the
src/pages/home/index.tsxfile.
Step 2 : Fetch Campaign Data
-
Find the comment
// step 17 - Fetch campaign data from the smart contract. -
Replace the existing
getCampaignDatafunction with this code snippet:
// step 17 - Fetch campaign data from the smart contract
const getCampaignData = async () => {
  try {
    const data = await smartContract?.callViewMethod("GetCampaignsData", "");
    if (data?.data?.value) {
      setCampaignData(data.data.value.reverse());
    }
  } catch {
  } finally {
    setLoading(false);
  }
};
Search Campaign Data
-
Scroll down to find the comment
// step 18 - Filter campaigns based on selected filter and search value. -
Replace the existing
filterCampaignsDatavariable with this code snippet:
// step 18 - Filter campaigns based on selected filter and search value
const filterCampaignsData = useMemo(() => {
  let data: DonationCampaign[] = [];

  if (campaignData && campaignData.length > 0) {
    if (selectedFilter) {
      // Filter campaigns by category
      data = campaignData.filter(({ type }) => selectedFilter === type);
    } else {
      data = campaignData;
    }

    if (searchValue) {
      // Filter campaigns by search value in title or category
      data = data.filter(
        ({ type, title }) =>
          type.toLowerCase().includes(searchValue.toLowerCase()) ||
          title.toLowerCase().includes(searchValue.toLowerCase())
      );
    }
  }
  return data;
}, [campaignData, selectedFilter, searchValue]);
Get Campaign Details
Step 1 : Locate the File
- Go to the
src/pages/campaign-details/index.tsxfile.
Step 2 : Fetch Campaign Details
-
Find the comment
// step 19 - Fetch campaign details from the smart contract. -
Replace the existing
getCampaignDetailsfunction with this code snippet:
// step 19 - Fetch campaign details from the smart contract
const getCampaignDetails = async () => {
  try {
    const data = await smartContract?.callViewMethod("GetCampaign", {
      value: id,
    });
    if (data?.data) {
      setCampaignDetails(data.data); // Set campaign details on success
    }
  } catch (error) {
    console.error("Error fetching campaign details:", error);
  } finally {
    setLoading(false); // Stop loading spinner after the operation
  }
};
Donate Funds
Let's prepare the functions for donate funds in active campaign.
Check Allowance
-
Scroll down to find the comment
// step 20 - Check if the user's wallet has sufficient allowance to spend tokens. -
Replace the existing
checkAllowancefunction with this code snippet:
// step 20 - Check if the user's wallet has sufficient allowance to spend tokens
const checkAllowance = async () => {
  const data = await tokenContract?.callViewMethod("GetAllowance", {
    symbol: "ELF",
    owner: currentWalletAddress,
    spender: donationContractAddress,
  });
  return data?.data?.allowance || 0; // Return allowance or 0 if unavailable
};
Donate funds to campaign
-
Scroll down to find the comment
// step 21 - Function to donate funds. -
Replace the existing
donateFundsfunction with this code snippet:
// step 21 - Function to donate funds
const donateFunds = async (amount: number) => {
  let donationLoading: Id;
  donationLoading = toast.loading("Donation In Progress..."); // Show loading toast
  setFormLoading(true); // Show form loader
  try {
    const allowance = await checkAllowance(); // Check current allowance
    if (convertTokenToAmount(Number(allowance)) < amount) {
      // Approve tokens if allowance is insufficient
      await tokenContract?.callSendMethod(
        "Approve",
        currentWalletAddress as string,
        {
          spender: donationContractAddress,
          symbol: "ELF",
          amount: setDefaultAllowance,
        }
      );
    }
    // Donate the specified amount
    await smartContract?.callSendMethod(
      "Donate",
      currentWalletAddress as string,
      {
        campaignId: id,
        amount: convertAmountToToken(amount),
      }
    );
    // Show success toast and refresh campaign details
    toast.update(donationLoading, {
      render: "Your funds successfully donated. Thank you for your generosity!",
      type: "success",
      isLoading: false,
    });
    removeNotification(donationLoading);
    getCampaignDetails(); // Refresh the campaign details after donation
  } catch (error) {
    handleError(donationLoading, error); // Handle errors and show feedback
    console.error("Donation error:", error);
    return "error";
  } finally {
    setFormLoading(false); // Hide form loader
  }
};
Explanation
The donateFunds function handles the process of donating ELF tokens to a specific campaign, ensuring proper approval and user feedback. Here's a step-by-step breakdown:
1. Display Loading Indicators:
- Shows a loading toast message ("Donation In Progress...") to inform the user that the process has started.
- Activates a loading state for the donation form to prevent duplicate actions.
2. Check Token Allowance:
- Calls the checkAllowance function to verify if the user has sufficient approval to transfer the specified amount of tokens.
- If the allowance is less than the donation amount, the function approves a default token allowance using the Approve method of the token contract.
3. Donate Tokens:
- Calls the Donate method of the smart contract to transfer the specified amount of ELF tokens to the campaign.
4. Success Handling:
- Updates the loading toast to a success message, thanking the user for their donation.
- Refreshes the campaign details to reflect the updated donation status.
5. Error Handling:
- If an error occurs during the process, it is logged, and an error toast is displayed to inform the user.
6. Final Cleanup:
- Ensures the form loading state is disabled, regardless of success or failure.
User Profile Details
Step 1 : Locate the File
- Go to the
src/pages/user-profile/index.tsxfile.
Step 2 : Get User Data
-
Find the comment
// step 22 - Fetch user data from the smart contract using the "GetUserDetails" method.. -
Replace the existing
getUserDatafunction with this code snippet:
// step 22 - Fetch user data from the smart contract using the "GetUserDetails" method.
const getUserData = async () => {
  try {
    const data = await smartContract?.callViewMethod(
      "GetUserDetails",
      currentWalletAddress
    );
    if (data?.data) {
      setUserData(data.data); // Update the state with fetched user data
    }
  } catch (error) {
    console.log("error getUserData", error); // Log error if fetching fails
  } finally {
    setLoading(false); // Set loading to false after fetching is complete
  }
};
Delete Campaign
-
Scroll down to find the comment
// step 23 - Delete a specific campaign using the campaign ID -
Replace the existing
deleteComapignfunction with this code snippet:
// step 23 - Delete a specific campaign using the campaign ID.
const deleteComapign = async (id: string) => {
  let deleteLoading: Id;
  deleteLoading = toast.loading("Deleting Campaign.."); // Show loading toast
  try {
    await smartContract?.callSendMethod(
      "DeleteCampaign",
      currentWalletAddress as string,
      {
        value: id, // Pass the campaign ID to be deleted
      }
    );
    toast.update(deleteLoading, {
      render: "Your Campaign successfully Deleted", // Update toast to success message
      type: "success",
      isLoading: false,
    });
    removeNotification(deleteLoading); // Remove the notification after completion
    getUserData(); // Refresh user data to reflect changes
  } catch (error) {
    handleError(deleteLoading, error); // Handle error using utility function
    console.log("error", error);
    return "error";
  }
};
Withdraw Raised Amount
-
Scroll down to find the comment
// step 24 - Withdraw amount of raised amount of campaign -
Replace the existing
withdrawAmountfunction with this code snippet:
// step 24 - Withdraw amount of raised amount of campaign
const withdrawAmount = async (id: string) => {
  let withdrawLoading: Id;
  withdrawLoading = toast.loading("Withdraw Amount is in progress..");
  try {
    await smartContract?.callSendMethod(
      "WithdrawCampaignAmount",
      currentWalletAddress as string,
      {
        campaignId: id,
      }
    );
    toast.update(withdrawLoading, {
      render: "Your raised amount withdraw successfully",
      type: "success",
      isLoading: false,
    });
    removeNotification(withdrawLoading);
    getUserData();
  } catch (error) {
    handleError(withdrawLoading, error);
    console.log("error", error);
    return "error";
  }
}
Now that we've written all the necessary frontend functions and components, we're ready to run the Donation dApp application in the next step.
Run Application
In this step, we will run the Donation dApp application.
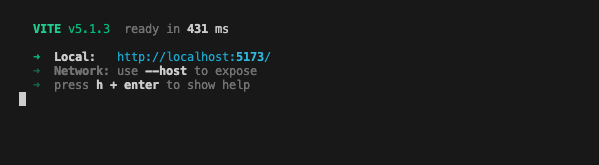
- To begin, run the following command on your terminal.
npm run dev
Note: Ensure that you are running this command under the donation/2-dapp folder.
-
You should observe the following as shown below.
-
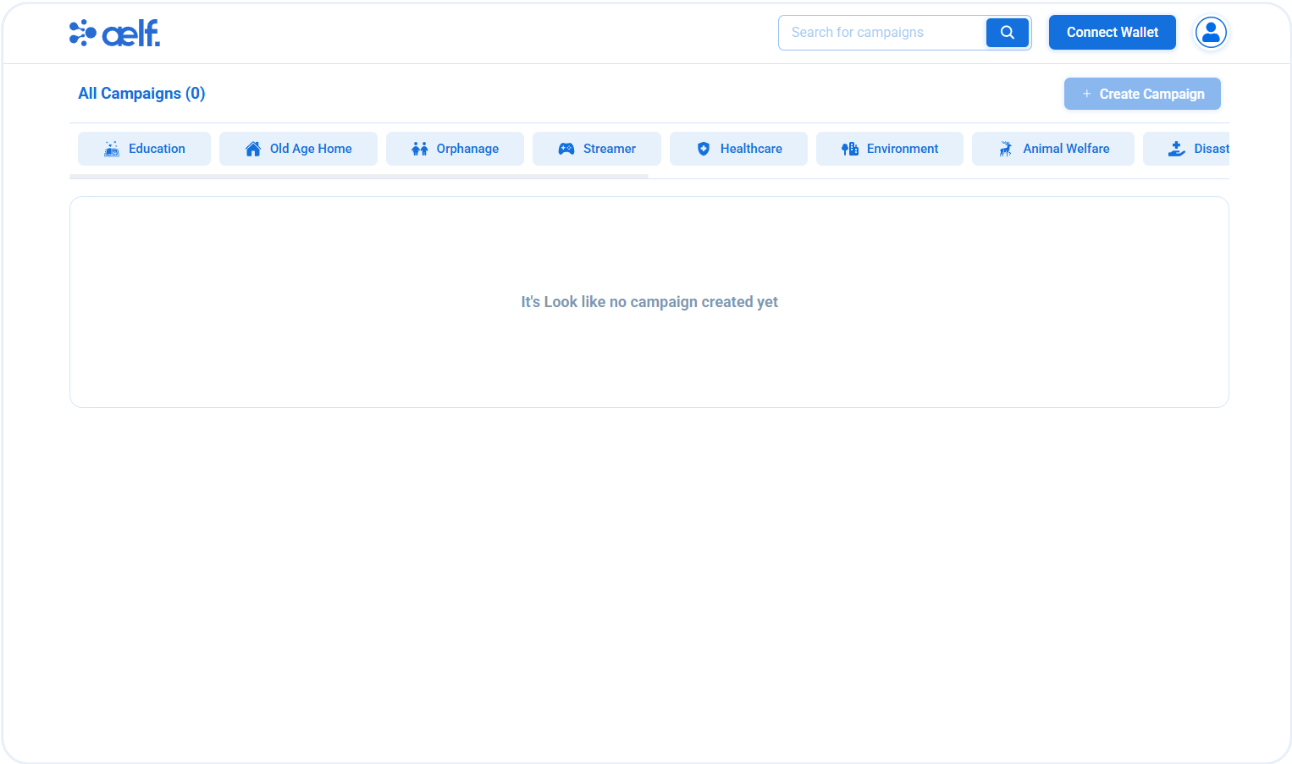
Upon clicking on the localhost URL, you should be directed to the Donation dApp landing page as shown below.
If you are developing and testing this with github codespace, you can use port forward to test the web server that is running in codespace, here is the link on how to use port forward for codespace https://docs.github.com/en/codespaces/developing-in-a-codespace/forwarding-ports-in-your-codespace
-
Usually codespace will automatically forward port, you should see a pop-up message at the bottom right of your codespace browser window as shown in the diagram below:
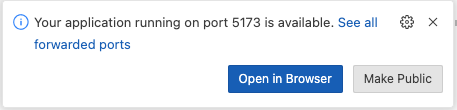
-
Click the link to open the Donation dApp in the browser.
Create Portkey Wallet
Portkey is the first AA wallet from aelf's ecosystem, migrating users, developers and projects from Web2 to Web3 with DID solution.
Users can swiftly log into Portkey via their Web2 social info with no private keys or mnemonics required. Underpinned by social recovery and decentralized guardian design, Portkey safeguards users' assets from centralized control and theft. Portkey has a unique payment delegation mechanism which enables interested parties to function as delegatees to pay for user activities on users' behalf. This means that users can create accounts for free and fees for other usages may also be covered in Portkey.
Portkey also provides crypto on/off-ramp services, allowing users to exchange fiat with crypto freely. It supports the storage and management of various digital assets such as tokens, NFTs, etc. The compatibility with multi-chains and seamless connection to all kinds of DApps makes Portkey a great way to enter the world of Web3.
With DID solution as its core, Portkey provides both Portkey Wallet and Portkey SDKs.
For more information, you may visit the official documentation for Portkey at https://doc.portkey.finance/.
- Download the Chrome extension for Portkey from https://chromewebstore.google.com/detail/portkey-wallet/iglbgmakmggfkoidiagnhknlndljlolb.
The Portkey extension supports Chrome browser only (for now). Please ensure that you are using Chrome browser. You may download Chrome from https://www.google.com/intl/en_sg/chrome/.
-
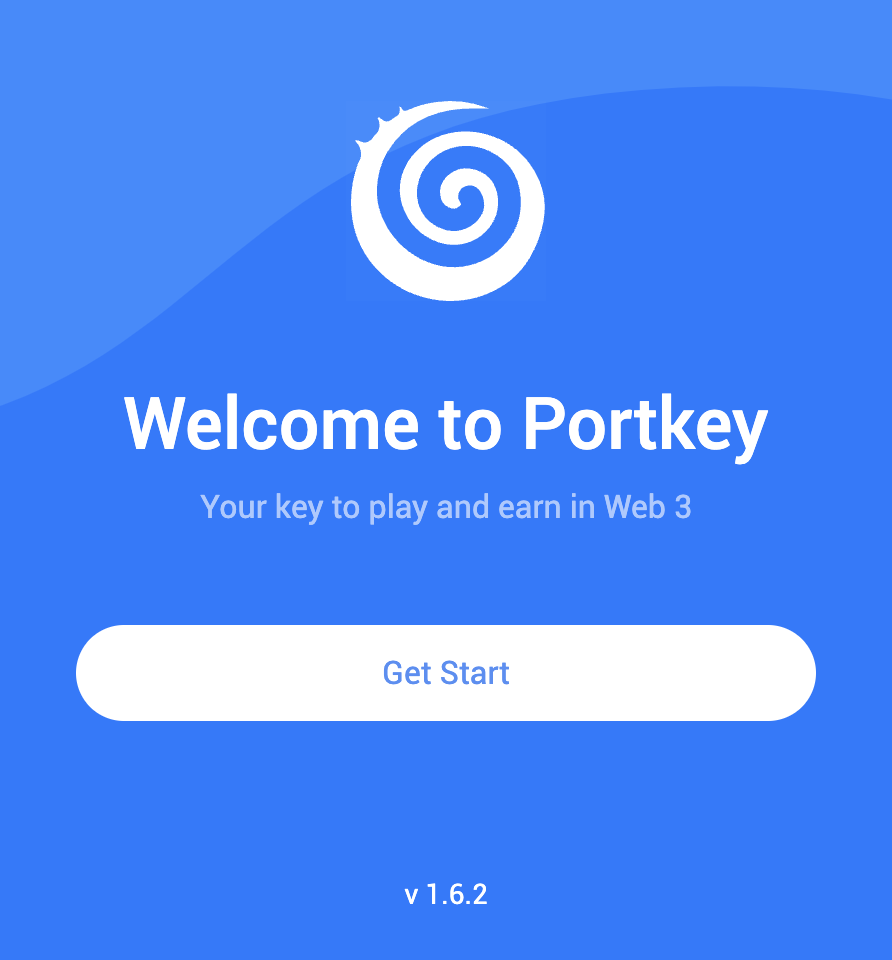
Once you have downloaded the extension, you should see the following on your browser as shown below.
-
Click on
Get Startand you should see the following interface as shown below.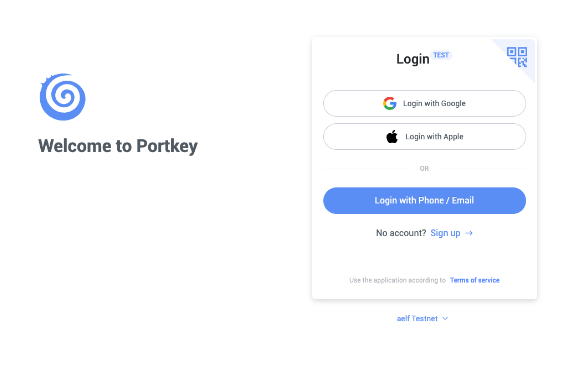
Sign up
-
Switch to aelf Testnet network by selecting it:
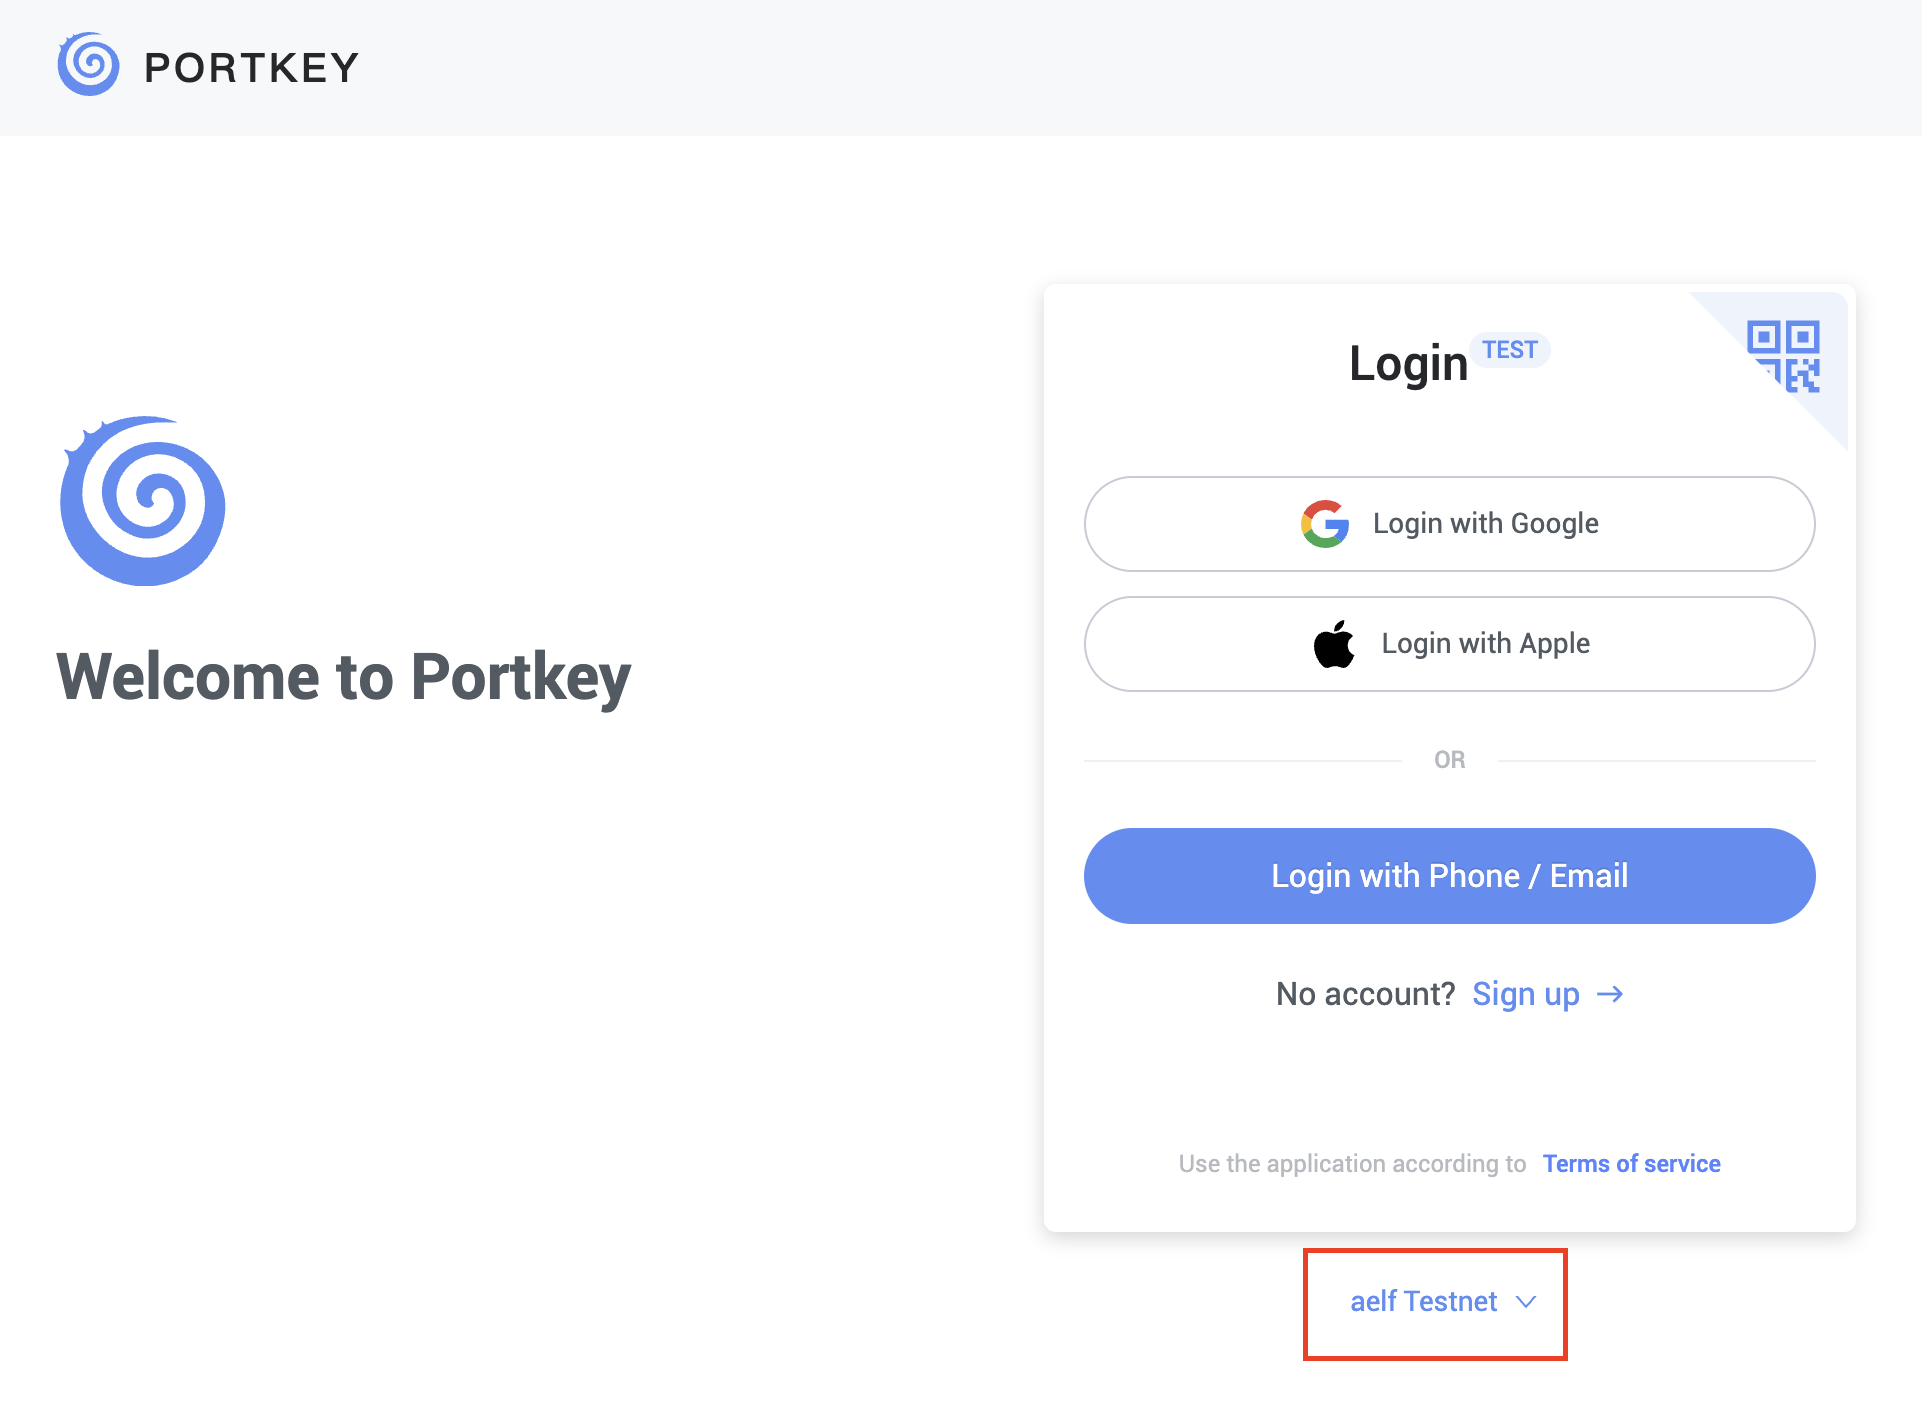
Please make sure you are using aelf Testnet in order to be able to receive your testnet tokens from the Faucet.
-
Proceed to sign up with a Google Account or your preferred login method and complete the necessary accounts creation prompts and you should observe the following interface once you have signed up.
With that, you have successfully created your very first Portkey wallet within seconds. How easy was that?
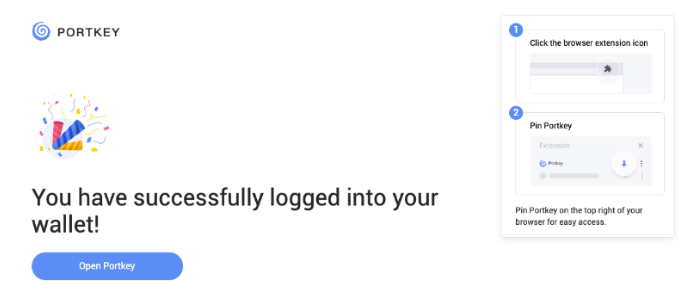
It is highly recommended to pin the Portkey wallet extension for easier access and navigation to your Portkey wallet!
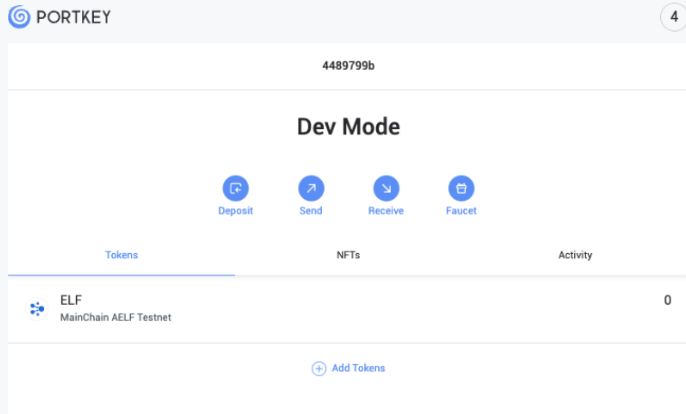
-
Next, click on ‘Open Portkey’ and you should now observe the following as shown below.
Connect Portkey Wallet
-
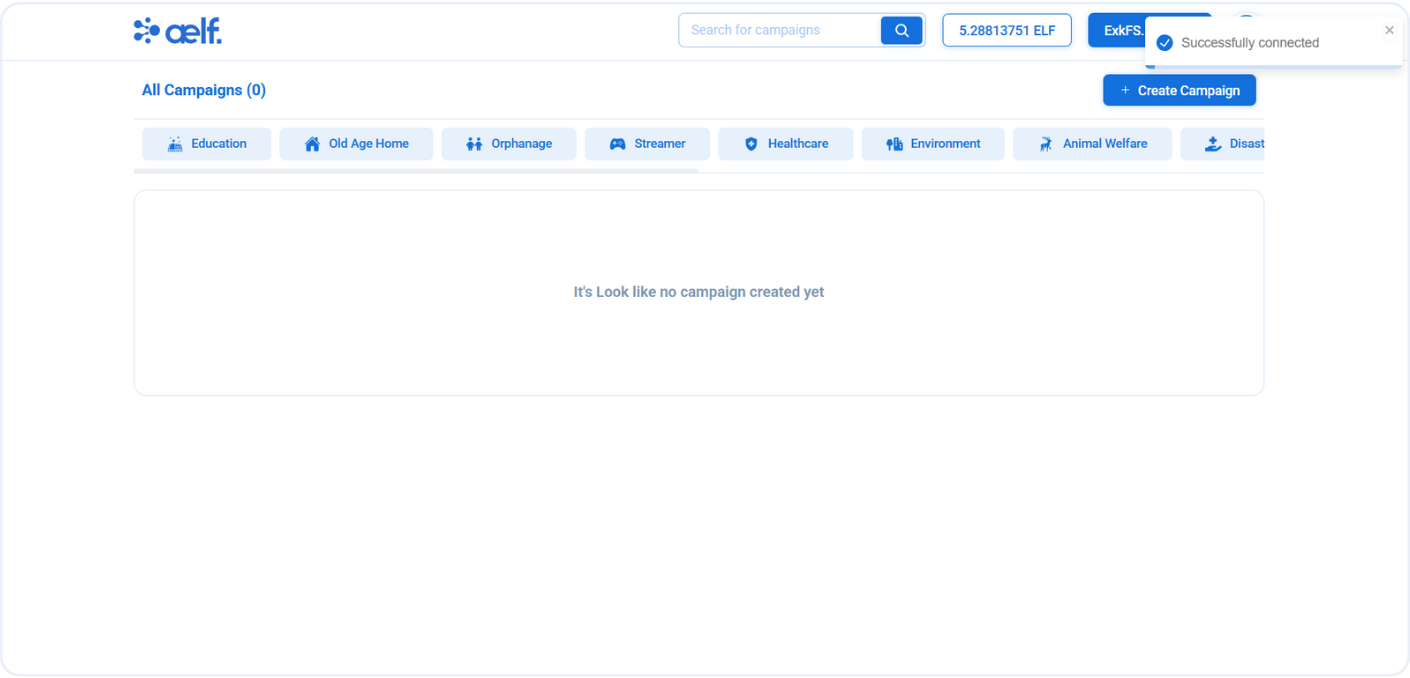
Click on "Connect Wallet" to connect your Portkey wallet.

-
The button will change to "Your Wallet Address" when the connection is successful.
Create a New Campaign
-
Click on "Create Campaign" button to create a new campaign.
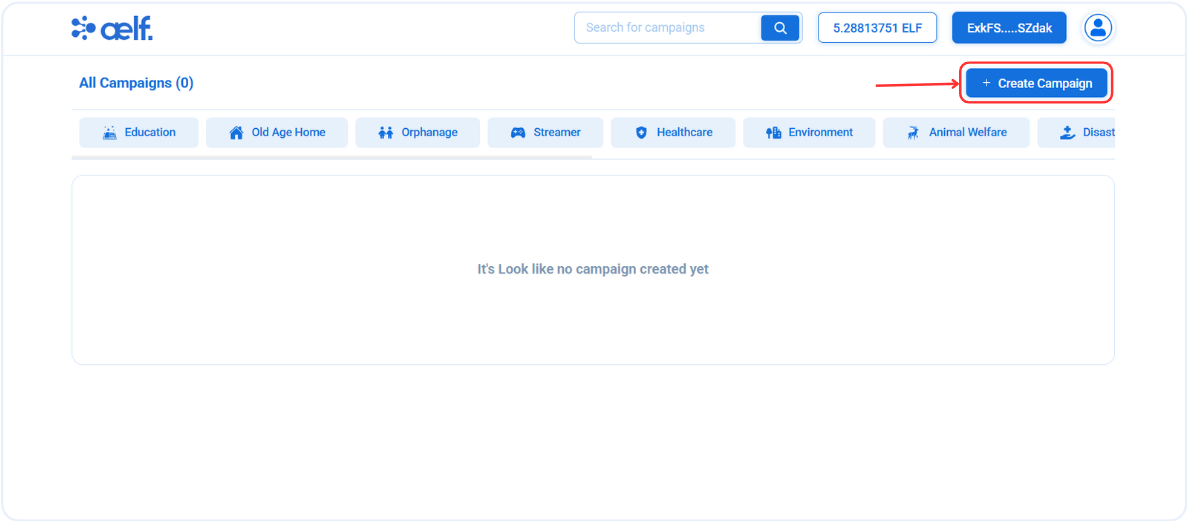
-
You will redirected to create capmpaign page form to create a new capmpaign.
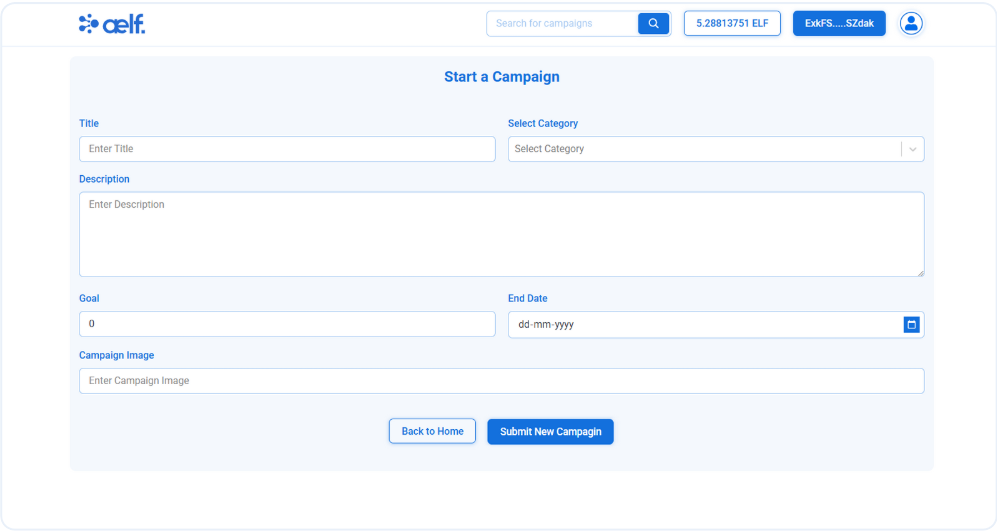
-
Please fill all the necessary fields like
Title,Description,Category,Goal,End DateandCampaign Image.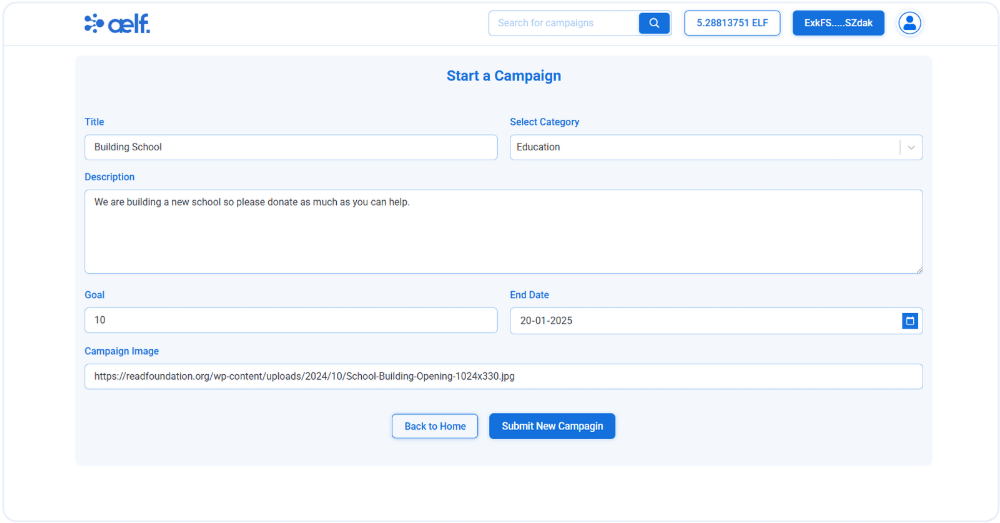
-
Click on Submit New Campaign Button.
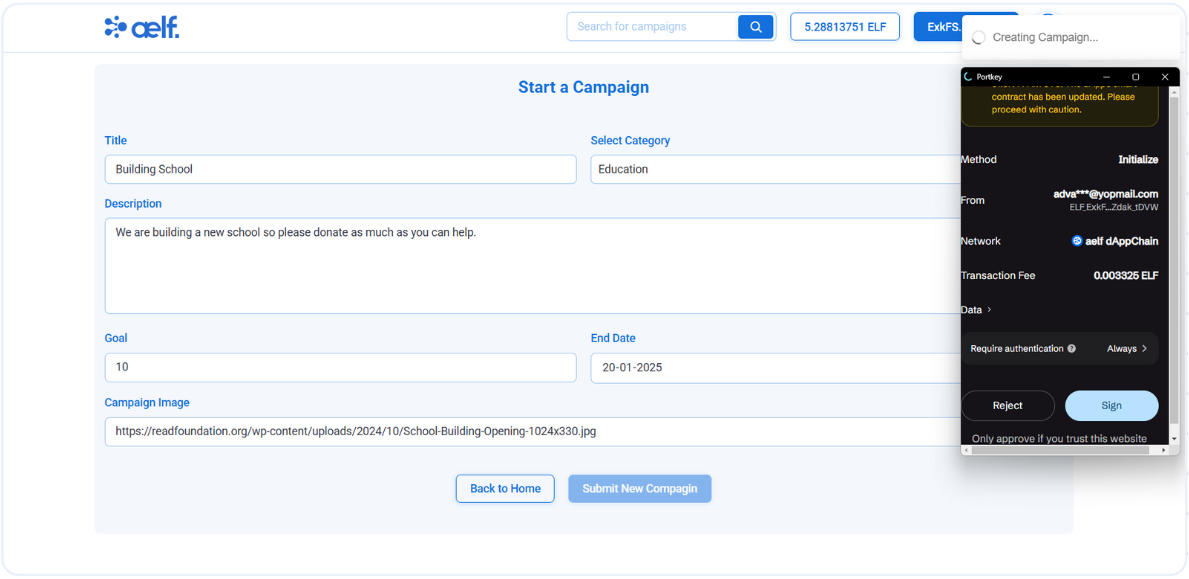
-
You will now receive the first-time initialization request on your Portkey wallet. Please sign the transaction to proceed.
-
Now, You will receive a transaction request for create campaign on your portkey wallet to Sign the transaction.
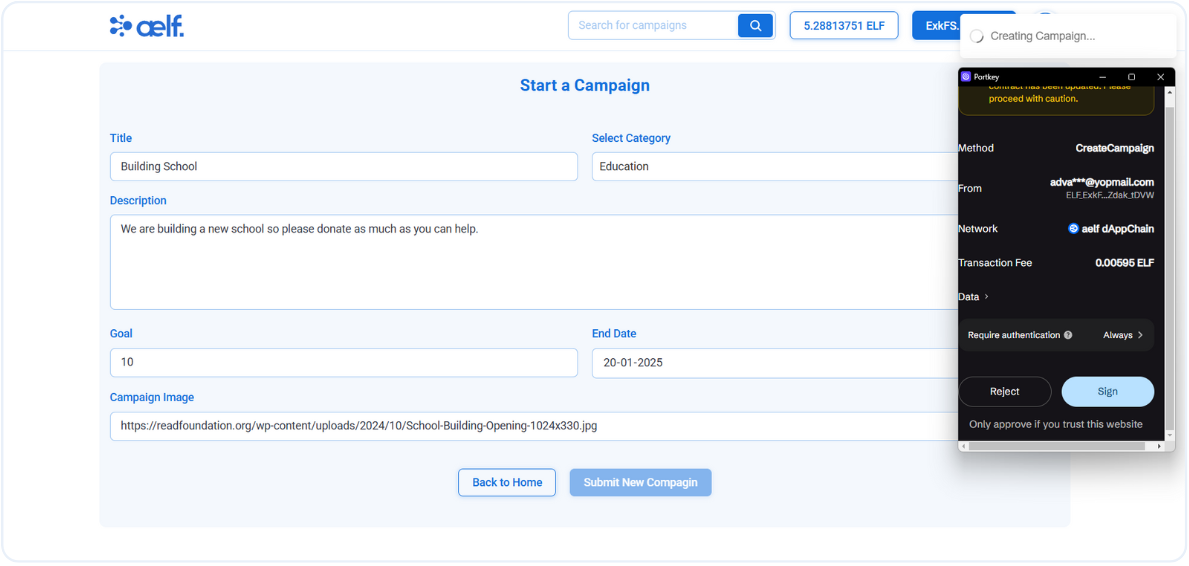
-
Click on Sign the transaction.
-
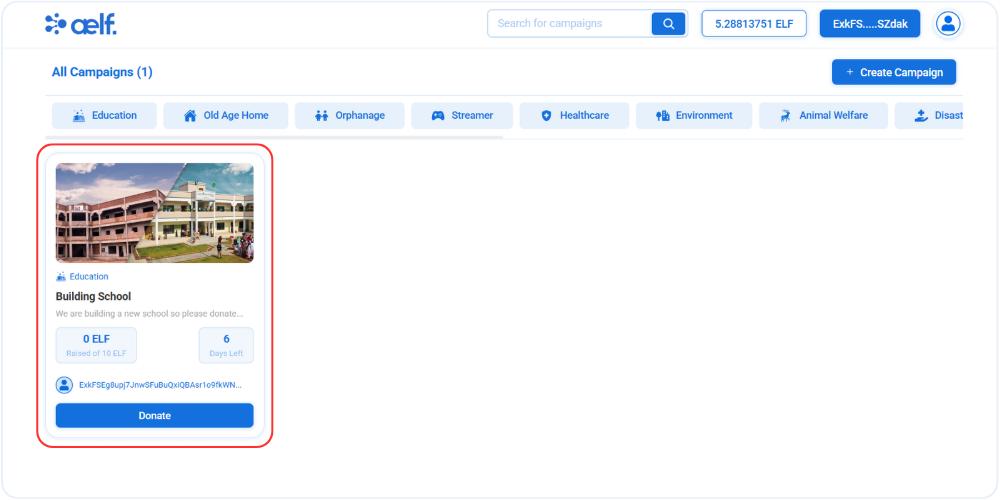
After the transaction is successfully processed, your first campaign will be created✅.
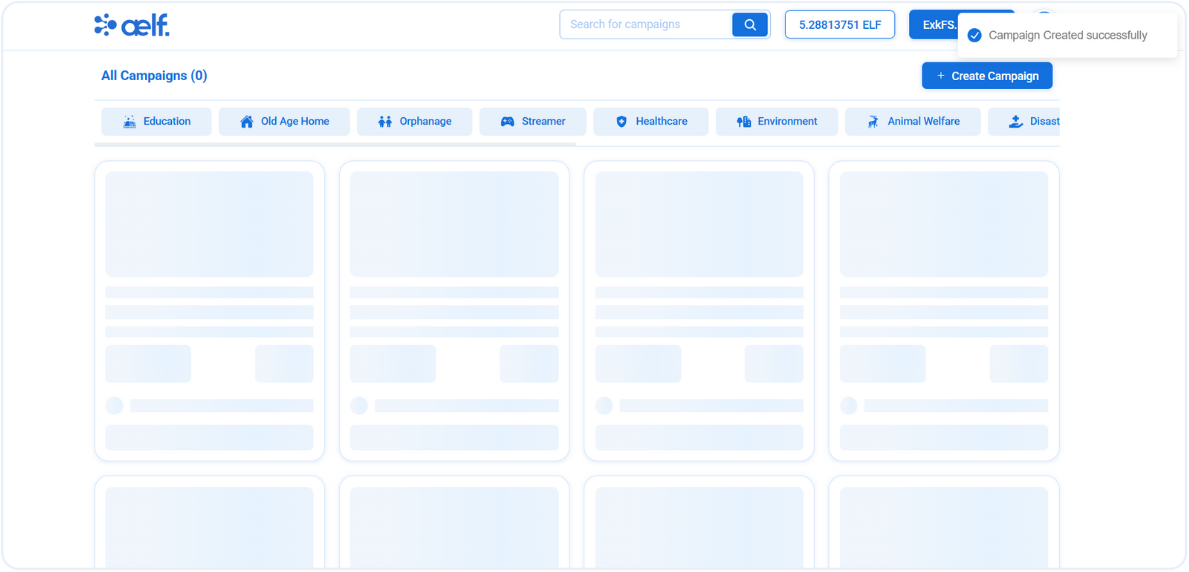
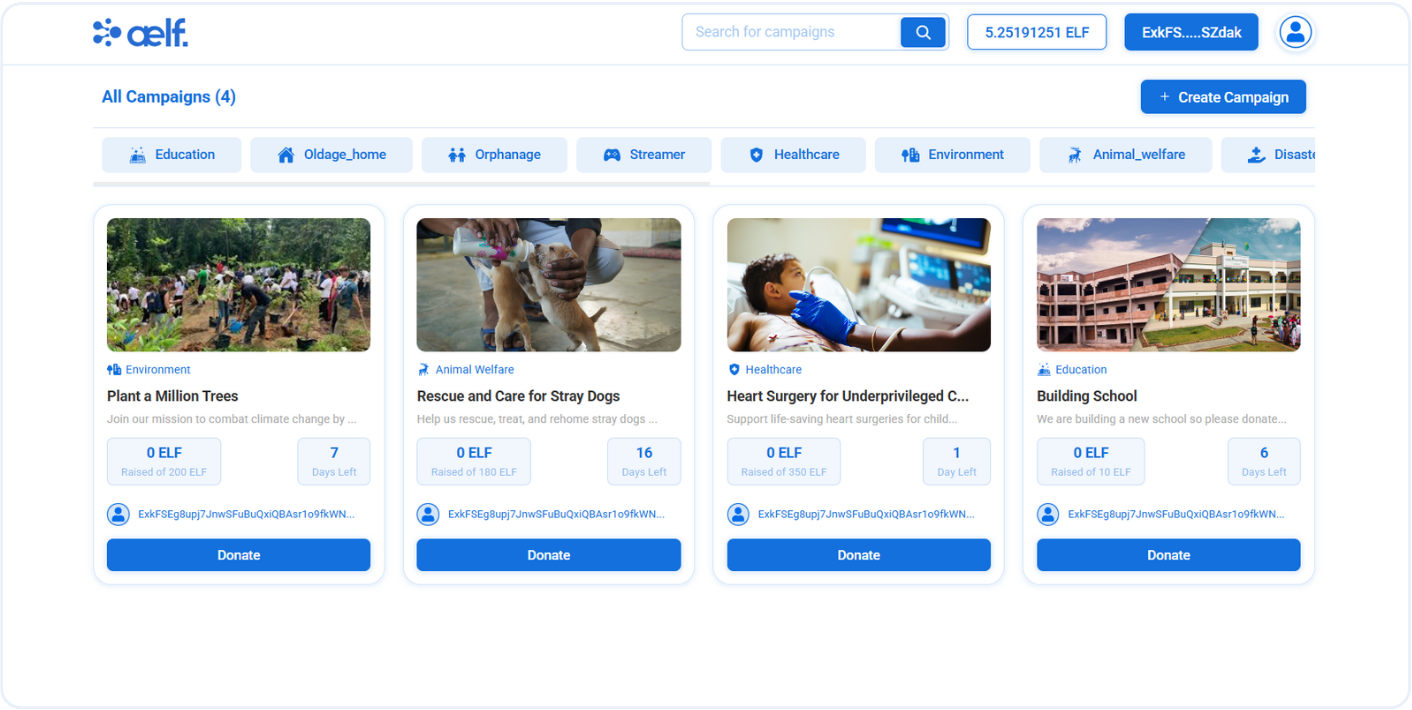
-
Your campaign will appear in home page with these following details.
Campaign ImageCategoryTitleDescriptionRaised ELF TokensRemaining TimeCreator Wallet Address
Edit Existing Campaign
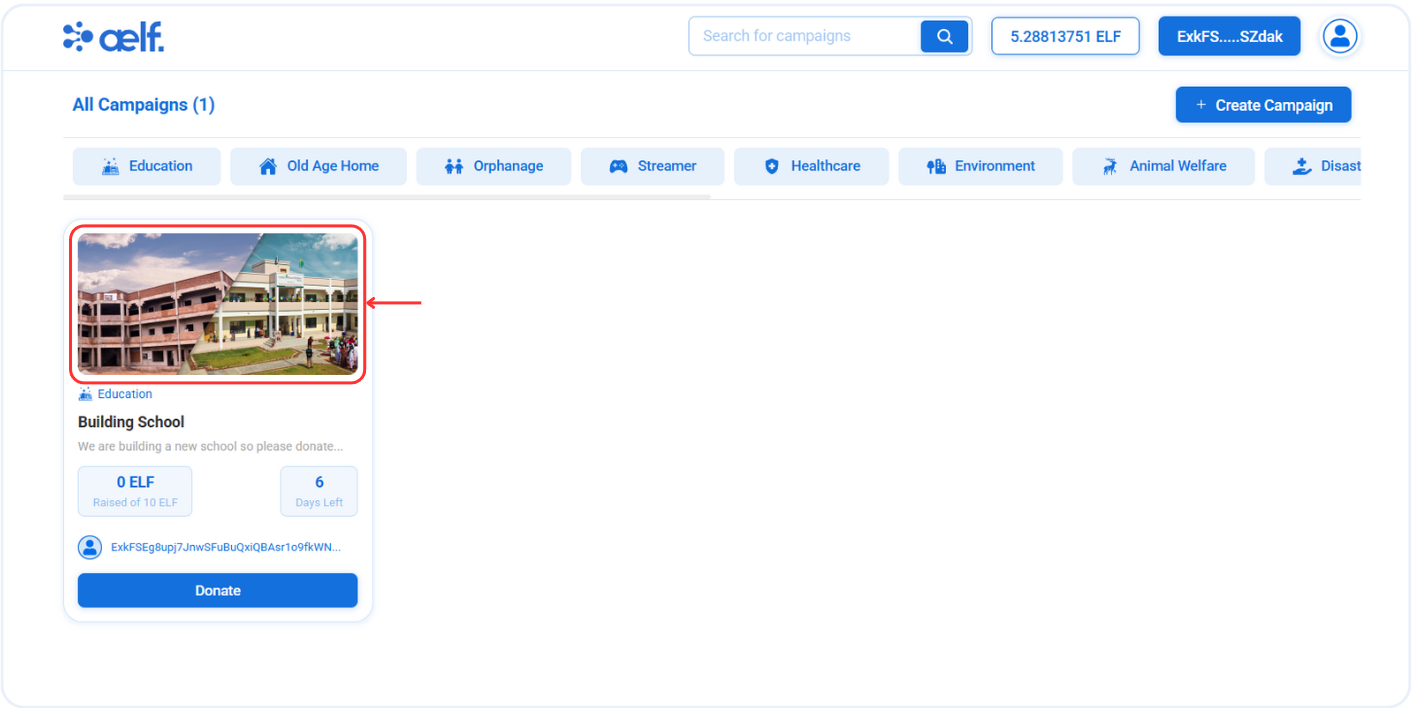
-
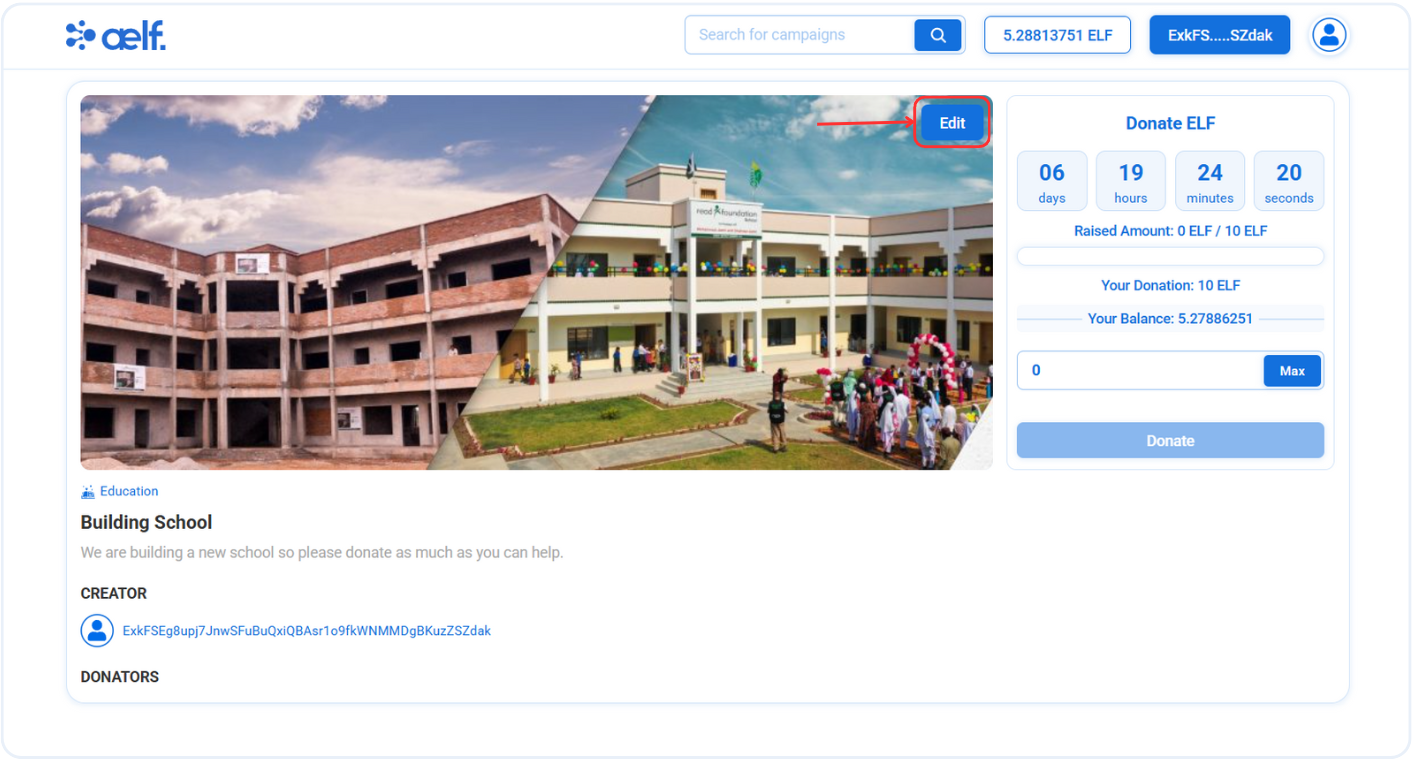
Click on the campaign image to view detailed information about it, as shown below.
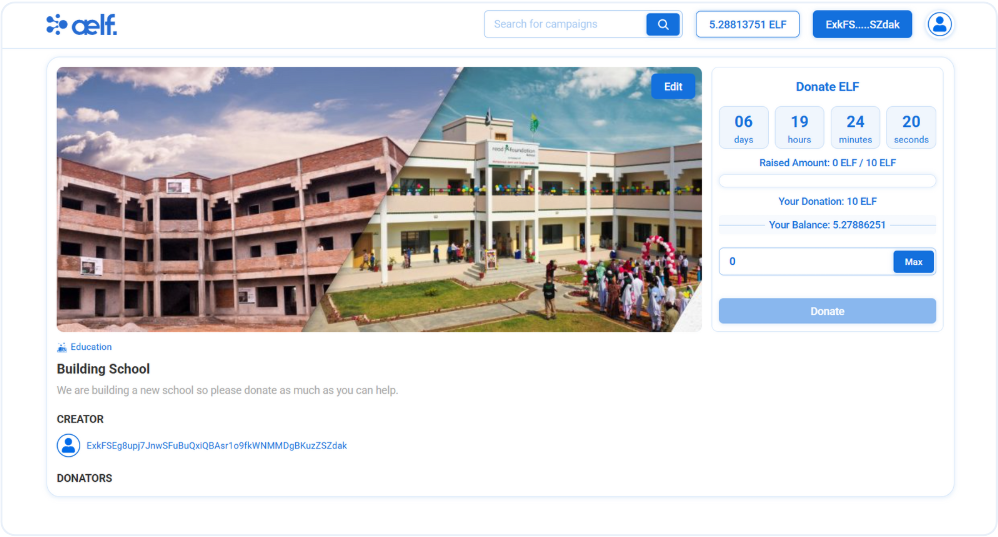
-
You will redirected to capmpaign detail page with all the information about it with donation widget in right side.
-
Click on Edit button on detail page, as shown below.
-
You will redirected to edit capmpaign page with prefield all information in form.
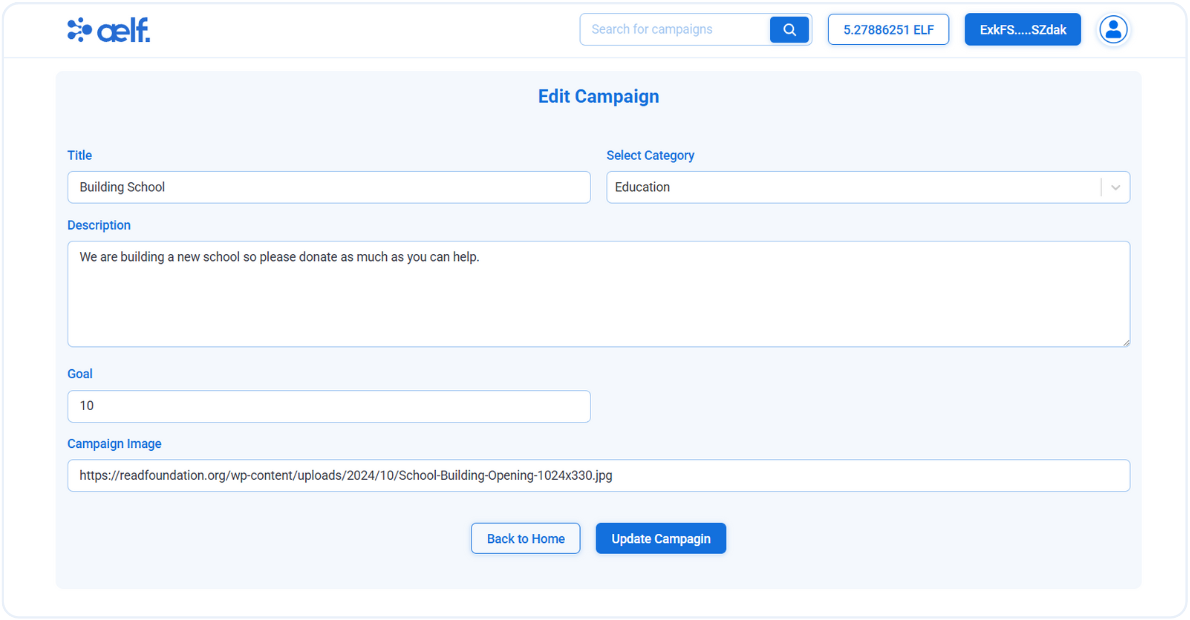
-
Edit campaign accordingly and submit the form.
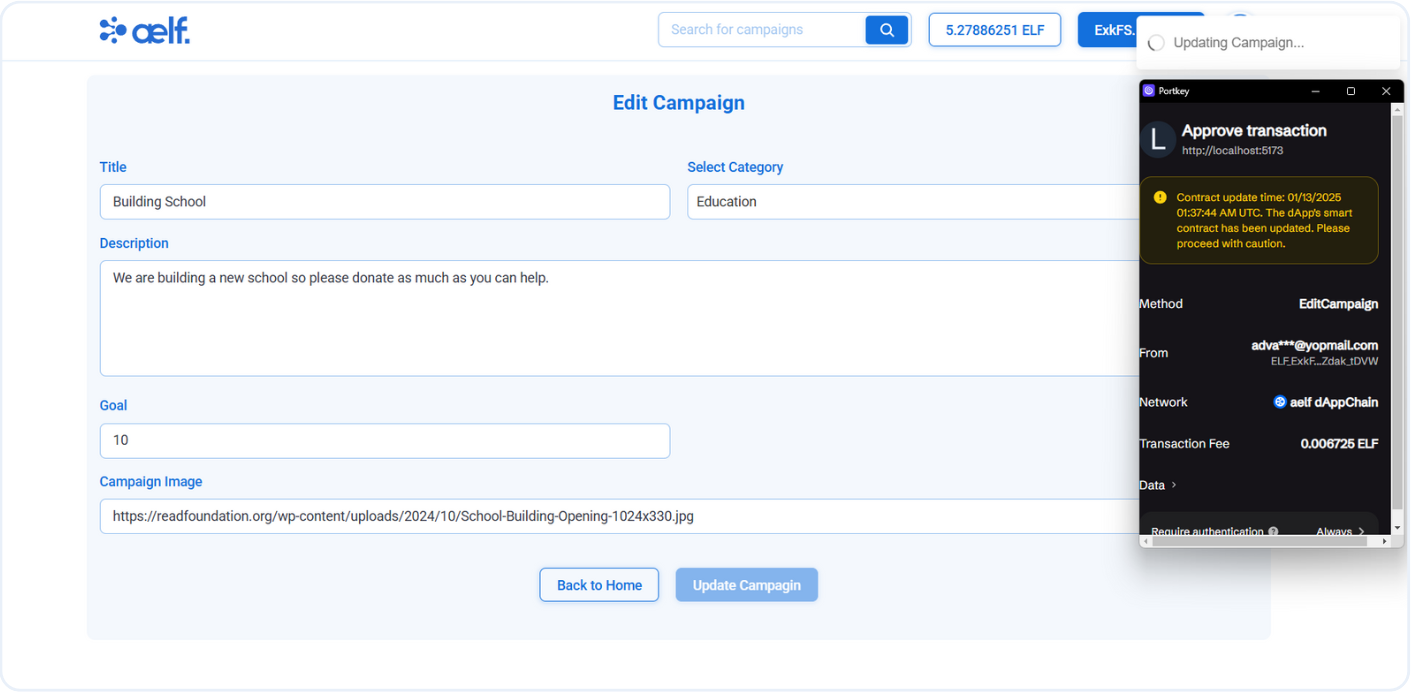
-
Now, You will receive a transaction request for edit the campaign on your portkey wallet to Sign the transaction.
-
Click on Sign the transaction.
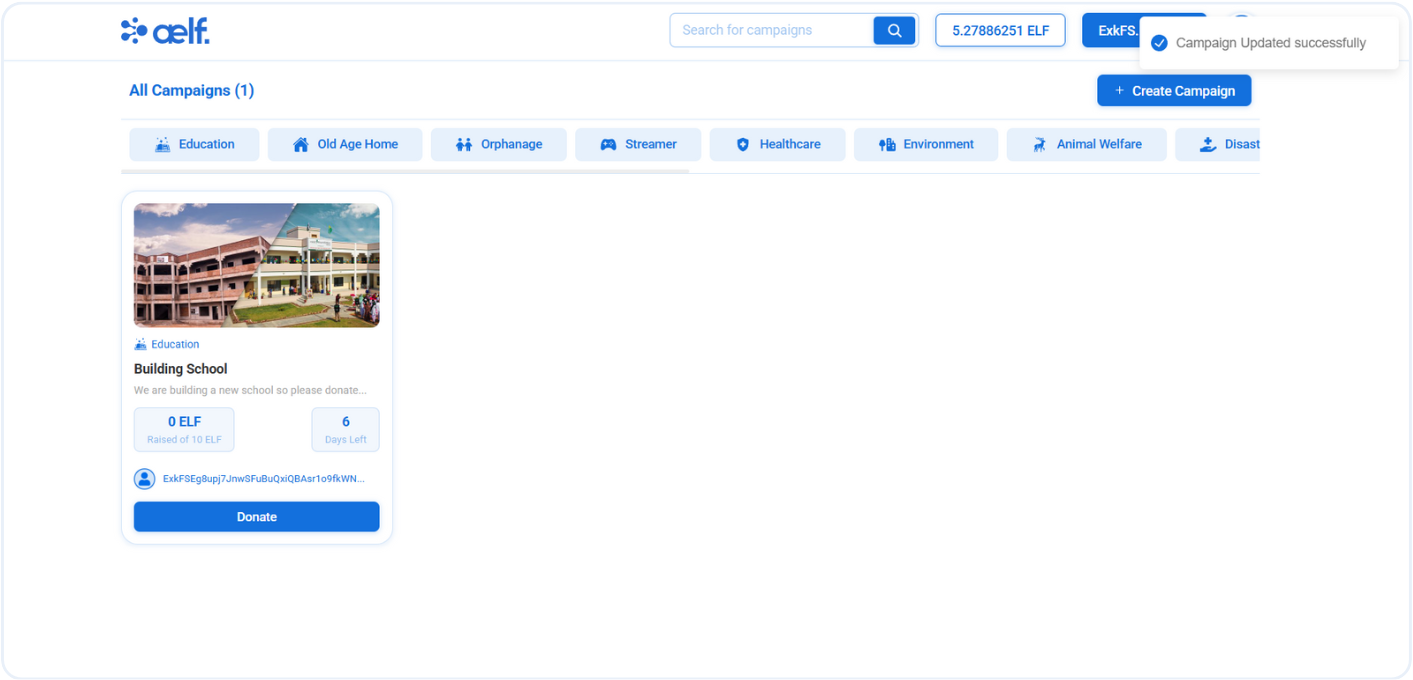
-
After the transaction is successfully processed, your campaign will updated.
Search Campaign
To test the search campaign feature, follow these steps:
1. Create Multiple Campaigns
- Begin by creating several campaigns to populate the campaign list, as shown below:
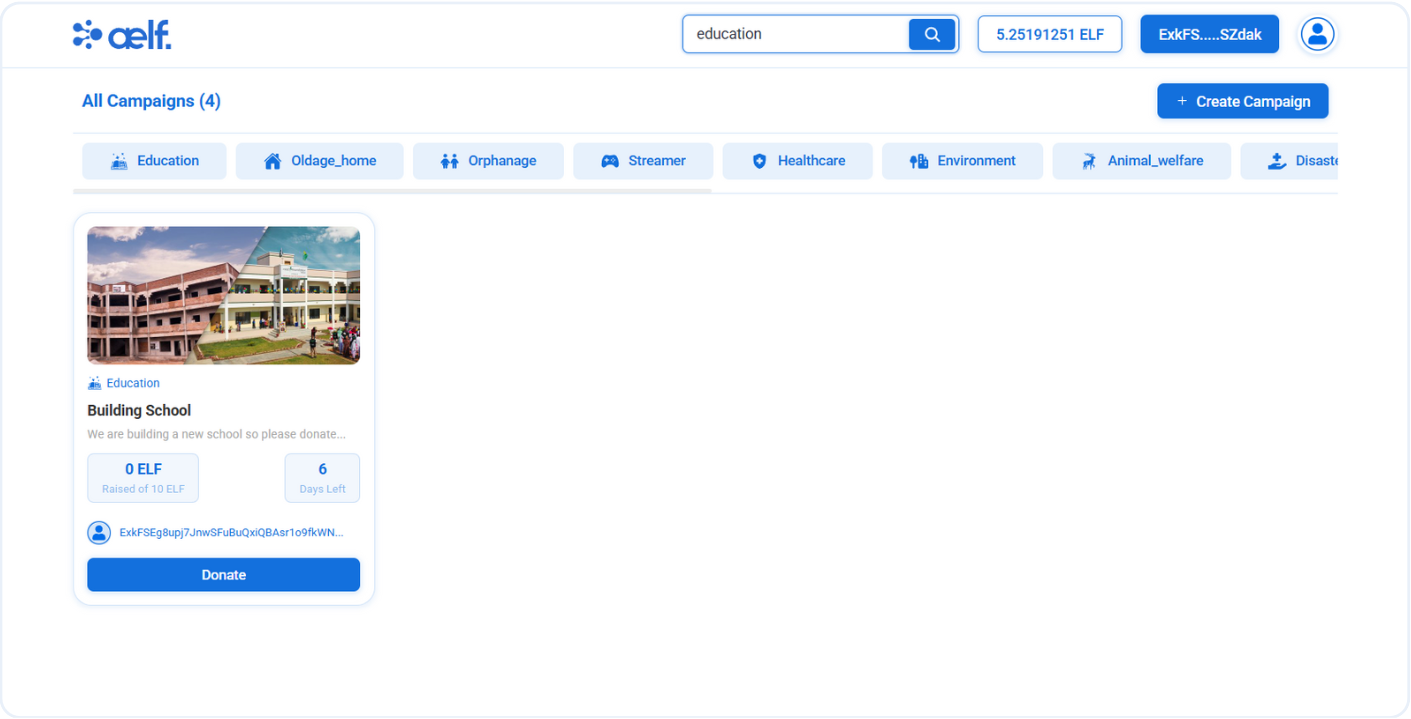
2. Use the Search Input
- Navigate to the header's search bar and type your desired keywords. Then click on the search icon, as illustrated below:

3. View Filtered Results
The campaign list will automatically update and display only the campaigns that match your search query.
Donate Funds to Campaign
Let's start to donate ELF funds in active campaigns so please follow below steps to perform the donation actions.
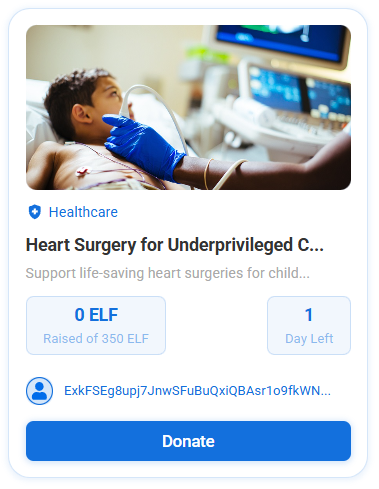
1. Select a Campaign
-
Click the Donate button on any campaign you wish to support.
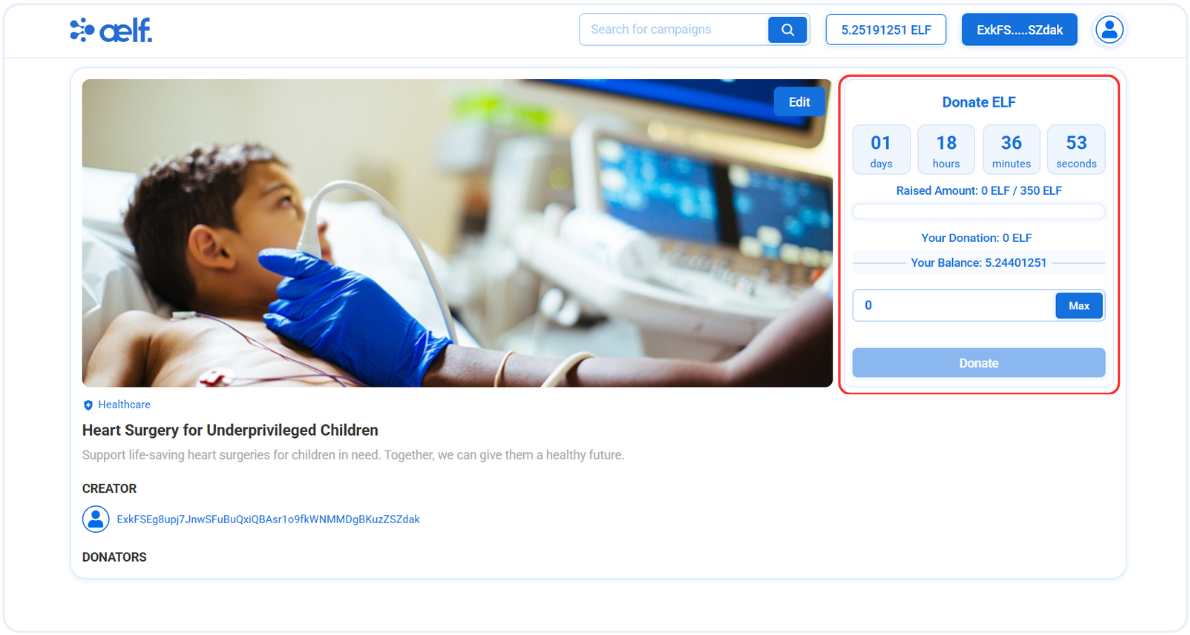
2. View Campaign Details
-
You’ll be redirected to the campaign details page, which includes a donation widget displaying:
- Remaining Time
- Raised Amount
- Total Goal Amount
- Your Donaition
- Your ELF Balance
3. Enter Donation Amount
-
Specify the amount you’d like to donate in the input field within the donation widget.
4. Initiate Donation
- Click on Donate button.
5. Approve Token Allowance (First-Time Donation)
-
For your first donation to a campaign, you’ll be prompted to approve a token allowance transaction. This allows the transfer of ELF tokens to the campaign owner.
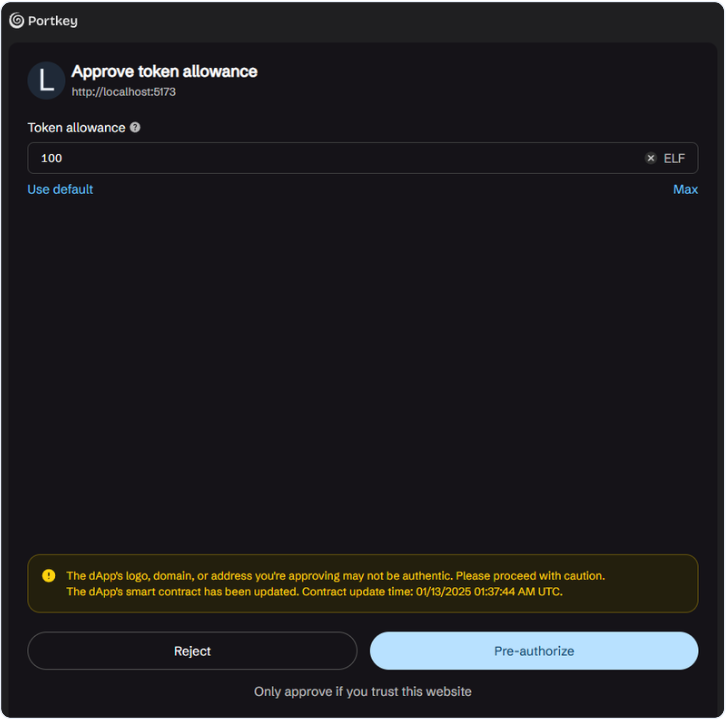
-
Authorize the transaction in your Portkey wallet.
6. Complete Donation
-
After approving the token allowance, you’ll receive another transaction request to finalize your donation.
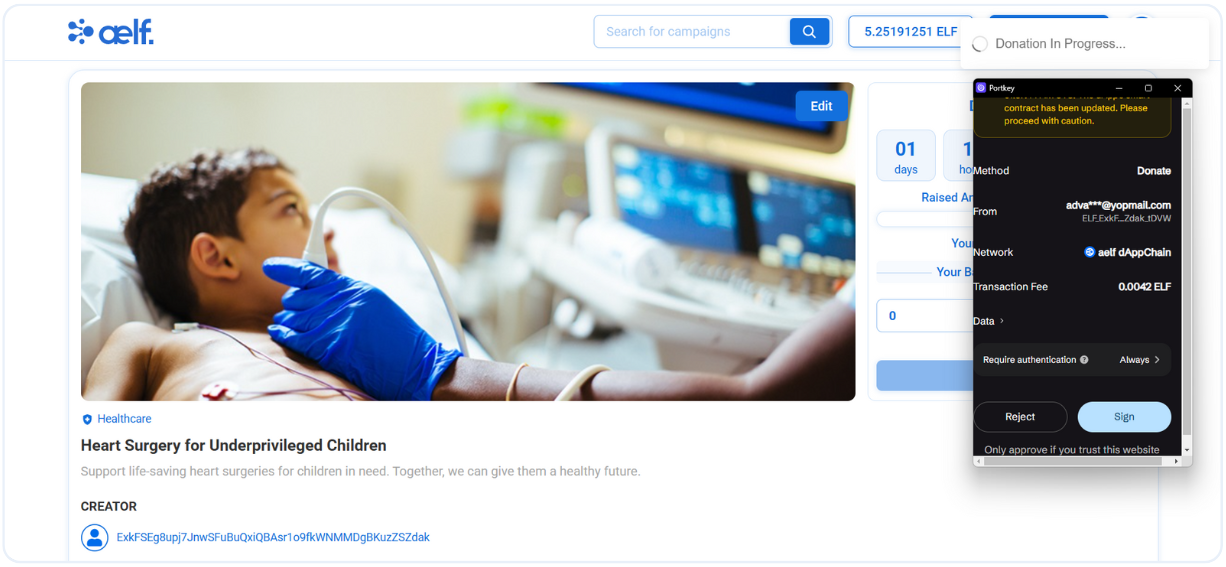
-
Confirm the transaction.
7. View Updated Campaign Details
-
Once the transaction is successful, the campaign details page will reflect the following updates:
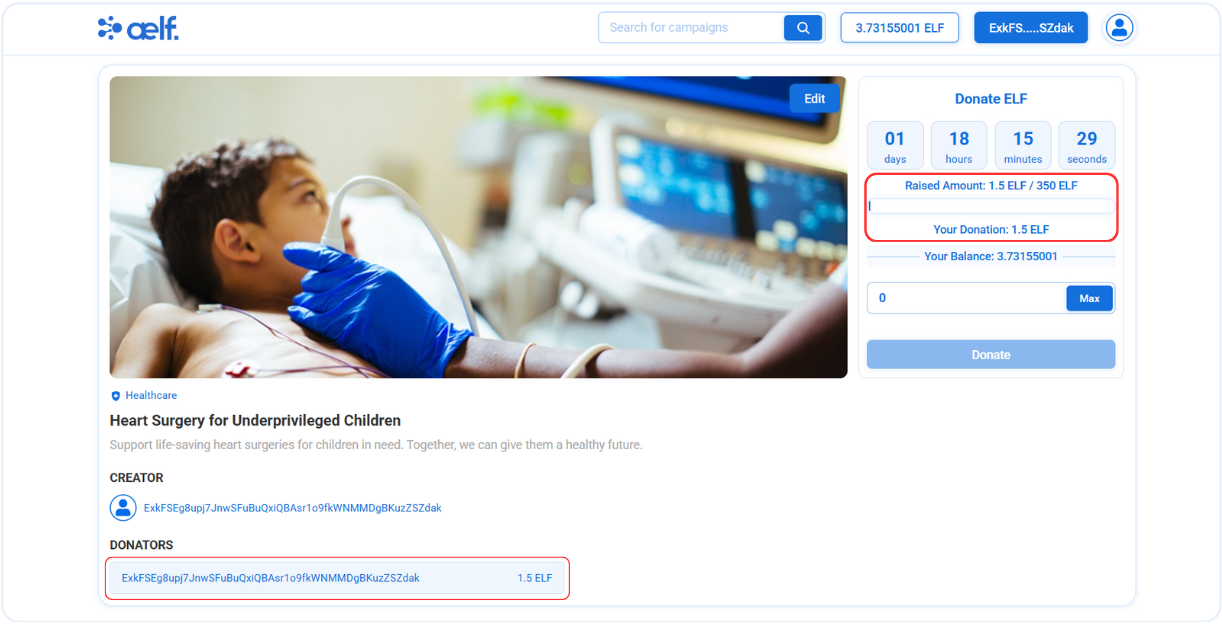
- The Raised amount will increase.
- Your Donation amount will updated.
- Your contribution will appear in the DONATORS section.
Congratulations! You’ve successfully donated to the campaign. Thank you for your generosity!
Delete Campaign
-
Click on this user profile button on header to navigate in user profile page.

-
Now, You will redirect to user profile page with certain information like
wallet address,your campaignsand etc.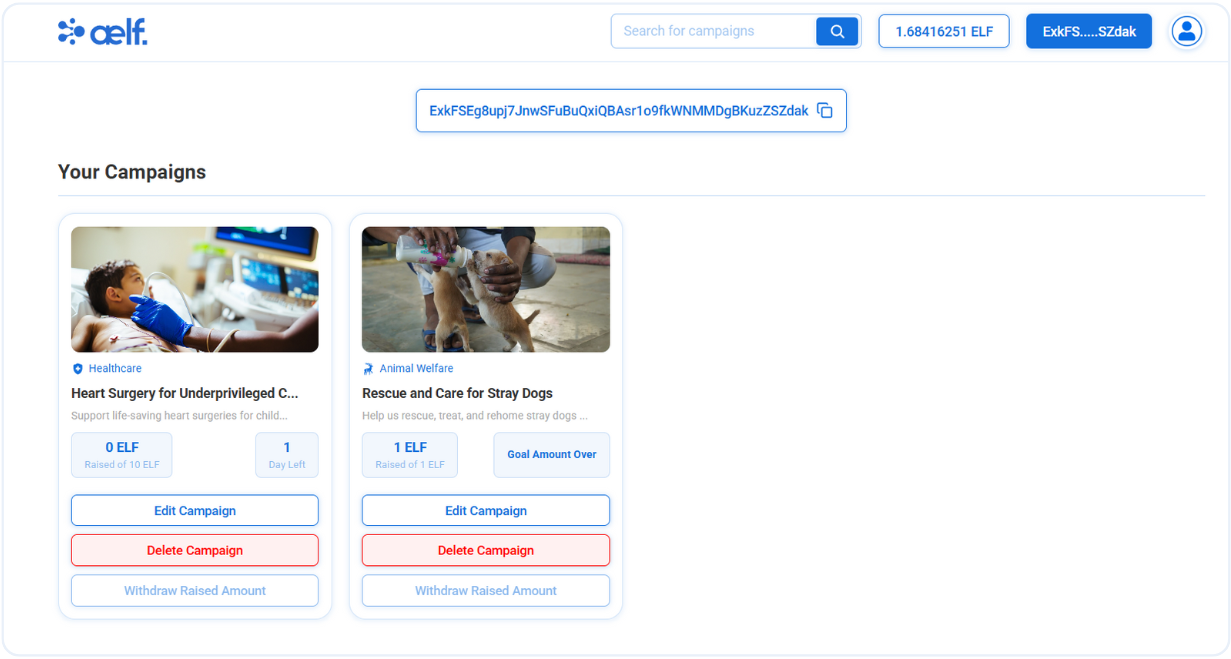
-
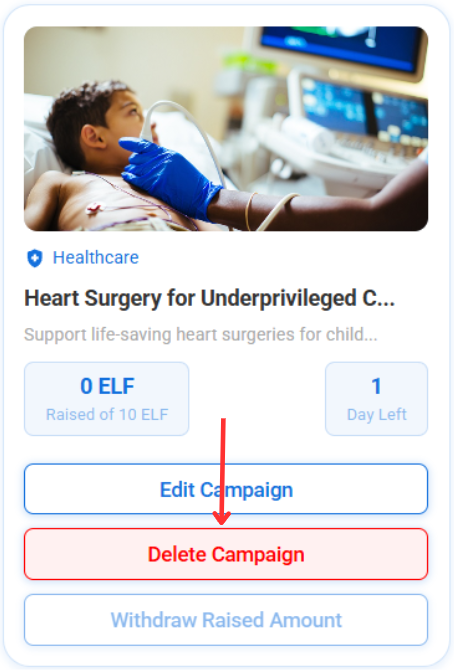
Click on Delete Campaign button on campaign card.
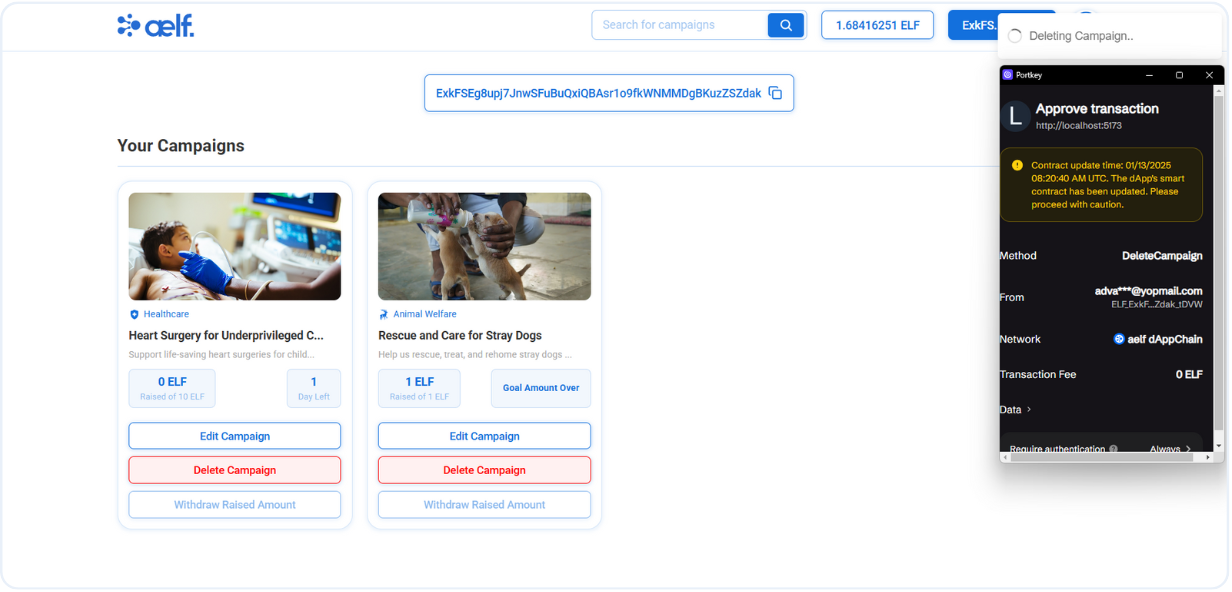
-
Now, You will receive a transaction request for delete the campaign on your portkey wallet to Sign the transaction.
-
Click on Sign the transaction.
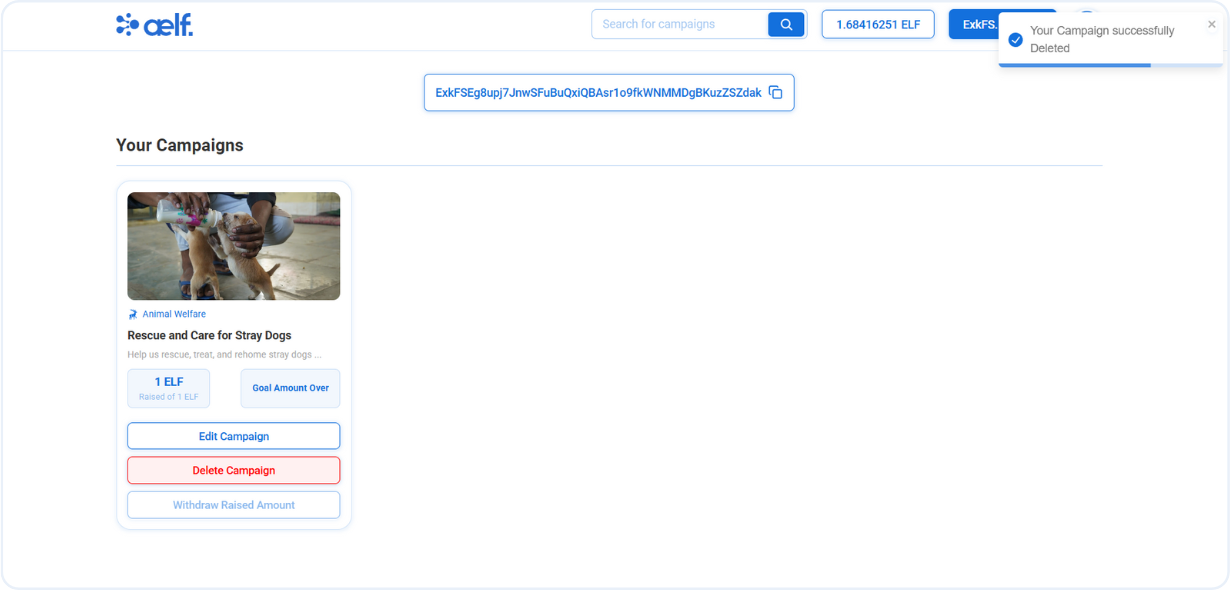
-
After the transaction is successfully processed, your campaign will be removed from the campaign list.
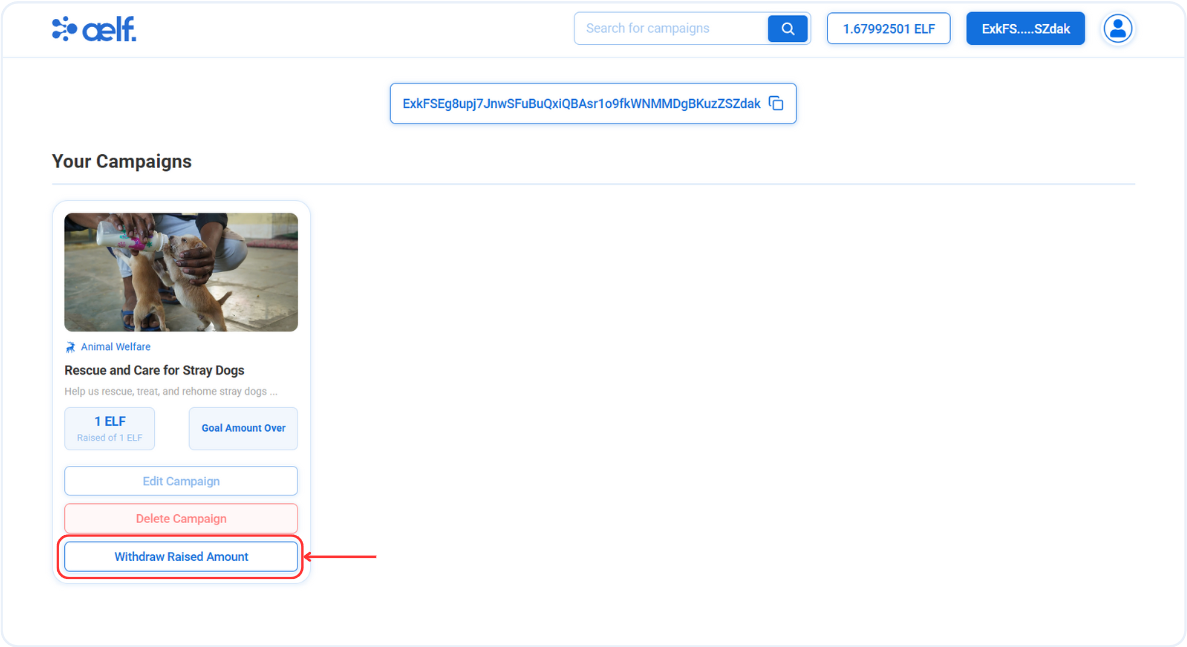
Withdraw Raised Amount
When the campaign is over, only the owner is eligible to withdraw the amount from their campaign. Let's withdraw the raised amount after the campaign has ended.
-
Redirect to user profile page.
-
Click on Withdraw Raised Amount button on campaign card.
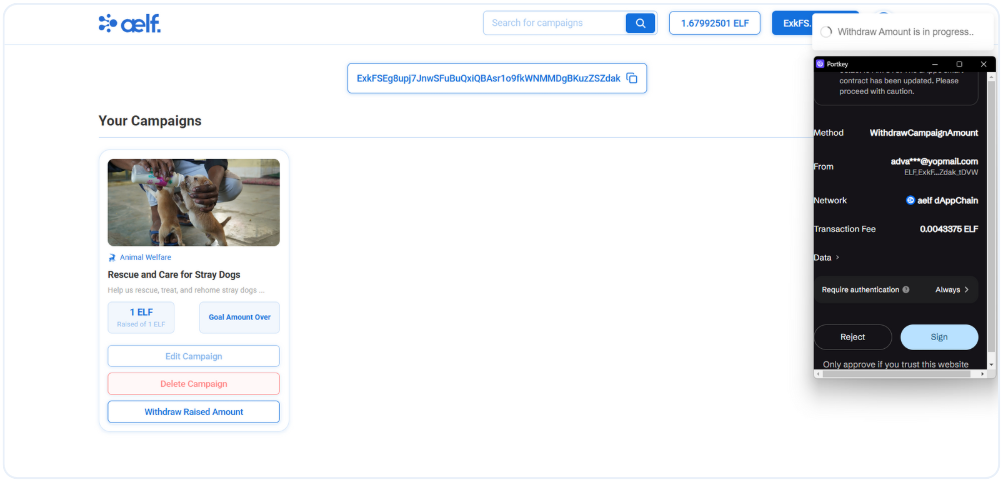
-
Now, You will receive a transaction request for withdraw amount on your portkey wallet to Sign the transaction.
-
Click on Sign the transaction.
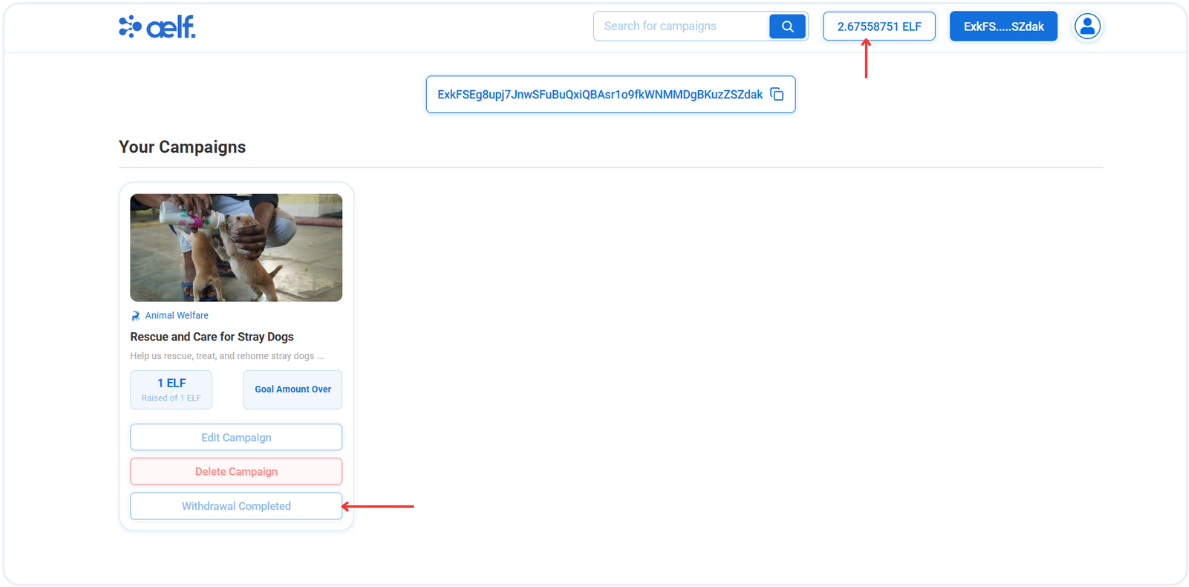
-
After the transaction is successfully processed, your token balance will be updated with raised amount and button will be change from Withdraw Raised Amount to Withdrawal Complted.
🎉 Congratulations Learners! You have successfully built your Donation dApp.
🎯 Conclusion
🎉 Congratulations on completing the Donation dApp tutorial! 🎉 You've taken a significant leap into blockchain development by creating a fully functional Donation dApp on the aelf blockchain. 🌟
📚 What You've Learned
Throughout this tutorial, you've gained expertise in:
-
🛠️ Setting Up Your Development Environment: Preparing your workspace with all the tools and configurations needed for your blockchain journey.
-
💻 Developing Your Smart Contract: Writing and deploying a smart contract that handles campaign creation, donations, and fund management.
-
🚀 Deploying the Smart Contract: Bringing your smart contract to life on the aelf blockchain, making it ready for real-world use.
-
🔧 Building a Fully Interactive dApp: Integrating wallet connectivity, creating and managing campaigns, processing donations, and ensuring a seamless user experience.
🔍 Final Output
By the end of this tutorial, you've achieved:
-
📜 A Deployed Donation Smart Contract: Capable of managing campaigns with features like creation, editing, deletion, and fund withdrawal.
-
💻 An Operational Donation dApp: Empowering users to donate, view campaign details, and manage profiles effortlessly.
➡️ What's Next?
Now that you've mastered the basics, here are some advanced ideas to explore:
-
📈 Advanced Features: Add functionalities like recurring donations, donor recognition, or campaign performance analytics.
-
🔒 Enhancing Security: Implement additional measures to secure user funds and protect sensitive data.
-
🌍 Cross-Chain Interoperability: Leverage aelf’s cross-chain capabilities to expand your Donation dApp to other blockchain ecosystems.
The world of decentralized applications holds limitless possibilities. With your newfound skills, you're ready to innovate, build, and make a meaningful impact with blockchain technology. 🚀
Happy coding and scaling your Donation dApp! 😊